
Stuffed Cheese Bread

Soft, buttery stuffed cheese bread brushed with garlic butter—mindlessly easy, ready in 15 minutes, and a guaranteed crowd pleaser.

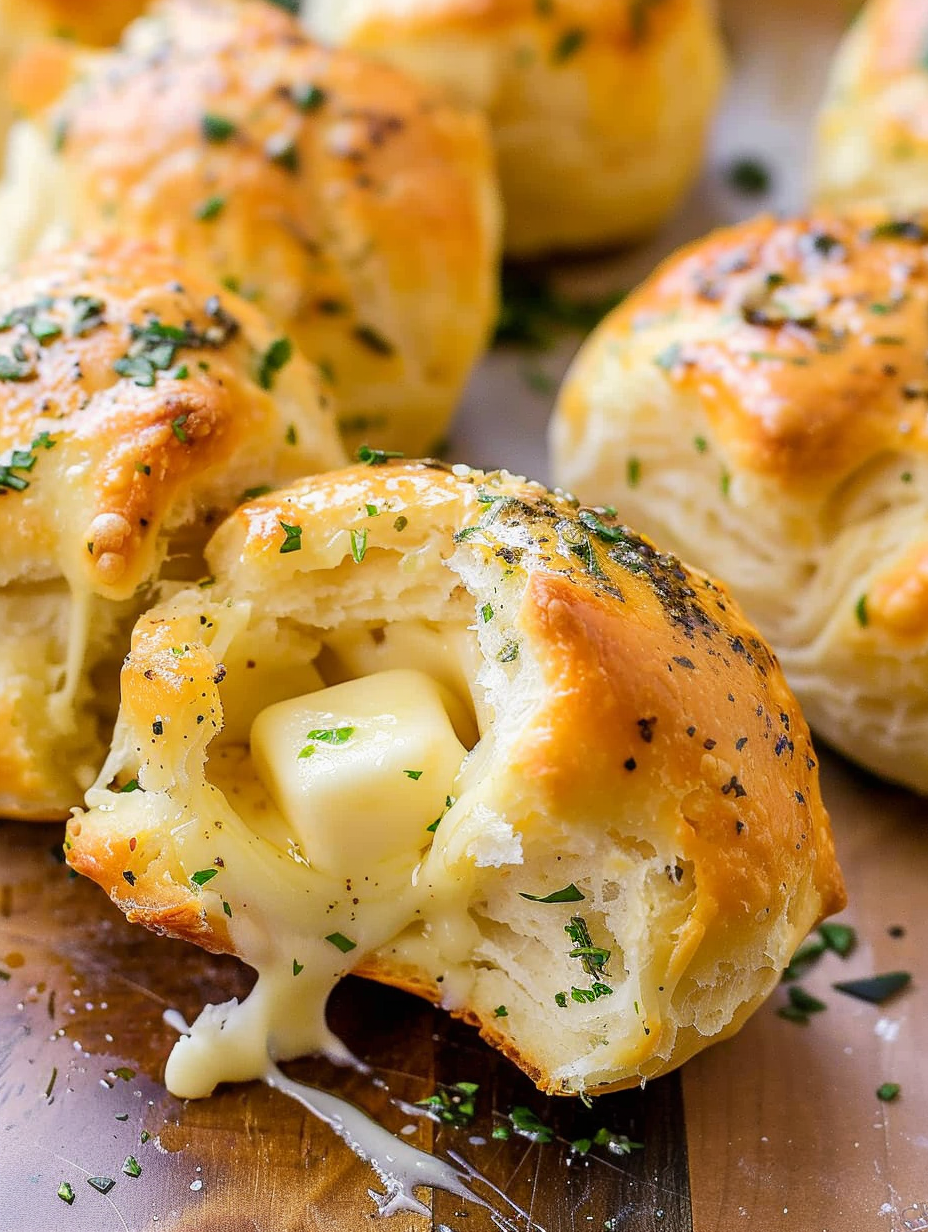
This soft, buttery stuffed cheese bread has been my favorite appetizer for years. I first discovered the combination during a weekend when unexpected guests arrived and I only had a tube of refrigerated biscuits, a block of mozzarella, and a restless oven. The result was instant magic: the biscuits puffed into golden clouds wrapped around molten cheese, and the final brush of garlic butter turned every bite into a warm, savory hug. The texture is especially delightful because the exterior is tender and slightly golden while the center yields a hot, stretchy ribbon of cheese.
What makes this so special is how reliably it delivers comfort and delight with almost no effort. I can have eight perfect portions on a baking sheet in minutes, and friends always ask for the recipe. The mild, milky pull of mozzarella pairs perfectly with the fragrant butter and garlic, and the finished pieces are best eaten right out of the oven when the cheese is at its most molten. I love serving these at casual gatherings, movie nights, or as a quick weekend brunch addition.
Why You'll Love This Recipe
- Minimal hands-on time: ready in about 15 minutes from start to finish, perfect when you need a fast appetizer that looks impressive.
- Pantry-friendly: uses a tube of refrigerated biscuit dough and standard pantry seasonings like garlic powder and Italian seasoning.
- Reliable results: the technique of sealing the dough around the cheese prevents leaks and keeps the interior wonderfully gooey.
- Crowd-pleasing: mild cheese and buttery garlic appeal to most palates, making this ideal for family meals and parties.
- Flexible: swap cheeses or add herbs and spices to fit dietary preferences or what you have on hand.
- Make-ahead friendly: you can assemble and refrigerate them for a short time before baking when you need to batch prep.
I remember the first time I made a double batch for a neighborhood potluck; they vanished so quickly I wondered if I should charge admission. Even picky eaters who normally avoid new things came back for seconds and asked what I did differently. Over time I learned small tweaks, like chilling slightly after filling to help the seam stay sealed while baking, and always brushing on plenty of garlic butter right out of the oven for glossy, flavorful tops.
Ingredients
- Refrigerated biscuit dough: One 16 ounce tube of large biscuits. I use Pillsbury Grands Homestyle Butter Tastin because the larger biscuit gives a generous pocket for cheese; look for the flakier, thicker varieties for best texture.
- Mozzarella cheese: Four ounces, cut into eight 1 inch cubes. Fresh mozzarella has great flavor, but pre-shredded melts differently; I prefer a block for that perfect stretchy pull. Cheddar or string cheese are friendly substitutes.
- Unsalted butter: Four tablespoons, melted. Using unsalted lets you control final seasoning; if you use salted butter reduce added salt to taste.
- Italian seasoning: One teaspoon. A balanced dried blend adds herby notes without overpowering the cheese; choose a blend with oregano, basil, and thyme.
- Garlic powder: One teaspoon or to taste. Garlic powder gives consistent, even garlic flavor; for a fresher punch use half a clove of finely minced garlic whisked into the melted butter.
- Salt: Half teaspoon or to taste. Kosher salt typically measures differently than table salt; if using kosher salt use a little more for the same intensity.
- Fresh parsley: Two tablespoons finely chopped, optional for garnish. Flat leaf parsley brightens the finished pieces and gives a fresh visual pop.
Instructions
Preheat and prepare:Preheat the oven to 400 degrees Fahrenheit. Line a baking sheet with a nonstick silicone mat or aluminum foil and spray lightly with cooking spray. Preheating to the full temperature ensures even puff and color; place the rack in the center of the oven for the most even browning.Portion the cheese and open the dough:Separate the eight biscuits and put a 1 inch cube of mozzarella into the center of each biscuit. Work on a lightly floured surface or a clean counter to avoid sticking. If the cheese is slightly cold it will be easier to contain while you wrap the dough around it.Seal the pockets:Gather the edges of each biscuit up and around the cheese, stretching the dough slightly to cover. Pinch seams tightly and roll between your palms to form a smooth ball with the seam on the bottom. A tight seal prevents cheese from leaking during baking. If the dough is very sticky, chill for five minutes to firm it before sealing.Bake until lightly golden:Arrange the sealed pieces seam-side down and bake for about 10 minutes or until very lightly golden brown. Watch closely in the last two minutes because they can progress quickly from perfect to overdone. The exterior should be set and show a gentle golden tint; the interior will contain hot, melty cheese.Prepare the garlic butter:While the rolls bake, add the melted butter to a small microwave-safe bowl and stir in Italian seasoning, garlic powder, and salt. Heat only if needed to fully melt the butter and combine ingredients. Taste and adjust salt and garlic to preference before brushing.Brush and finish:Right after removing the pieces from the oven, generously brush each one with the garlic butter so the tops absorb the flavor while warm. Sprinkle with chopped parsley if using and serve immediately for best texture and flavor.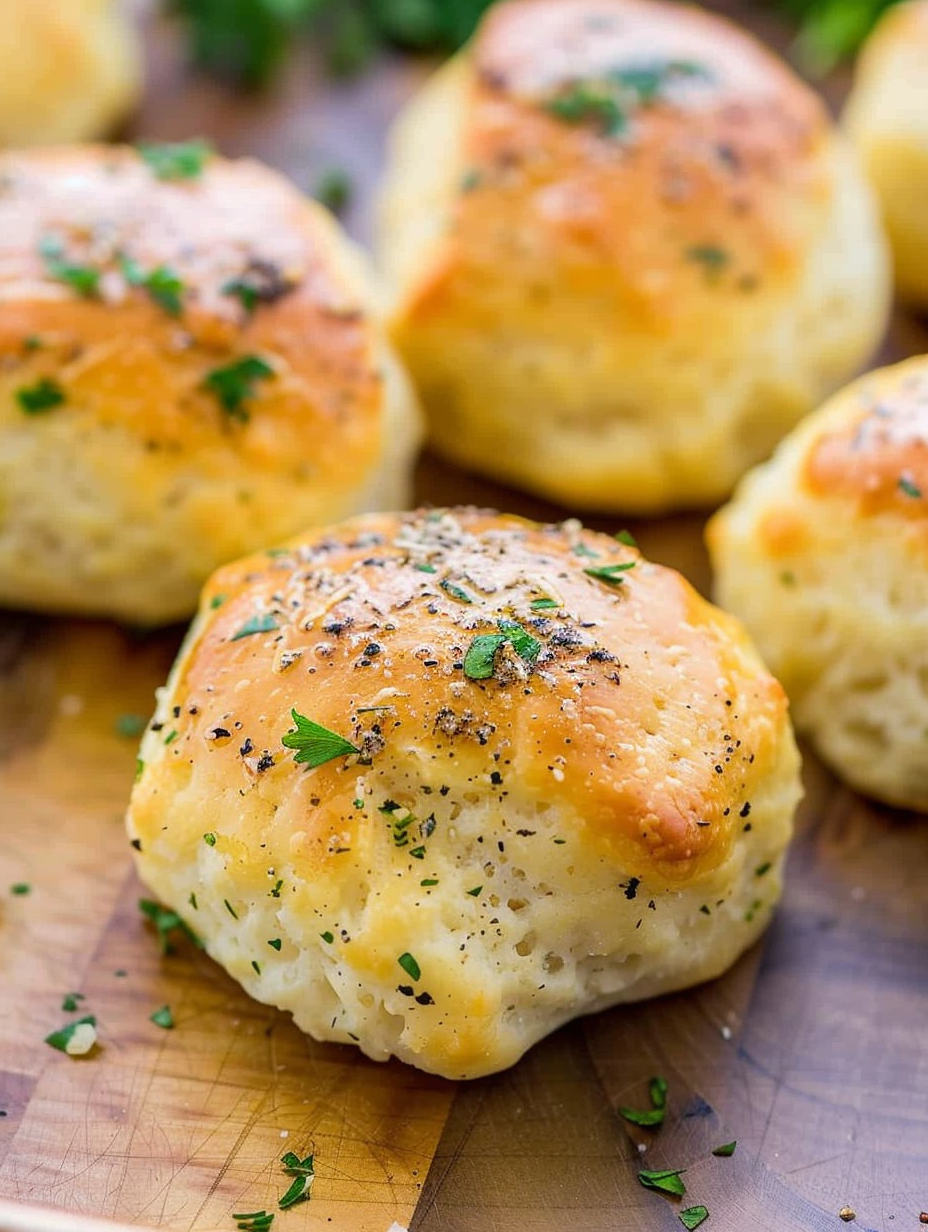
You Must Know
- Best eaten warm: the pieces are at their peak right out of the oven when the cheese is fully molten and the butter is glossy.
- Freezing: assemble and freeze raw, then bake from frozen adding a few extra minutes; they freeze well for up to three months wrapped tightly.
- Allergen note: contains dairy and gluten; not suitable for those with those allergies unless ingredients are substituted.
- Portion control: each piece is small and rich, so plan two per person for appetizers or one as a side for a very filling meal.
- Watch browning closely: a minute can make a big difference between lightly golden and overbrowned.
My favorite aspect is how reliably simple the process is: even kids can help assemble the pockets, and I have a stash of quick variations that keep this from ever feeling repetitive. Once, I swapped in a smoked cheddar and added a pinch of cayenne for a lively party version; the balance of smoky cheese and buttery garlic was addictive. The simplicity makes it a go-to for last-minute hosting because you spend minutes prepping and get big rewards when guests arrive.
Storage Tips
To store leftovers, allow the pieces to cool to room temperature for no more than two hours, then place them in an airtight container in the refrigerator for up to three days. Reheat in a 350 degrees Fahrenheit oven for 5 to 8 minutes to refresh the exterior and re-melt the cheese; microwaving will make them overly soft and unevenly melted. For longer storage, freeze assembled but unbaked pockets on a baking sheet until firm, then transfer to a freezer bag; bake from frozen adding 5 to 8 minutes to the bake time. Use parchment or silicone to prevent sticking in the freezer and label with the date.
Ingredient Substitutions
You can easily swap cheeses: sharp cheddar gives a bolder, tangy flavor while provolone adds a mellow, creamy melt. If you prefer herbier notes, fold 1 tablespoon of finely chopped fresh basil into the melted butter. For a lower-fat option, use part-skim mozzarella, though the stretch will be slightly less dramatic. To make this gluten free, choose a certified gluten-free biscuit dough brand and confirm seasonings are GF. If you want a dairy-free alternative, use vegan buttery spread and vegan mozzarella; texture and flavor will vary, but the concept holds.
Serving Suggestions
Serve the pieces on a warm platter with a small bowl of marinara for dipping or a herby ranch for contrast. They pair beautifully with a crisp salad for a light meal or alongside soup for a comforting bowl-and-bread combination. Garnish with freshly chopped parsley or a quick dusting of grated Parmesan for an elevated look. For brunch, add thin slices of prosciutto or a smear of pesto inside the dough before sealing for a savory twist.
Cultural Background
While not tied to a single traditional cuisine, the idea of enclosed cheese breads appears in many cultures, from Italian calzones to Brazilian pao de queijo. This version is an American shortcut inspired by convenience dough and the universal love of melty cheese. Using refrigerated biscuit dough is a modern twist that leverages convenience foods to recreate the satisfying experience of freshly baked filled breads without the time investment of scratch dough.
Seasonal Adaptations
In summer, add chopped sun-dried tomatoes and basil for Mediterranean brightness. In fall and winter, swap in a smoked gouda with a pinch of nutmeg for cozy, deep flavors. For holiday gatherings, consider mixing in chopped roasted garlic and rosemary into the butter, and top with a sprinkle of flaky sea salt after brushing to add a festive finish.
Meal Prep Tips
To streamline hosting, assemble the pockets and place them on the baking sheet, then cover lightly and refrigerate for up to 12 hours before baking. If you need more lead time, freeze them as described in Storage Tips. Make the garlic butter ahead and keep it chilled; warm it slightly before brushing. Use a pastry brush for quick, even coverage and a small bowl for dipping so you can brush while the pieces are hot right out of the oven.
These pieces are small, comforting, and designed to be shared. I hope you enjoy making them as much as my friends and I do—simple techniques and big flavor make them a permanent favorite in my kitchen.
Pro Tips
Chill the filled pieces for 5 minutes before baking if dough becomes sticky; it helps seals hold.
Brush with garlic butter right out of the oven so the tops absorb flavor while warm.
Watch closely during the last two minutes of baking; biscuits can go from golden to overdone quickly.
Use a block of cheese cut into cubes for the best melt and stretch.
This nourishing stuffed cheese bread recipe is sure to be a staple in your kitchen. Enjoy every moist, high protein slice — it is perfect for breakfast or as a wholesome snack any time.
FAQs about Recipes
Can I freeze these before baking?
Yes. Assemble and freeze on a tray until solid, then transfer to a freezer bag. Bake from frozen, adding 5 to 8 minutes.
How should I reheat leftovers?
They are best eaten warm. Reheat at 350 degrees Fahrenheit for 5 to 8 minutes to restore texture.
Tags
Stuffed Cheese Bread
This Stuffed Cheese Bread recipe makes perfectly juicy, tender, and flavorful steak every time! Serve with potatoes and a side salad for an unforgettable dinner in under 30 minutes.
Instructions
Preheat and prepare
Preheat oven to 400 degrees Fahrenheit. Line a baking sheet with a silicone mat or foil and spray lightly with cooking spray. Position oven rack in the center for even browning.
Portion and open the dough
Separate the eight biscuits and place a 1-inch cube of mozzarella into the center of each. Work on a lightly floured surface if needed to prevent sticking.
Seal the pockets
Gather dough edges up and around the cheese, pinch seams tightly and roll between palms to form smooth balls with seams on the bottom to prevent leaks.
Bake until lightly golden
Arrange seam-side down and bake for about 10 minutes until very lightly golden. Monitor the last minutes closely to prevent overbrowning.
Make garlic butter and finish
Melt butter in a microwave-safe bowl, stir in Italian seasoning, garlic powder and salt. Brush generously over hot pieces as soon as they come from the oven and garnish with parsley.
Last Step: Please leave a rating and comment letting us know how you liked this recipe! This helps our business to thrive and continue providing free, high-quality recipes for you.
Nutrition
Did You Make This?
Leave a comment & rating below or tag
@savoryte on social media!
Categories:
You might also like...

Tilapia with Lemon Butter
Flaky pan-seared tilapia topped with a velvety lemon butter sauce. Quick to cook, bright with citrus, and weeknight-easy yet dinner-party special.

Healthy Egg Muffin Cups
Start your morning with veggie-loaded, protein-packed egg muffins at just 50 calories each. Perfect for make-ahead breakfasts, freezer-friendly, and easy to customize.
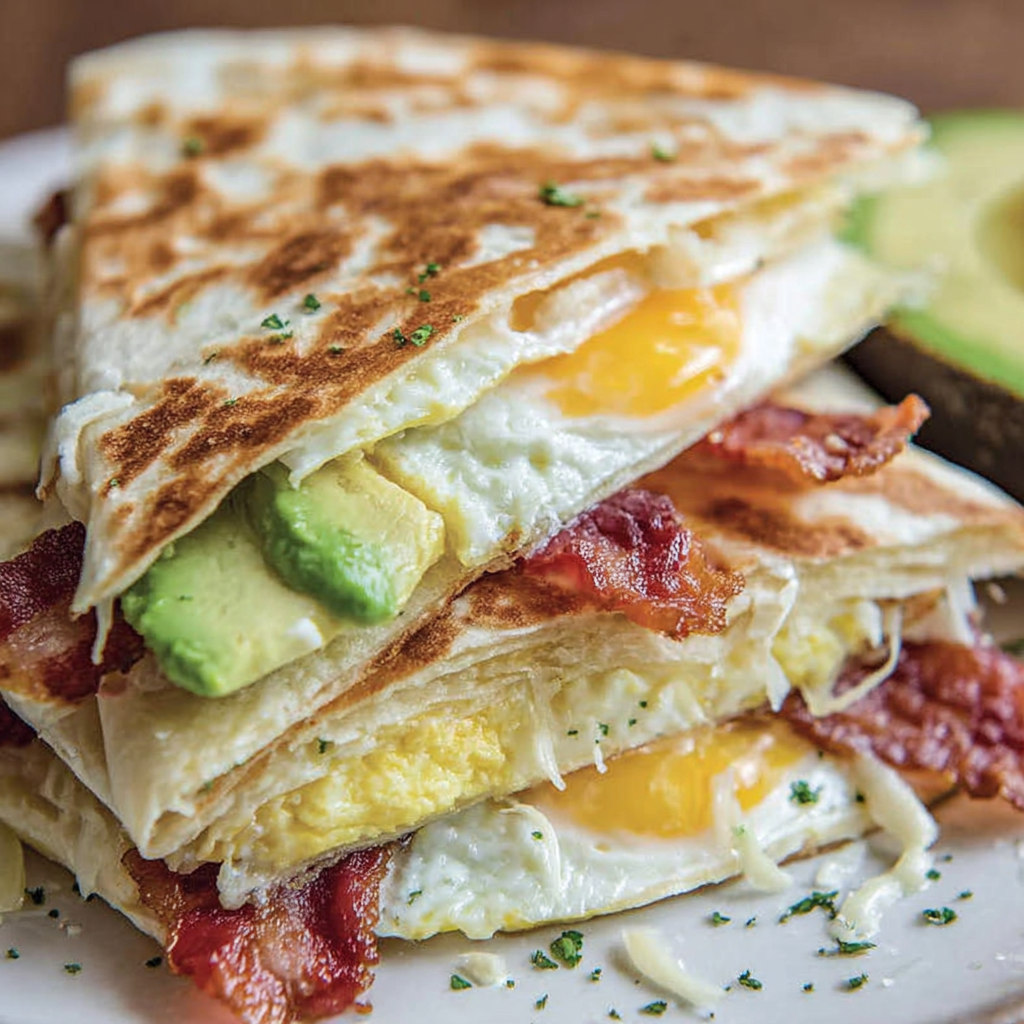
TikTok Breakfast Tortilla Fold
Crispy, cheesy, and ready in minutes, this viral tortilla fold layers bacon, egg, avocado, and melty cheese into a perfectly portable triangle.
Did You Make This?
Leave a comment & rating below or tag @savoryte on social media!
Rate This Recipe
Share This Recipe
Enjoyed this recipe? Share it with friends and family, and don't forget to leave a review!
Comments (1)
This recipe looks amazing! Can't wait to try it.
Comments are stored locally in your browser. Server comments are displayed alongside your local comments.

Hi, I'm Sophia!
What's Popular

30-Minute Meals!
Join to receive our email series which contains a round-up of some of our quick and easy family favorite recipes.