
>>

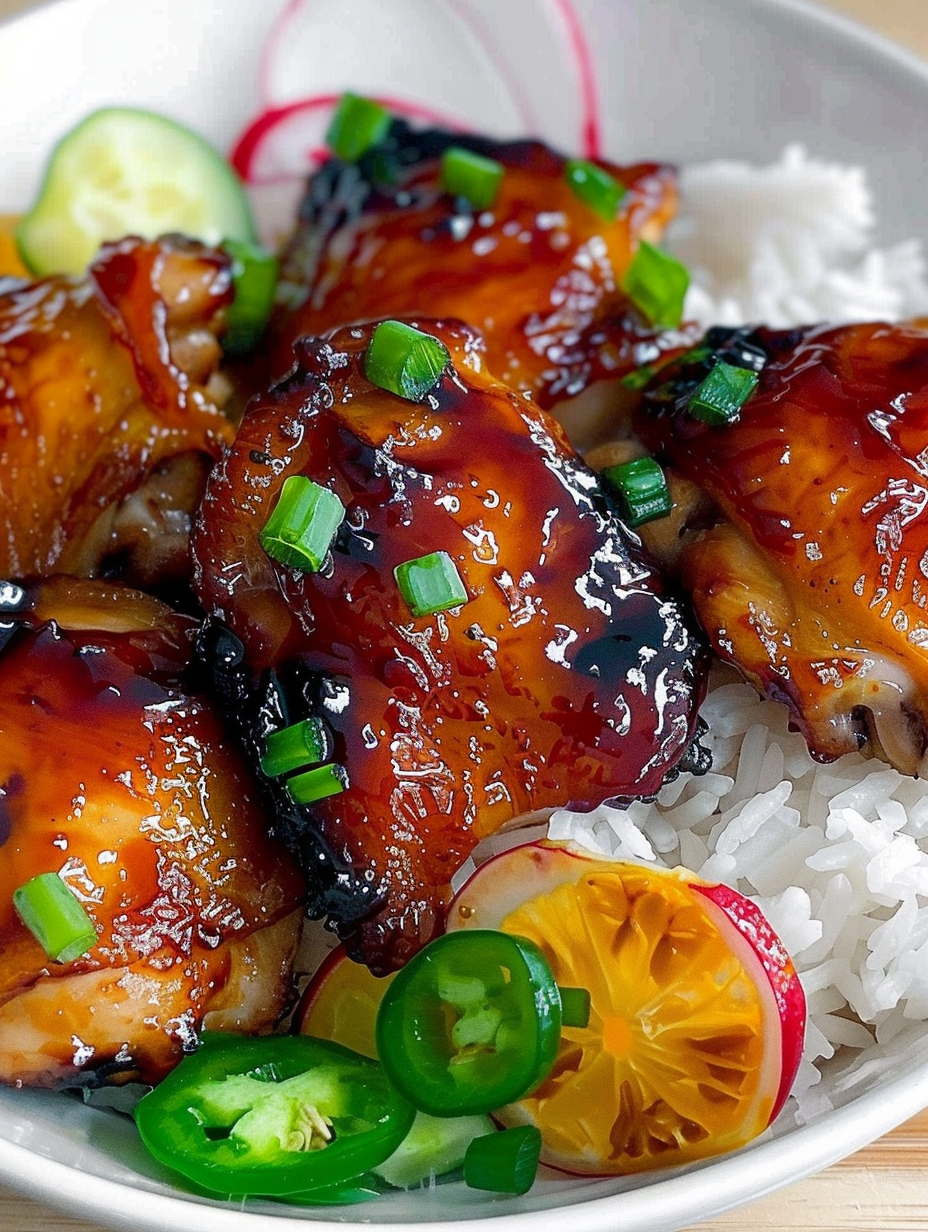
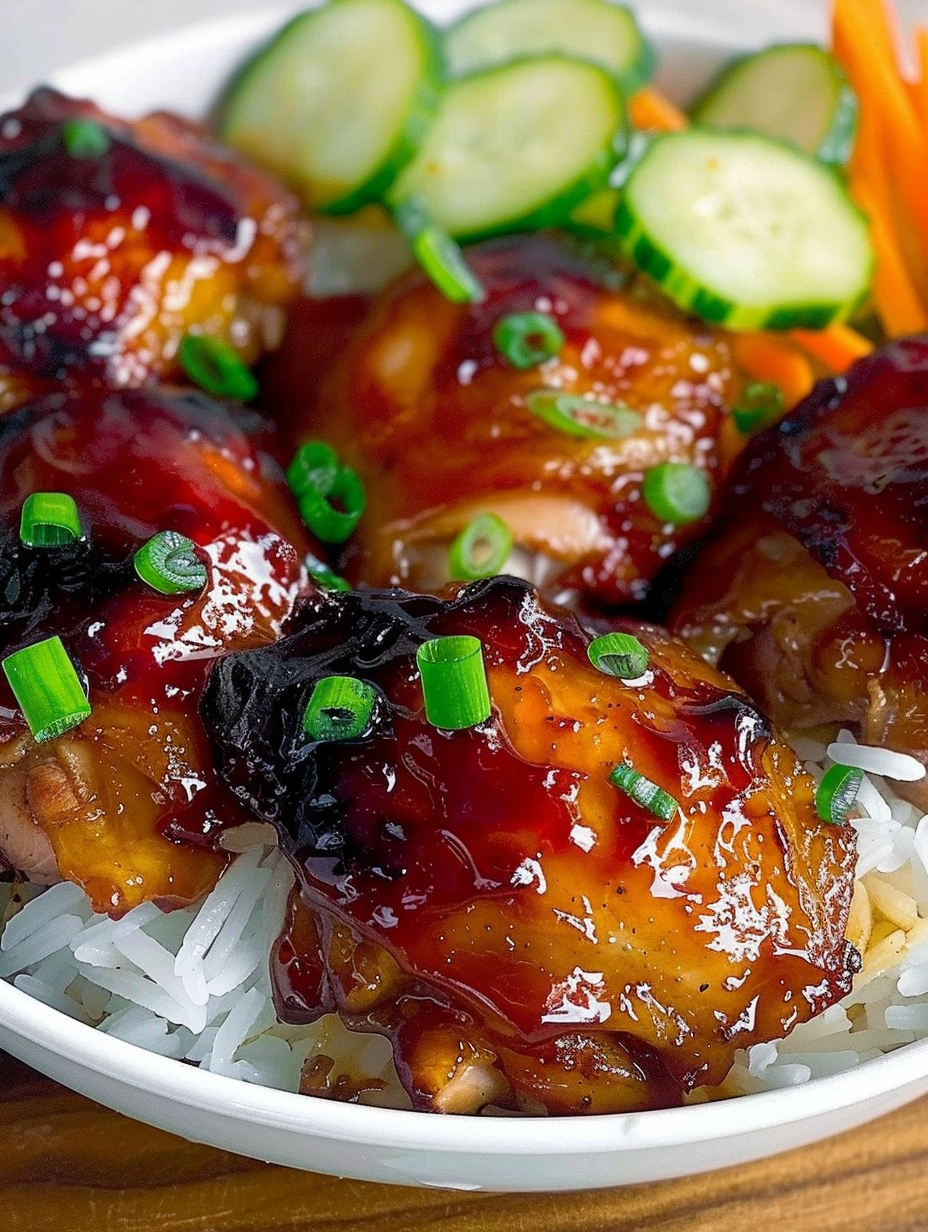
Juicy bone-in chicken thighs glazed in a sticky sweet chili sauce — air-fried to crispy perfection in under 30 minutes. Perfect for busy weeknights.
This recipe for Sticky Sweet Chili Chicken Thighs has been my go-to when I need something fast, flavorful, and family-approved. I first put this combination together on a hectic weeknight when the grocery store run was late and the kids wanted dinner fast. Bone-in thighs are forgiving, stay juicy under high heat, and the sweet chili glaze transforms basic roasted poultry into an irresistible sticky dish. The first time I served it, my partner and kids fought over the last piece — a good sign that it was a keeper.
What makes this preparation special is the contrast: the air fryer crisps the skin while the glaze creates layers of sweet, savory, and umami notes. I discovered that basting multiple times while the thighs cook produces those lacquered edges that make people pause before taking a bite. This version works equally well in the oven if you prefer, but the air fryer saves time, uses less oil, and gives you consistent browning. It’s an ideal weeknight option when you want big flavor with minimal fuss.
On the first night I served this, friends texted asking for the recipe before dessert was cleared. It’s one of those dishes that feels like restaurant food but takes almost no active time — perfect for nights when you want to relax and still impress.

My favorite part is the second glaze — each time I baste, the sauce caramels a bit more and I know the final result will have sticky edges and deep umami flavor. Family members always ask for the extra glaze on the side for dipping, and I keep a little reserved before basting for exactly that reason.
Store cooled thighs in an airtight container in the refrigerator for up to 3 days. To freeze, place thighs in a single layer on a baking sheet until solid, then transfer to a freezer-safe bag or container with the glaze tucked in a separate small container if you prefer to refresh the coating after reheating. Reheat gently in a 350°F oven for 10 to 12 minutes (from refrigerated) to avoid drying the meat; cover loosely with foil if the skin is already browned and you want to retain moisture. Thawed frozen thighs reheat well in the air fryer at 350°F for 6 to 8 minutes to refresh crispness.
If you need gluten-free, swap the soy sauce for tamari and use a gluten-free oyster alternative or add a splash of extra soy-free umami such as mushroom seasoning. For a vegetarian-inspired option, replace thighs with thick tofu slabs or cauliflower steaks and adjust cooking times — both take well to the glaze but will not have the same cooking tolerances as bone-in poultry. Swap avocado oil for light olive oil or grapeseed oil if unavailable. If you like more heat, stir in 1/2 teaspoon crushed red pepper flakes or a teaspoon Sriracha into the glaze.
Serve over steamed jasmine rice to soak up the sticky glaze, alongside quick-pickled cucumbers or a crunchy slaw for contrast. For a heartier plate, add roasted broccoli or bok choy sautéed with garlic. Presentation tip: slice thighs off the bone and fan them over a pool of extra glaze, then sprinkle toasted sesame seeds and thinly sliced scallions for a restaurant-style finish.
The flavor profile draws on Southeast Asian elements: sweet chili sauce has roots in Thai condiments while oyster and soy sauces bring Chinese umami. This mash-up is common in modern home cooking where pantry staples from multiple Asian cuisines come together to create bold, familiar flavors. The result is not a traditional dish from one region but a beloved hybrid that highlights sticky-sweet, salty, and savory notes.
In summer, grill the thighs instead of using the air fryer for a smoky edge and brush on the glaze near the end. In winter, pair the dish with warming sides like garlic-butter green beans and steamed brown rice. For holiday gatherings, double the glaze and keep it warm for a buffet-style serving so guests can spoon extra over their portions.
To meal-prep, cook a double batch and portion into microwave-safe containers with rice and steamed vegetables. Refrigerate for up to 3 days. When reheating, use the oven or air fryer to restore texture; microwave only if time is tight and you cover with a damp paper towel to retain moisture. Keep a small extra portion of glaze in a separate container to refresh the shine after reheating.
These Sticky Sweet Chili Chicken Thighs are a weekday lifesaver and a crowd-pleaser. The simple glaze, the forgiving bone-in thighs, and the quick air-fryer method combine to give a meal you’ll be proud to serve any night of the week. Make it your own with garnishes and side swaps, and don’t be surprised when people ask for seconds.
Always pat the skin completely dry before seasoning to ensure the crispiest skin in the air fryer.
Reserve a small portion of glaze before basting to use as a dipping sauce that hasn’t touched raw chicken.
Use an instant-read thermometer and remove thighs at 165°F to prevent overcooking and maintain juiciness.
Baste at least three times during the final cook to build a glossy lacquer on the surface.
This nourishing sticky sweet chili chicken thighs (air fryer) recipe is sure to be a staple in your kitchen. Enjoy every moist, high protein slice — it is perfect for breakfast or as a wholesome snack any time.
Yes. You can roast in the oven at 400°F on a wire rack set over a baking sheet for 25 to 30 minutes, basting with the glaze in the last 10 minutes.
Use tamari and a gluten-free oyster sauce alternative; check labels since traditional soy and oyster sauces contain gluten and shellfish.
This Sticky Sweet Chili Chicken Thighs (Air Fryer) recipe makes perfectly juicy, tender, and flavorful steak every time! Serve with potatoes and a side salad for an unforgettable dinner in under 30 minutes.
Preheat the air fryer to 375°F for 3 to 5 minutes so the basket is hot and the thighs sizzle on contact.
Pat chicken thighs dry with paper towels. Toss with 1 tablespoon avocado oil, 1 teaspoon garlic powder, 1/2 teaspoon salt, and 1/2 teaspoon pepper to coat evenly.
Arrange thighs skin-side down in a single layer and air fry at 375°F for 15 minutes to start cooking through and color the underside.
Whisk together 1/2 cup sweet chili sauce, 3 tablespoons soy sauce, 1 tablespoon oyster sauce, and 1 tablespoon sesame oil in a small bowl; adjust balance to taste.
Flip thighs skin-side up, brush with glaze, and return to the air fryer. Baste at least twice more during the next 10 minutes to create layers of caramelized glaze.
Continue cooking for an additional 10 minutes at 375°F or until an instant-read thermometer reads 165°F in the thickest part of the thigh.
For extra crispness and shine, transfer to a baking sheet and broil for 2 to 3 minutes, watching carefully to avoid burning the glaze.
Allow thighs to rest 5 minutes before serving. Serve over jasmine rice or with your favorite vegetable sides and garnish with sesame seeds and scallions.
Last Step: Please leave a rating and comment letting us know how you liked this recipe! This helps our business to thrive and continue providing free, high-quality recipes for you.
Leave a comment & rating below or tag
@savoryte on social media!

Flaky pan-seared tilapia topped with a velvety lemon butter sauce. Quick to cook, bright with citrus, and weeknight-easy yet dinner-party special.

Start your morning with veggie-loaded, protein-packed egg muffins at just 50 calories each. Perfect for make-ahead breakfasts, freezer-friendly, and easy to customize.

Crispy, cheesy, and ready in minutes, this viral tortilla fold layers bacon, egg, avocado, and melty cheese into a perfectly portable triangle.
Leave a comment & rating below or tag @savoryte on social media!
Enjoyed this recipe? Share it with friends and family, and don't forget to leave a review!
This recipe looks amazing! Can't wait to try it.
Comments are stored locally in your browser. Server comments are displayed alongside your local comments.

Join to receive our email series which contains a round-up of some of our quick and easy family favorite recipes.
