
Southern Buttermilk Biscuits - Old-Fashioned Recipe
30-MINUTE MEALS! Get the email series now
Savoryte

Old‑Fashioned Southern Buttermilk Biscuits

5 from 1 vote
1 Comments
Sophia
By: SophiaUpdated: Aug 28, 2026
This post may contain affiliate links. Please read our disclosure policy.

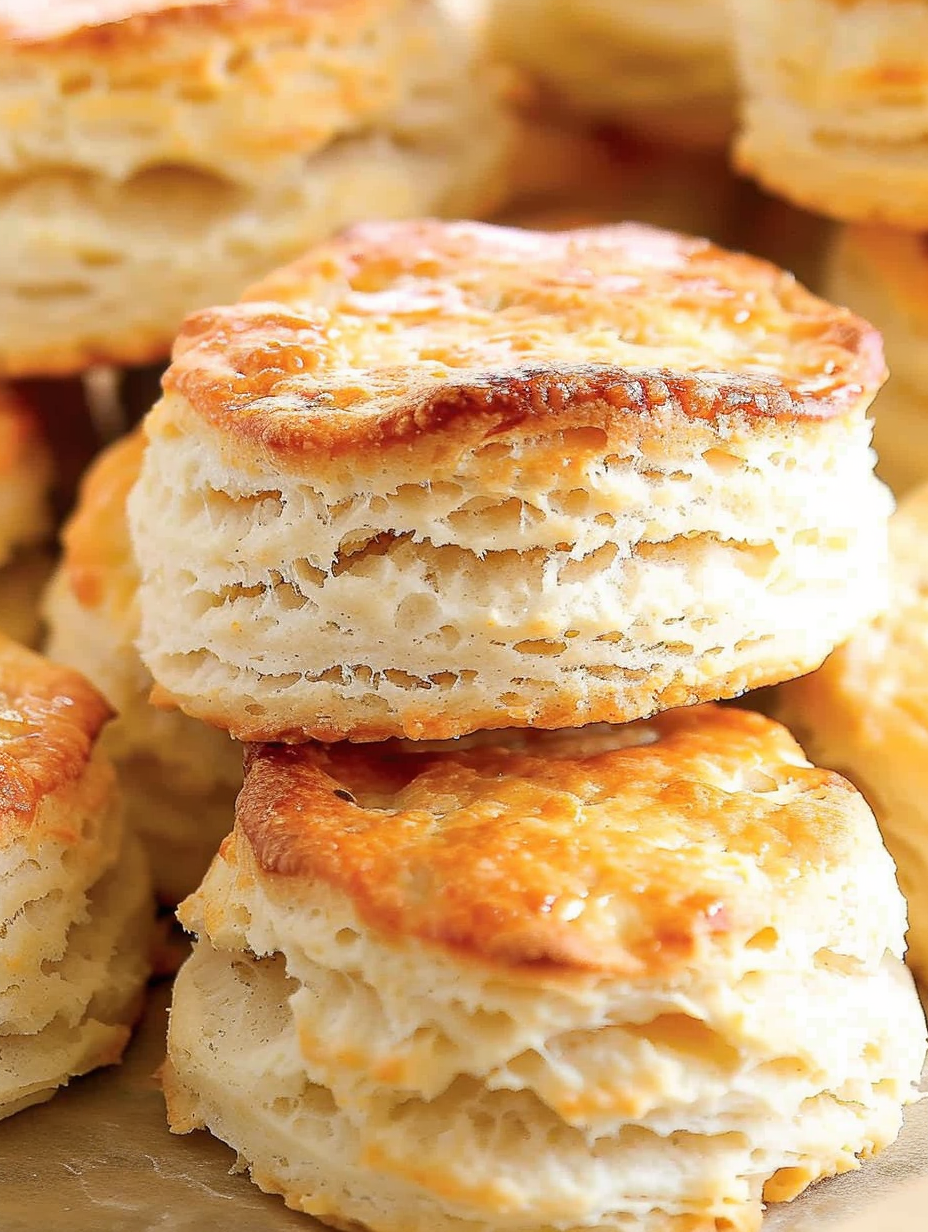
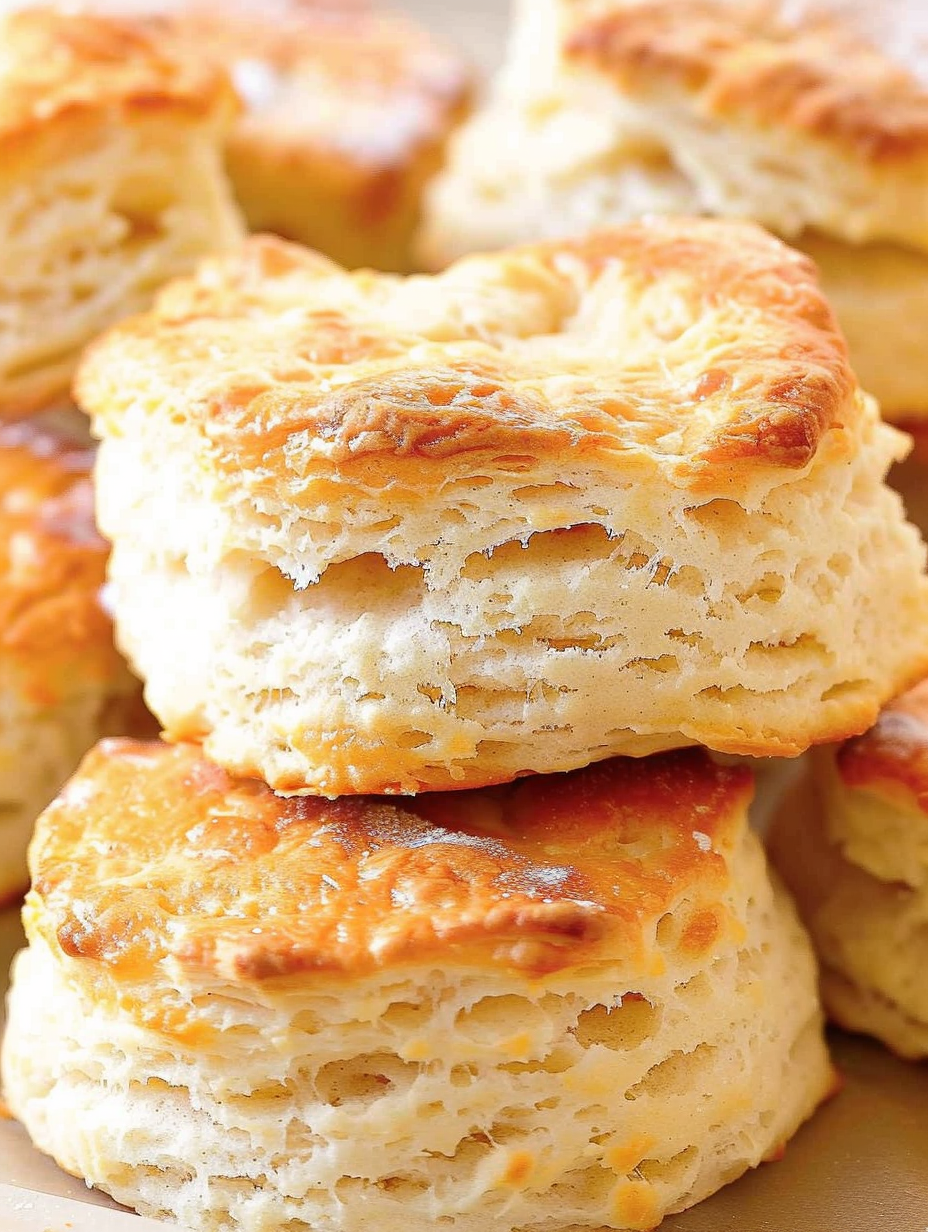
Thick, flaky, melt‑in‑your‑mouth Southern biscuits made with cold butter and tangy buttermilk — perfect for breakfast or as a comforting side.
Old‑Fashioned Southern Buttermilk Biscuits
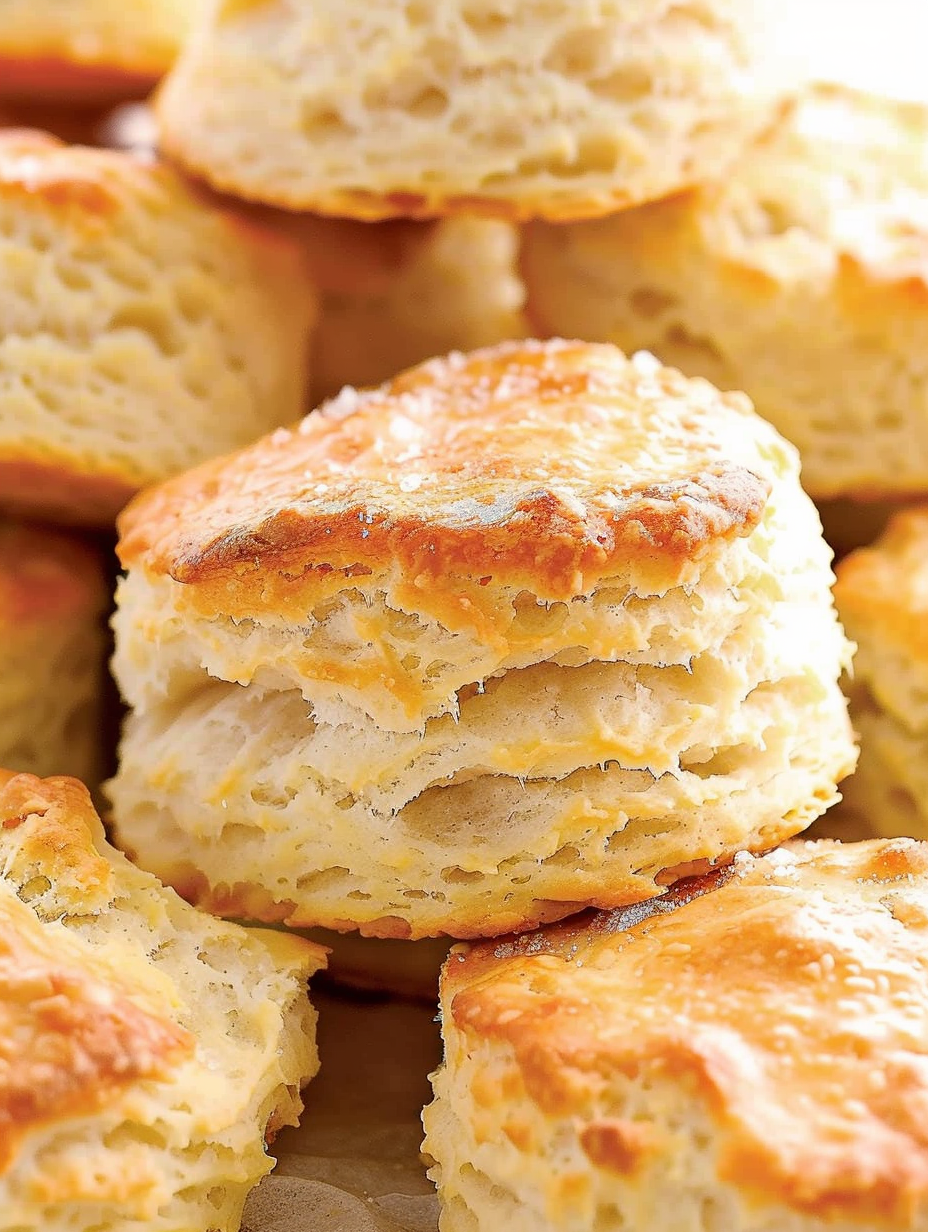
This recipe for old-fashioned Southern buttermilk biscuits is the kind of baking that feels like a warm kitchen hug. I first learned to make these on a chilly weekend when my grandmother handed me her well-worn biscuit cutter and a single sheet of notes. The result was an immediate family favorite: biscuits that rise high, split into tender layers, and have just enough buttery tang from the buttermilk to make every bite unforgettable. They're crisp on the outside, pillowy inside and pair with everything from honey and butter to gravy and fried chicken. I discovered the folding technique in a small community class years ago and kept refining it until the biscuits were reliably thick and tender every time. The folding creates noticeable layers without turning the dough into a laminated pastry, which helps the biscuits remain tender rather than tough. Because these rely on cold butter and minimal handling, the technique is forgiving for home bakers. I love making a batch on Sunday mornings; the house smells like comfort and everyone crowds the table. Even guests who usually avoid carbs ask for seconds.

Why You'll Love This Recipe

  • Produces tall, layered biscuits every time thanks to the tri-fold technique and very cold butter; you get flaky layers without complicated laminating.
  • Uses pantry staples — all-purpose flour, baking powder, and a touch of sugar — with tangy buttermilk for authentic flavor; nothing exotic required.
  • Quick hands-on time: about 25 minutes of active work and 15 minutes in the oven. Ideal for weekend breakfasts or last-minute guests.
  • Make-ahead friendly: dough can be chilled briefly for up to a day or frozen after cutting for longer storage; reheat to restore crisp tops.
  • Crowd-pleaser adaptability: serve sweet with preserves or savory with sausage gravy; works for holiday brunches and simple weeknight dinners alike.
  • Beginner-friendly technique: the instructions explain visual cues and troubleshooting so even first-time bakers can succeed.

When I first brought these to a family gathering they vanished within minutes. My brother declared them the best he'd ever had and requested them for every holiday. The combination of crunchy golden tops and soft, steaming interiors has become a small ritual in my home — breaking one open and spreading warm butter while it's still steaming feels like an instant celebration.
Ingredients

  • Unsalted butter (10 tablespoons, divided): Use high-quality butter like Kerrygold or Plugra if available for a richer flavor; keep most of it very cold or partially frozen to create steam pockets during baking.
  • All-purpose flour (2 cups, plus more for dusting): King Arthur or Pillsbury perform well; spoon and level the flour to avoid dense biscuits and dust your work surface lightly to prevent sticking.
  • Baking powder (1 1/2 tablespoons): Fresh baking powder is crucial for height; check the expiry and replace if older than 6 months for best rise.
  • Granulated sugar (1 tablespoon): Balances the tang of the buttermilk; optional if you prefer less sweetness.
  • Salt (3/4 teaspoon): Enhances flavor — use fine sea salt or table salt and measure carefully.
  • Baking soda (1/4 teaspoon): Reacts with the buttermilk to add subtle lift and tenderness.
  • Buttermilk (3/4 cup plus 1 tablespoon, divided): Full-fat cultured buttermilk creates the characteristic tang and reacts with the baking soda. If you only have low-fat, expect a slightly different crumb.

Instructions

Preheat and prepare: Preheat the oven to 425°F and line a baking sheet with parchment paper. A hot oven jump-starts rise, so allow at least 15 minutes for the oven to come fully to temperature. If using a dark baking sheet, lower the rack slightly to prevent over-browning on the bottom. Chill the butter and buttermilk: Grate 8 tablespoons of the butter with a box grater or dice into very small pieces and place in the freezer for 15 minutes. Also chill the buttermilk; tiny frozen bits help create pockets of steam when baking. Cold fat is the secret to flaky layers. Mix dry ingredients: Whisk together 2 cups all-purpose flour, 1 1/2 tablespoons baking powder, 1 tablespoon sugar, 3/4 teaspoon salt, and 1/4 teaspoon baking soda in a large bowl. Even distribution of leaveners prevents uneven rising and creates a uniform crumb. Cut in the butter: Add the cold grated or diced butter and cut it into the flour using a pastry cutter, two forks, or your fingertips. Work quickly until the mixture looks crumbly with pea-sized pieces of butter remaining; these bits melt in the oven and create steam layers. Incorporate the buttermilk: Pour in 3/4 cup buttermilk and stir until mostly combined. The dough should still be slightly shaggy with some dry flour visible — overworking will develop gluten and toughen the biscuits. Form and fold: Turn the mixture onto a lightly floured surface and gently bring it together into a ball. Roll into a 1/2-inch thick rectangle, tri-fold one side over the center, then the other 1/3 over the top. Repeat this fold and roll process three times total, finishing by rolling the dough to a 1-inch thickness. These folds create layered structure without heavy laminating. Cut and arrange: Using a 2 1/2-inch biscuit cutter, press straight down without twisting to avoid sealing the edges. Place biscuits close together on the parchment so they support each other and rise taller. Re-roll scraps as needed until you have eight biscuits total. Brush and bake: Brush the tops with the remaining 1 tablespoon buttermilk and bake at 425°F for 13 to 15 minutes until puffed and golden. Visual cues: golden tops and a hollow sound when tapped indicate doneness. Finish with butter: While the biscuits bake, melt the remaining 2 tablespoons of butter. Brush the hot biscuits immediately when they come from the oven for a glossy, buttery finish. Let cool slightly before serving. User provided content image 1

You Must Know

  • These keep well refrigerated for 2 days in an airtight container and freeze up to 3 months; thaw and reheat in a warm oven to refresh crispness.
  • Using very cold butter and minimal handling prevents gluten development and ensures a tender interior with flaky layers.
  • Do not twist the cutter — pressing straight down maintains edge height and prevents sealing that stops vertical rise.
  • Fresh baking powder is essential for maximum rise; test by sprinkling a little into hot water — it should fizz vigorously.

My favorite part of this method is how reliably it produces tall biscuits no matter the flour brand, as long as you follow the cold-butter and folding rules. At a community potluck, I once doubled the batch and a neighbor swore they were straight from a diner; that kind of response never gets old and keeps me making them for every special morning.

Storage Tips

Store cooled biscuits in an airtight container at room temperature for up to 24 hours; after that refrigerate to maintain freshness for up to 48 hours. For longer storage, freeze on a sheet tray until firm, then transfer to a sealed freezer bag for up to 3 months. To reheat, thaw overnight in the fridge or at room temperature for 30 minutes, then warm in a 350°F oven for 8 to 10 minutes. For best texture, reapply a light brush of melted butter before serving to refresh the glossy top and enhance flavor.

Ingredient Substitutions

If you don't have cultured buttermilk, make a substitute by adding 1 tablespoon white vinegar or lemon juice to a measuring cup and filling to 1 cup with whole milk; let sit 5 minutes. For a richer biscuit, replace up to 2 tablespoons of butter with cold cream cheese, which adds tenderness but will slightly alter flavor. For a gluten-free option, use a 1-to-1 gluten-free flour blend that contains xantham gum; expect a slightly different crumb and reduce mixing to avoid crumbliness. Reduce sugar or omit entirely for savory applications.
User provided content image 2

Serving Suggestions

Serve warm with softened butter and honey for breakfast, or split and ladle over sausage gravy for a classic Southern plate. They are also excellent alongside fried or roasted chicken for dinner, or use as mini sandwich buns with ham and cheddar for a brunch spread. Garnish with a sprinkle of flaky sea salt if serving savory, or top with jam and whipped cream for a sweeter presentation. Fresh herbs like chives folded into the dough add a savory twist that's delightful with eggs.

Cultural Background

The biscuit has deep roots in Southern American cooking as a humble, versatile bread that rose to prominence because of simple ingredients and quick preparation. Early versions date back to colonial times and evolved from European quick breads; the addition of chemical leaveners in the 19th century transformed them into the tall, flaky biscuits celebrated in Southern kitchens today. Regional variations include sweetened rounds, herb-studded versions, and the famous biscuit-and-gravy pairing that became a breakfast staple.

Seasonal Adaptations

In spring, fold in grated cheddar and chives for a savory seasonal biscuit; summer calls for sweet corn kernels and a touch of sugar. In autumn, add a tablespoon of pureed pumpkin and warm spices for a tender seasonal variation, reducing added liquid slightly. During winter holidays, serve with spiced apple butter or cranberry compote. Adjust bake time by a minute or two when adding moist ingredients to ensure the centers are fully baked.

Meal Prep Tips

For quick breakfasts, prepare the dough the night before, shape into a disk, wrap tightly, and refrigerate. The next morning, roll to 1-inch thickness, cut, and bake as directed — allow an extra minute or two if starting from cold. To freeze single portions, bake fully, cool, wrap individually in foil, and freeze; reheat in a 325°F oven wrapped in foil for 10 to 12 minutes. Use shallow airtight containers to avoid squashing the tops when storing in the fridge.

These biscuits are more than a recipe — they are a small ritual that turns ordinary mornings into moments worth savoring. Try the folding technique once and you'll wonder why you waited so long to learn it; the results speak for themselves: tall, tender, and deliciously nostalgic.

Pro Tips

  • Keep the butter and buttermilk very cold to create steam pockets for flaky layers.

  • Do not twist the biscuit cutter; press straight down to preserve edge height for better rise.

  • Use fresh baking powder for maximum lift and check its freshness before baking.

  • Handle the dough as little as possible to avoid gluten development and tough biscuits.

This nourishing old‑fashioned southern buttermilk biscuits recipe is sure to be a staple in your kitchen. Enjoy every moist, high protein slice — it is perfect for breakfast or as a wholesome snack any time.

Tags

Comfort FoodRecipeSide DishSouthern CuisineBakingAmerican
No ratings yet

Old‑Fashioned Southern Buttermilk Biscuits

This Old‑Fashioned Southern Buttermilk Biscuits recipe makes perfectly juicy, tender, and flavorful steak every time! Serve with potatoes and a side salad for an unforgettable dinner in under 30 minutes.

Servings: 8 steaks
Old‑Fashioned Southern Buttermilk Biscuits
Prep:25 minutes
Cook:15 minutes
Rest Time:10 mins
Total:40 minutes

Ingredients

Main

Instructions

1

Preheat and prepare

Preheat the oven to 425°F and line a baking sheet with parchment paper. Allow the oven at least 15 minutes to reach full temperature for an immediate oven spring.

2

Chill the butter and buttermilk

Grate or dice 8 tablespoons of butter and place in the freezer for 15 minutes. Chill the buttermilk as well; small frozen spots encourage steam layering during baking.

3

Combine dry ingredients

Whisk 2 cups flour, 1 1/2 tablespoons baking powder, 1 tablespoon sugar, 3/4 teaspoon salt, and 1/4 teaspoon baking soda in a large bowl to evenly distribute leaveners.

4

Cut in the butter

Add the cold butter to the dry mix and cut in with a pastry cutter or two forks until the mixture is crumbly with pea-sized pieces of butter remaining.

5

Add buttermilk and form dough

Pour in 3/4 cup buttermilk and stir until combined but still slightly shaggy. Turn onto a lightly floured surface and bring together into a ball with minimal handling.

6

Tri-fold technique

Roll to 1/2-inch thickness, tri-fold into thirds, roll again. Repeat the fold and roll process three times total, finishing with a 1-inch thickness to create layers.

7

Cut and bake

Cut biscuits with a 2 1/2-inch cutter straight down, place close together on the sheet, brush with remaining 1 tablespoon buttermilk, and bake 13-15 minutes until golden.

8

Finish with butter

Melt the remaining 2 tablespoons butter while biscuits bake and brush the tops immediately after removing from the oven. Let cool slightly before serving.

Last Step: Please leave a rating and comment letting us know how you liked this recipe! This helps our business to thrive and continue providing free, high-quality recipes for you.

Nutrition

Calories: 261kcal | Carbohydrates: 22g | Protein:
3g | Fat: 17g | Saturated Fat: 5g |
Polyunsaturated Fat: 3g | Monounsaturated Fat:
7g | Trans Fat: 1g | Cholesterol: 253mg | Sodium:
0mg | Potassium: 953mg | Fiber: 0g | Sugar:
0g | Vitamin A: 577IU | Vitamin C: 3mg | Calcium:
47mg | Iron: 6mg

Did You Make This?

Leave a comment & rating below or tag
@savoryte on social media!

Old‑Fashioned Southern Buttermilk Biscuits

Categories:

Old‑Fashioned Southern Buttermilk Biscuits

Did You Make This?

Leave a comment & rating below or tag @savoryte on social media!

Rate This Recipe

Share This Recipe

Enjoyed this recipe? Share it with friends and family, and don't forget to leave a review!

Comments (1)

Leave a Comment

0/1000 characters
Food Lover
1 day ago

This recipe looks amazing! Can't wait to try it.

Rating:

Comments are stored locally in your browser. Server comments are displayed alongside your local comments.

Family photo

Hi, I'm Sophia!

Chef and recipe creator specializing in delicious Comfort Food cooking. Passionate about sharing easy-to-follow recipes that bring families together around the dinner table.

30-Minute Meals!

Join to receive our email series which contains a round-up of some of our quick and easy family favorite recipes.