
Salted White Chocolate Peanut Butter Balls

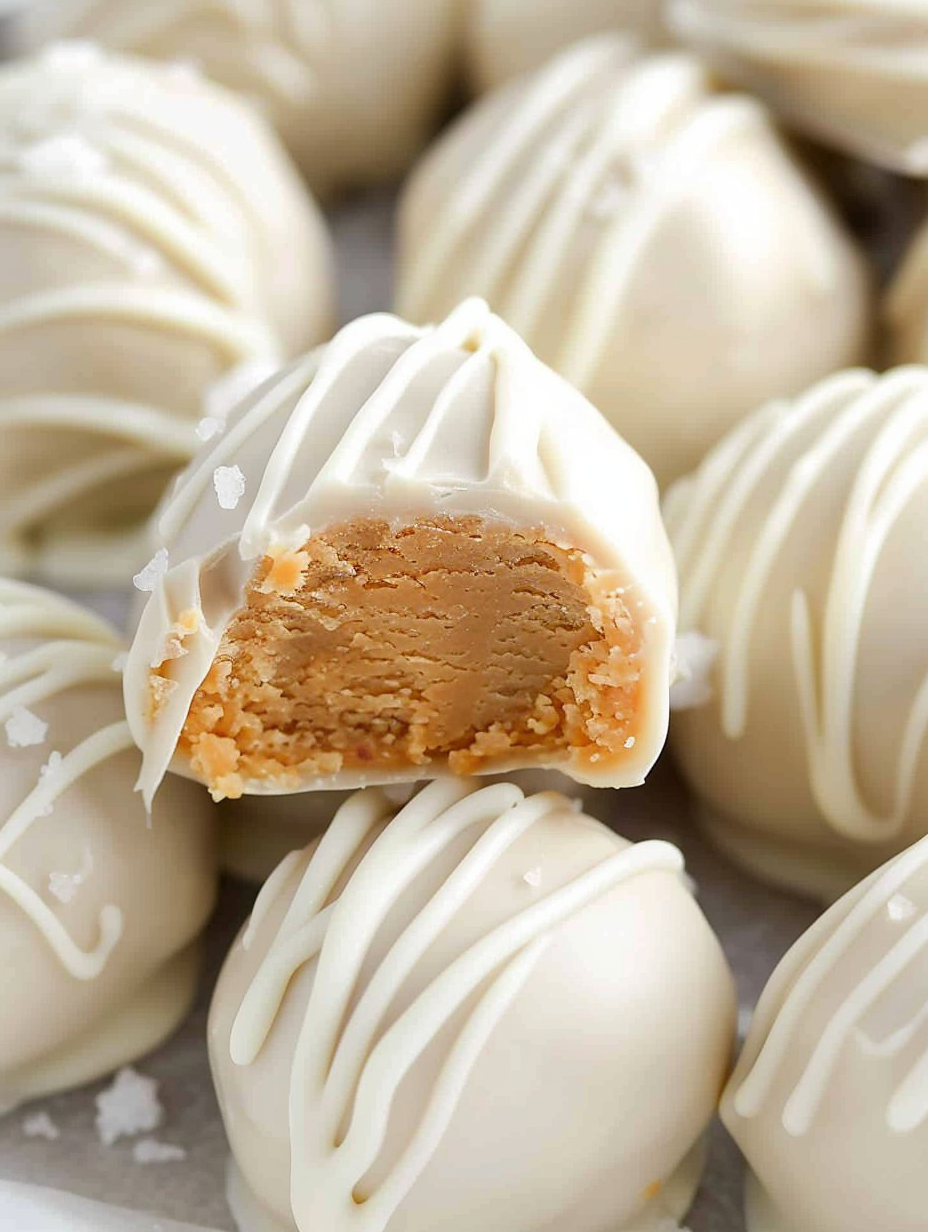
Creamy peanut butter centers enrobed in silky white chocolate and finished with flaked sea salt — an easy, crowd-pleasing holiday treat.
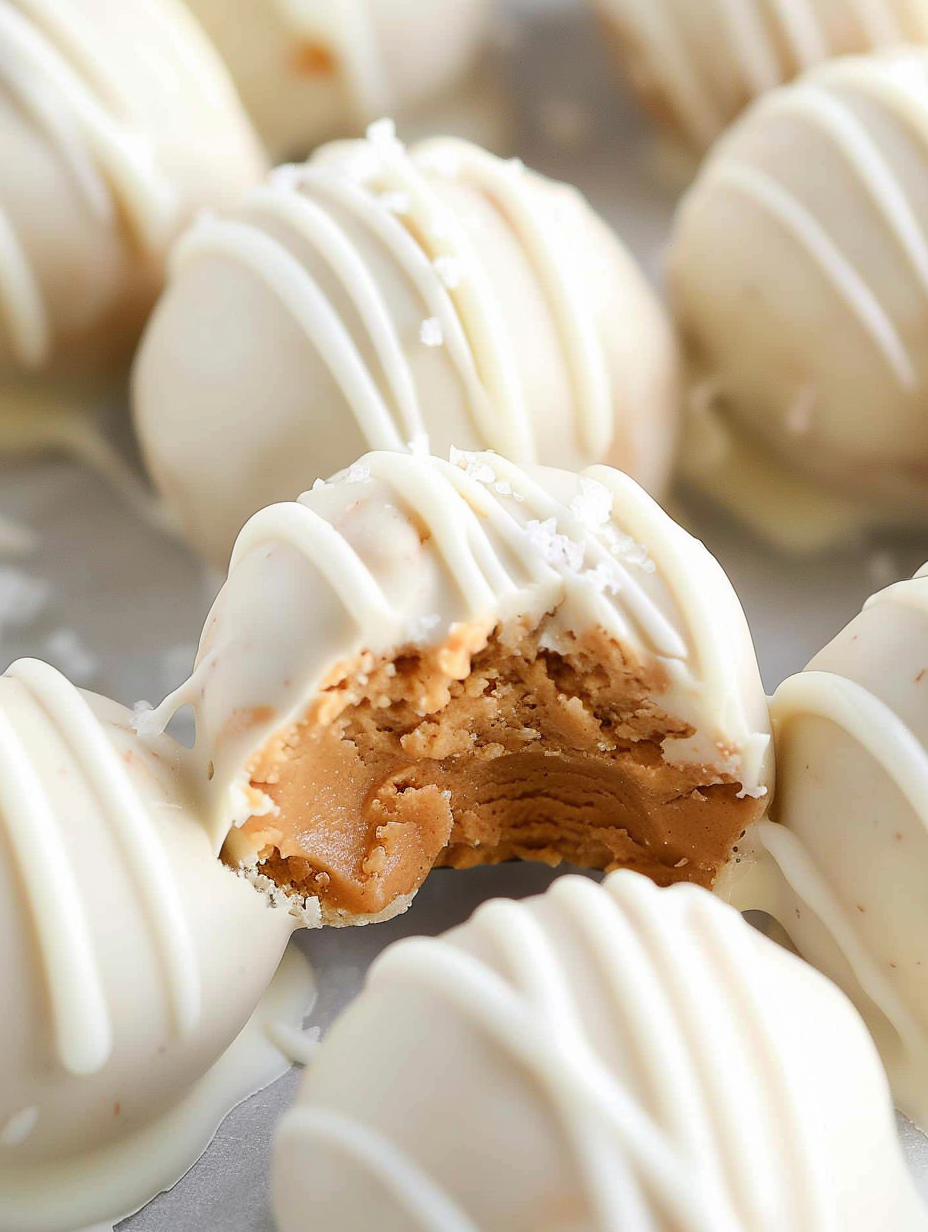
This tray of salted white chocolate peanut butter balls has been my go-to holiday sweet for years. I first assembled this combination on a rainy afternoon when I wanted a no-bake treat that felt special but didn’t require a stack of equipment. The result was deceptively simple: a rich, creamy peanut butter center gently sweetened and stabilized with coconut flour, coated in melted white chocolate so silky it melts on the tongue, and finished with a sprinkle of flaked sea salt that keeps each bite balanced. Every time I bring these to a party, they disappear first.
I discovered the recipe while adapting pantry staples to make a gluten-free and straightforward confection. Because it requires no oven and just a few steps, it’s perfect for last-minute gifts, cookie exchanges, or a weekend batch to keep in the fridge. Texture is everything here — the center should be slightly firm but yielding, while the coating should snap ever so slightly before giving way to creamy peanut butter. Those contrasts are what make this treat memorable to my family and friends.
Why You'll Love This Recipe
- Ready with minimal active time — about 30 minutes of hands-on preparation and a short chill — so it’s ideal for busy holiday days.
- Uses pantry-friendly ingredients like creamy no-stir peanut butter, powdered sugar, and white chocolate chips, which makes it easy to assemble without specialty shopping.
- Gluten-free by design when you use certified gluten-free white chocolate and coconut flour, accommodating guests with gluten sensitivities.
- Make-ahead friendly: you can complete the batch up to a week in advance and refrigerate or freeze for longer storage.
- Customizable: swap in dark or milk chocolate for a different flavor profile, or roll in crushed pretzels for crunch and a salty-sweet twist.
- Great for gifting — they pop into a small box or tin and look polished with just a sprinkle of flaked sea salt.
I still remember the first time I watched my neighbor taste one and close her eyes in delight — she insisted they tasted like a gourmet candy shop. My partner always requests an extra handful to hide in the back of the fridge, which I take as the sincerest compliment. There’s a kind of nostalgic comfort in the peanut butter and white chocolate pairing that makes these little bites feel both classic and indulgent.
Ingredients
- Creamy no-stir peanut butter (3/4 cup): Use a brand you enjoy for flavor as it is the main component; no-stir jars keep the texture consistent so the centers set evenly. Natural, unsalted options work if you adjust the added salt and sugar.
- Cane sugar (1/2 cup): Adds body and a bit of grainy texture that balances the powdered sugar. You can substitute granulated white sugar but cane carries a rounder flavor.
- Salt (1/8 teaspoon): A small pinch in the batter intensifies the peanut flavor; the flaky sea salt on top provides the finishing contrast.
- Coconut flour (1/4 cup): A drying agent that stabilizes the peanut butter so the balls hold shape; use measured scoops as coconut flour is highly absorbent.
- Powdered sugar (2 tablespoons): Smooths the texture and adds a silkiness to the center without grit; sift if it’s lumpy.
- White chocolate baking chips (2 cups): Choose a good-quality baking chip for a smooth melt; brands vary in sweetness and mouthfeel so pick one you like.
- Flaked sea salt (for topping): Use a finishing salt like Maldon or fleur de sel to get that pronounced, delicate crunch on top.
Instructions
Combine the center ingredients: In a mixing bowl, beat together 3/4 cup creamy no-stir peanut butter, 1/2 cup cane sugar, 1/8 teaspoon salt, 1/4 cup coconut flour, and 2 tablespoons powdered sugar until homogenous. Scrape the sides and use a sturdy spoon or paddle attachment on a stand mixer. The mixture should be thick but pliable; if it’s too sticky, add a scant teaspoon of coconut flour at a time. Shape the centers: Use a mini cookie scoop or your hands to portion the batter into even balls (aim for 10 to 12). Roll between your palms for a smooth surface and place on a baking sheet lined with wax paper or parchment. Consistent sizing helps them set and dip evenly. Chill briefly: Freeze the peanut butter balls for 20 minutes to firm them up. A brief chill helps prevent the centers from melting when they hit the warm chocolate and makes dipping much neater. Melt the coating: Place 2 cups white chocolate baking chips in a microwave-safe bowl and heat in 20 to 30 second increments, stirring between each interval until completely smooth. Take care not to overheat — stop when there are soft streaks and stir until they're gone; residual heat will finish the melt. Dip and finish: Remove the peanut butter balls from the freezer and dip them one at a time. Drop a ball into the melted white chocolate and use a spoon to coat it fully. Lift with a fork, tap gently to remove excess coating, and use a toothpick to transfer the truffle back to the lined baking sheet. Immediately top with a few flakes of sea salt while the coating is wet. Set and drizzle: After dipping all balls, chill in the refrigerator for about 15 minutes until the chocolate has set. Rewarm any remaining white chocolate, transfer to a small zipper bag, and snip a tiny corner to drizzle over the tops for visual texture. Return to the fridge until fully hardened.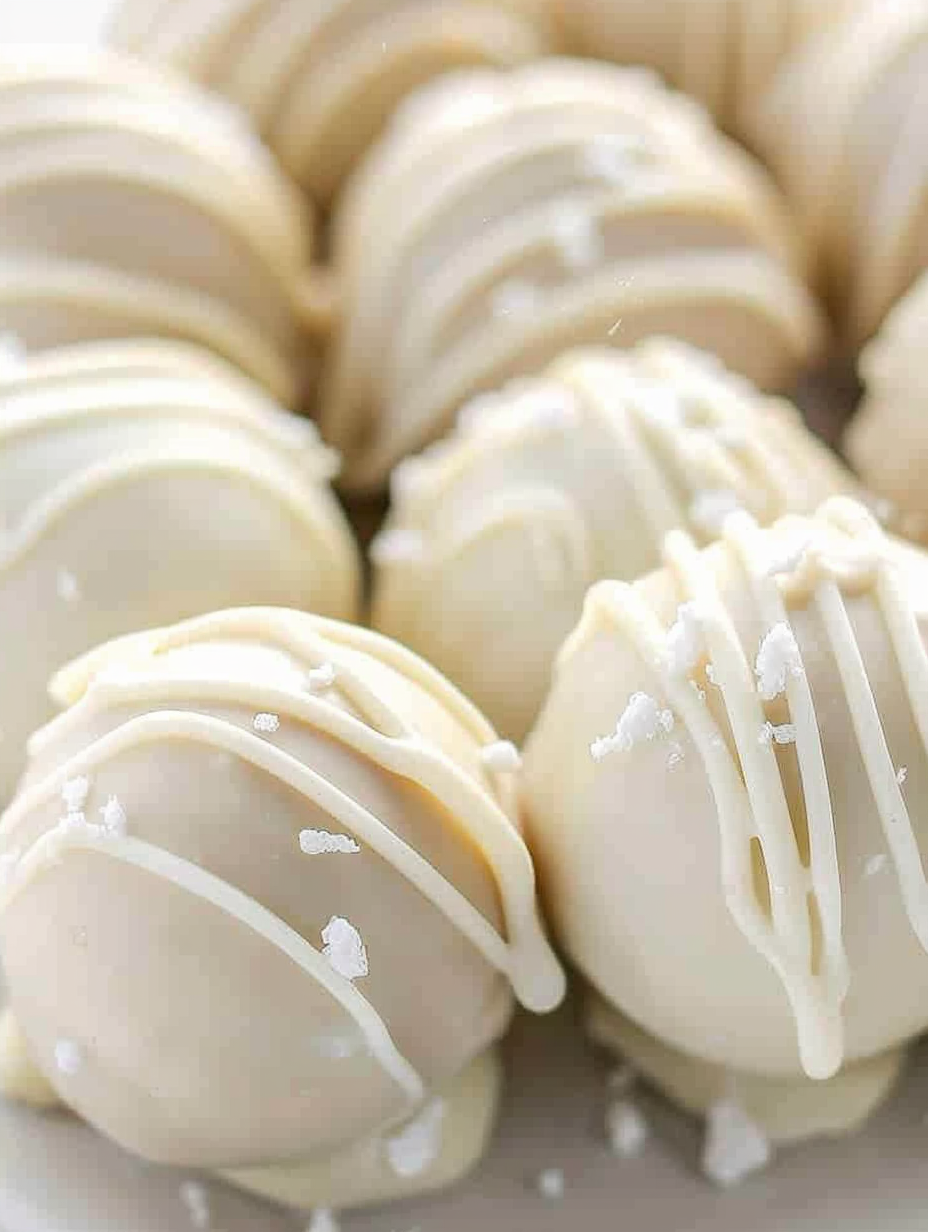
You Must Know
- These hold well in the refrigerator for up to one week in an airtight container and freeze beautifully for up to three months.
- Adjust sweetness by choosing a less-sweet white chocolate or reducing the cane sugar by a tablespoon if you prefer a milder center.
- The coconut flour is crucial for structure; swapping for almond flour will change texture and moisture and may require more or less volume.
- Flaked sea salt is a finishing touch — use sparingly to avoid overpowering the white chocolate’s sweetness.
My favorite thing about making these is their versatility. I’ve made them for cookie exchanges, teacher gifts, and quiet weeknight nibbling. One holiday I packed individual portions into tiny boxes with parchment, tied them with baker’s twine, and left them on neighbors’ doorsteps — they were one of the few treats that came back with notes of appreciation.
Storage Tips
Store finished bites in a single layer or separated by parchment in an airtight container in the refrigerator for up to one week. For longer storage, freeze in a rigid container with parchment layers for up to three months; thaw in the refrigerator for a few hours before serving. Avoid leaving them at room temperature for extended periods, as white chocolate is sensitive to heat and can bloom or soften. When transporting, keep them chilled in an insulated bag with ice packs to maintain shape and prevent sweating.
Ingredient Substitutions
If you prefer a less-sweet option, substitute high-quality dark chocolate for the coating, using a 60 to 70 percent cacao chocolate for contrast. For peanut allergies, swap the peanut butter for sunbutter or almond butter, but note that nut-free subs may require tweaking the coconut flour amount to achieve the same consistency. If you don’t have coconut flour, powdered almond flour is not a direct 1:1 swap; start with slightly more almond flour and add gradually until the mixture holds shape.
Serving Suggestions
Serve these chilled on a small dessert platter with a scattering of extra flaked sea salt. They pair beautifully with sparkling wine or a rich, nut-forward coffee. For parties, place them on decorative cupcake liners to keep presentation tidy. Try combining with salted caramel popcorn or spiced nuts on a holiday dessert board for a pleasing assortment of textures and flavors.
Cultural Background
The pairing of chocolate and peanut butter is a beloved American classic with roots in early 20th-century confectionery. While milk or dark chocolate often dominates, white chocolate offers a lush, creamy counterpoint to roasted peanuts. Confections like these are modern interpretations of truffle-like candies and reflect a broader tradition of no-bake sweets that gained popularity for home entertaining and gifting in mid-century American kitchens.
Seasonal Adaptations
For winter holidays, add a pinch of cinnamon or orange zest to the peanut butter mixture for warmth and aromatic depth. In spring, stir in a few teaspoons of freeze-dried strawberry powder for a fruity accent. For summer gatherings, keep them chilled and consider a crushed pretzel or toasted coconut outer coating for a lighter, beachy texture. Small seasonal garnishes like edible gold flakes or red-hued sprinkles can transform these for special occasions.
Meal Prep Tips
Make the centers in advance and keep them frozen on a tray, then dip shortly before serving or gifting to minimize condensation. Portioning with a mini scoop and freezing on a sheet ensures consistent sizing and quick assembly. Pack in small batches (8 to 10 pieces per container) if you plan to distribute as gifts — this also reduces the chance of crushed toppings during transit.
These salted white chocolate peanut butter balls are a small, joyful bite that combines nostalgia, ease, and a balance of sweet and salty. They’re one of those recipes that invites personalization, whether through coating choices, toppings, or the way you present them to loved ones. I hope you make a batch and tuck a few away for a quiet moment of indulgence.
Pro Tips
Chill the centers on a baking sheet before dipping to prevent melting and ensure a neat coating.
Melt white chocolate slowly in short bursts and stir frequently to avoid scorching.
Use flaked sea salt rather than fine salt for the best textural contrast and visual appeal.
If the coating thickens while you dip, warm it gently in 10-second microwave bursts and stir to restore fluidity.
This nourishing salted white chocolate peanut butter balls recipe is sure to be a staple in your kitchen. Enjoy every moist, high protein slice — it is perfect for breakfast or as a wholesome snack any time.
FAQs about Recipes
How long do these keep?
Yes. Store in an airtight container in the refrigerator for up to one week or freeze for up to three months.
What’s the best way to get clean, even coatings?
Use a mini cookie scoop for uniform size and chill the centers to prevent melting when dipping.
Tags
Salted White Chocolate Peanut Butter Balls
This Salted White Chocolate Peanut Butter Balls recipe makes perfectly juicy, tender, and flavorful steak every time! Serve with potatoes and a side salad for an unforgettable dinner in under 30 minutes.
Instructions
Mix the center ingredients
In a mixing bowl, beat together 3/4 cup creamy no-stir peanut butter, 1/2 cup cane sugar, 1/8 teaspoon salt, 1/4 cup coconut flour, and 2 tablespoons powdered sugar until combined and thick.
Portion and chill
Scoop the batter into 10 to 12 even portions using a mini cookie scoop or your hands, roll into balls, and place on a baking sheet lined with wax paper. Freeze for 20 minutes to firm.
Melt the coating
Melt 2 cups white chocolate baking chips in a microwave-safe bowl in 20 to 30 second intervals, stirring until smooth and fluid but not overheated.
Dip and top
Dip each chilled ball into the melted white chocolate, tap off excess, transfer to the lined sheet, and immediately sprinkle with flaked sea salt while coating is wet.
Set and drizzle
Refrigerate for 15 minutes to set. Warm remaining chocolate, transfer to a small zipper bag, snip a tiny corner, and drizzle over tops. Chill until fully hardened.
Last Step: Please leave a rating and comment letting us know how you liked this recipe! This helps our business to thrive and continue providing free, high-quality recipes for you.
Nutrition
Did You Make This?
Leave a comment & rating below or tag
@savoryte on social media!
Categories:
You might also like...

Tilapia with Lemon Butter
Flaky pan-seared tilapia topped with a velvety lemon butter sauce. Quick to cook, bright with citrus, and weeknight-easy yet dinner-party special.

Healthy Egg Muffin Cups
Start your morning with veggie-loaded, protein-packed egg muffins at just 50 calories each. Perfect for make-ahead breakfasts, freezer-friendly, and easy to customize.

TikTok Breakfast Tortilla Fold
Crispy, cheesy, and ready in minutes, this viral tortilla fold layers bacon, egg, avocado, and melty cheese into a perfectly portable triangle.
Did You Make This?
Leave a comment & rating below or tag @savoryte on social media!
Rate This Recipe
Share This Recipe
Enjoyed this recipe? Share it with friends and family, and don't forget to leave a review!
Comments (1)
This recipe looks amazing! Can't wait to try it.
Comments are stored locally in your browser. Server comments are displayed alongside your local comments.

Hi, I'm Sophia!
What's Popular

30-Minute Meals!
Join to receive our email series which contains a round-up of some of our quick and easy family favorite recipes.