
No Bake Muddy Buddy Protein Cookies

Six-ingredient, no-bake cookie bites that take under five minutes to make — each one packs about 6 grams of protein and a nostalgic Muddy Buddy crunch.
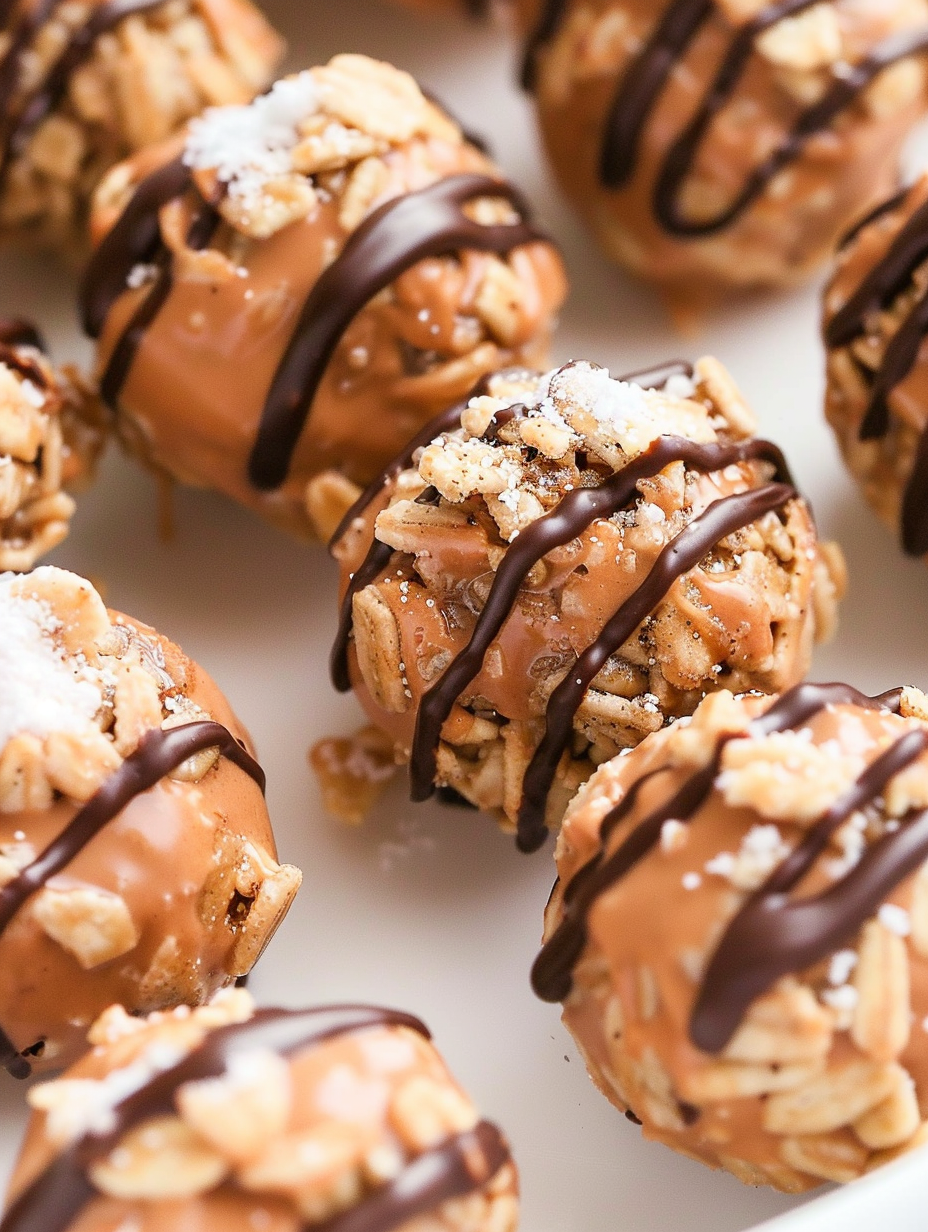
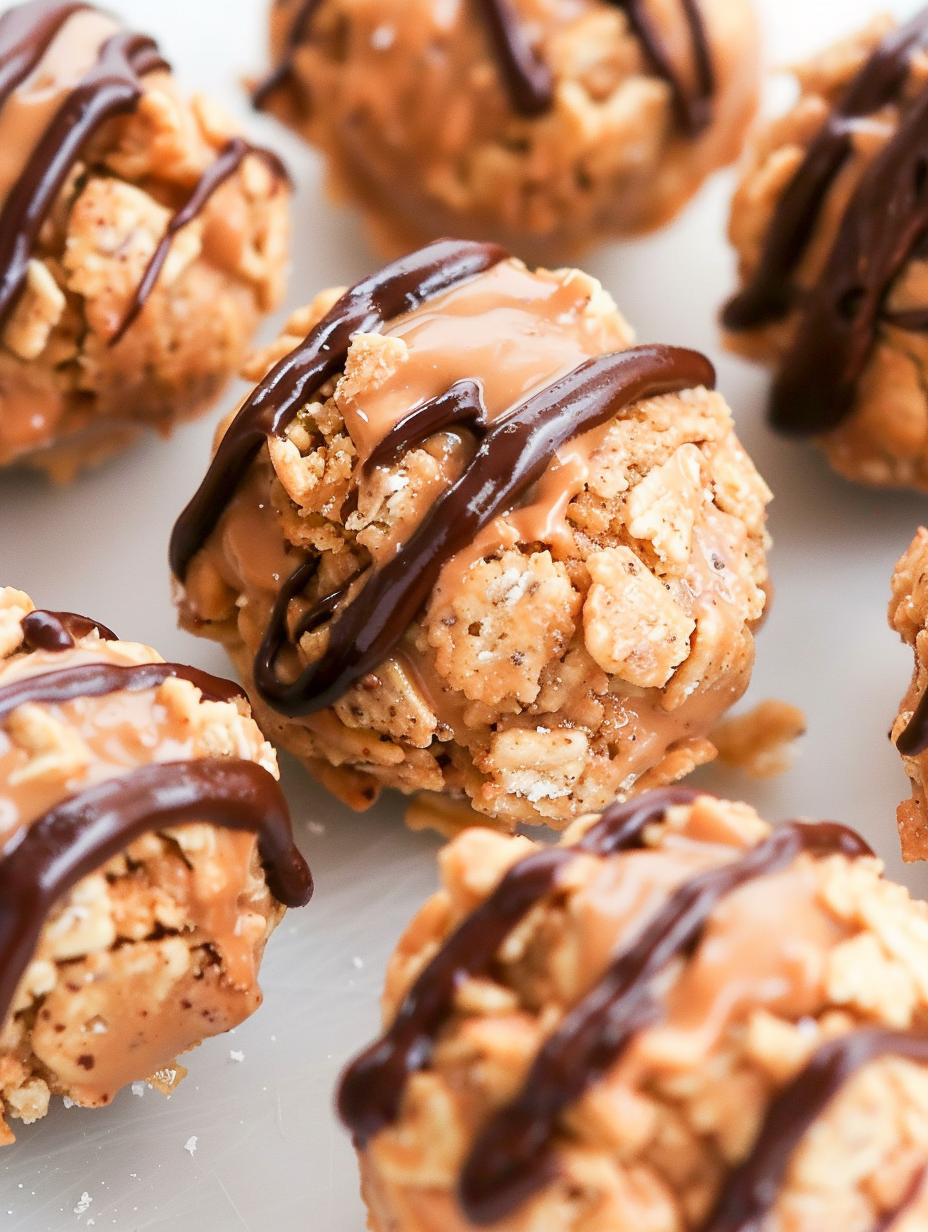
This batch of No Bake Muddy Buddy Protein Cookies started as a quick pantry rescue and became a favorite for after-school snacks, gym-day fuel, and last-minute dessert needs. I first made them on a hectic Saturday when I had a jar of peanut butter, a box of Rice Chex, and a scoop of vanilla protein powder on the counter. The mix of sweet vanilla, creamy peanut butter, and that familiar cereal crunch felt like a grown-up version of a childhood treat. What makes these special is the texture contrast — crisp cereal broken into small pieces, a tender peanut butter-protein binder, and a glossy chocolate drizzle that sets quickly. They’re small enough to eat two or three, but satisfying enough that one cookie often hits the spot.
I discovered the recipe while experimenting with ways to stretch protein powder into snacks the whole family would accept. These cookies are ready in under five minutes of active time, require just six ingredients, and don’t need an oven. That combination has saved many busy mornings when a portable breakfast or a protein-packed snack was the only way anyone made it out the door. They travel well, are fridge-friendly, and are easy to scale when friends drop by. The powdered-sugar finish is optional but adds a touch of nostalgia and a pretty presentation when giving them away in a small box.
Why You'll Love This Recipe
- Fast and reliable: made from six pantry ingredients and assembled in about five minutes — perfect for mornings when time is tight.
- High-protein snack: each cookie contains roughly 6 grams of protein, making them satisfying after workouts or as an afternoon pick-me-up.
- No oven required: the entire process is stovetop- and microwave-safe only, so they’re great in dorm rooms, offices, or small kitchens.
- Kid-friendly and portable: small, hand-held bites that fit into lunchboxes or snack bags without making a mess.
- Flexible and forgiving: easy ingredient swaps for allergies or dietary preferences, and simple to scale for larger batches.
- Minimal cleanup: one bowl to mix, one bowl to melt chocolate, and a tray or plate to set — no baking sheets involved.
Personally, these became my go-to when I needed something that felt like a treat but still supported my protein goals. My nieces loved helping me press the cereal into balls, and the adult friends kept asking for the recipe because they couldn’t believe how much flavor comes from so few ingredients. I’ve mastered tiny variations — a bit less honey when serving with yogurt, or a touch more protein powder for a firmer bite — and each time they still deliver the comforting Muddy Buddy vibe.
Ingredients
- Rice Chex cereal (1 1/2 cups): Use plain Rice Chex for a neutral, crispy base — it keeps the bites light. If you prefer gluten-free labeling, choose Rice Chex explicitly marked gluten-free. The cereal provides the Muddy Buddy crunch we love.
- Peanut butter (1/2 cup): Creamy, natural-style peanut butter works best because it blends smoothly with the powder. If your peanut butter is very oily, give it a quick stir first. Brands like Smucker's Natural or Santa Cruz Organic give consistent results.
- Vanilla protein powder (1/4 cup): A scoop of vanilla whey or plant-based protein adds flavor and structure. Use a finely milled powder so the mixture stays cohesive; plant-based blends may yield a slightly denser texture.
- Honey (1 tablespoon): Adds sweetness and helps bind the mixture. Swap for maple syrup if you need a vegan option (note the flavor shift).
- Vanilla extract (1/2 teaspoon): A small amount amplifies the sweetness and rounds the flavor. Use pure vanilla for the cleanest taste.
- Semi-sweet chocolate chips (1/4 cup): Melted to create a drizzle that sets on top. Choose a good-quality brand like Ghirardelli or Callebaut if you want a glossy finish; use dairy-free chips for a vegan variation.
- Powdered sugar (for garnish): Optional dusting that gives the classic Muddy Buddy look and a slight contrast to the chocolate drizzle.
Instructions
Mix the binder: In a medium bowl combine the peanut butter, vanilla protein powder, honey, and vanilla extract. Stir until completely smooth and uniform. If your peanut butter is thick, warm it for 10–15 seconds in the microwave to make mixing easier. The goal is a spreadable paste that will coat and lightly bind the cereal. Add and break the cereal: Pour the 1 1/2 cups Rice Chex into the bowl. Use a large spoon to press and partially smash the cereal pieces so most are broken into smaller fragments — this helps the bites hold together without becoming heavy. Aim for a mix of fine crumbs and small crunchy bits; too much crushing removes the signature texture. Form the cookies: Use a tablespoon cookie scoop to portion out the mixture. Roll each scoop between your palms to form a compact ball. If the mixture is too sticky, chill it for 5 minutes or dampen your hands slightly. Arrange the balls on a parchment-lined plate while you prepare the chocolate. Melt the chocolate: Place the 1/4 cup semi-sweet chocolate chips in a microwave-safe bowl. Microwave for 45 seconds, stir, then microwave for an additional 30 seconds. If needed, heat in 15-second bursts until fully melted, stirring between each burst. Smooth chocolate will give the best drizzle that sets quickly at room temperature. Drizzle and finish: Transfer the melted chocolate to a small zip-top bag and snip a tiny corner. Drizzle chocolate over each ball, then dust with a light sprinkle of powdered sugar if desired. Eat immediately for a softer center, or refrigerate for 10–15 minutes for a firmer texture. Store as directed below.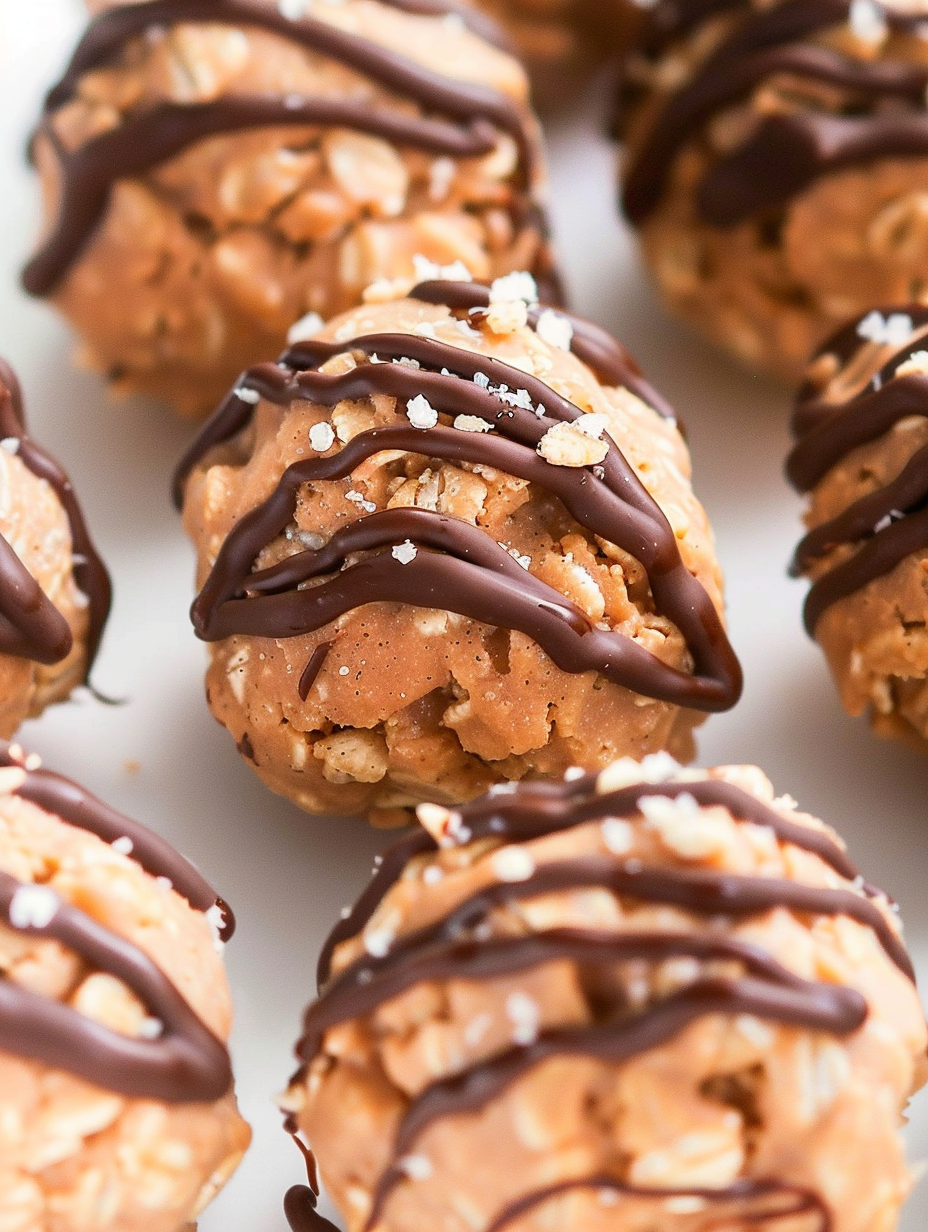
You Must Know
- Nutrition snapshot: about 149 calories and roughly 6 grams of protein per cookie — a compact, energy-dense snack.
- Storage: keep refrigerated for up to 7 days or at room temperature for 2–3 days in an airtight container.
- Freezing: these freeze well for up to 3 months; thaw on the counter for 10–20 minutes before eating.
- Texture tip: refrigerate briefly if you want a firmer bite; serve right away if you prefer a softer center.
My favorite part is how quickly they come together on busy days — a spoon, a bowl, and a microwave are often all I need. Friends who come by for morning workouts always leave with a small bag of these; they travel well and keep energy levels steady. I also love slipping them into a lunchbox alongside fruit for a balanced snack that feels a little indulgent without being overly sugary.
Storage Tips
Store the cookie bites in an airtight container. At room temperature they will stay fresh for 2–3 days; in the refrigerator they remain good for up to 7 days with the chocolate drizzle kept from sweating. For longer storage, arrange the bites in a single layer on a tray, freeze until solid, then transfer to a freezer bag for up to 3 months. When reheating from frozen, let them sit at room temperature for 10–15 minutes or microwave for 10–12 seconds if you want a softer texture — avoid overheating which will make the peanut butter oily.
Ingredient Substitutions
To make these dairy-free, choose dairy-free chocolate chips and a plant-based protein powder. Swap peanut butter for almond butter or sunflower seed butter to avoid tree-nut or peanut allergies — sunflower seed butter is a reliable peanut alternative with similar spreadability. If you prefer less sweetness, reduce the honey to 2 teaspoons and add a pinch of salt to balance flavors. For a higher-protein version, increase the protein powder to 1/3 cup and add a tablespoon of oat flour to maintain texture.
Serving Suggestions
Serve these bites on a small platter with fresh berries and a dollop of Greek yogurt for breakfast-style portions, or pair with a simple smoothie as a post-workout snack. They work well on dessert boards alongside pretzels, dried fruit, and nuts at casual gatherings. Garnish with flaky sea salt on top of the chocolate drizzle for a sweet-salty contrast, or dust with extra powdered sugar for a festive look when gifting.
Cultural Background
These treats are inspired by the classic Muddy Buddies (also called Puppy Chow) — a nostalgic snack of cereal coated in chocolate, peanut butter, and dusted with powdered sugar. That recipe rose to popularity for potlucks and holiday parties because it’s simple, shareable, and adaptable. Turning the concept into a protein-forward, no-bake cookie borrows the comforting flavor profile while aligning with modern preferences for nutrient-dense snacks suitable for active lifestyles.
Seasonal Adaptations
In winter, add a pinch of cinnamon and swap the powdered sugar for a light snow-dusting of cocoa for a cozy twist. For summer, fold in freeze-dried strawberries or add shredded coconut for a tropical note. At holiday time, use peppermint extract and top with crushed candy canes for festive red-and-white accents. Each adaptation shifts the flavor profile while keeping the basic method intact.
Meal Prep Tips
Make a double batch and portion the bites into small containers for grab-and-go snacks throughout the week. Use silicone muffin liners to separate layers in a storage container and avoid sticking. If you plan to pack them for the day, place them in an insulated bag with a small ice pack to keep the chocolate from softening in warm weather. For predictable results, weigh or level your tablespoon scoop so each bite has consistent nutrition and portion control.
These little bites are proof that convenience doesn’t have to sacrifice flavor. Whether you’re packing lunches, fueling workouts, or satisfying a late-night sweet tooth, they bring a lot of joy with minimal fuss. Try the variations and make them yours — they’ve been a staple in our kitchen for the simplicity and the smiles they create.
Pro Tips
If the mixture is sticky, chill it for 5–10 minutes to firm up before rolling.
Use a tablespoon cookie scoop for uniform size and nutrition consistency.
Warm very thick peanut butter for 10–15 seconds to make mixing easier.
This nourishing no bake muddy buddy protein cookies recipe is sure to be a staple in your kitchen. Enjoy every moist, high protein slice — it is perfect for breakfast or as a wholesome snack any time.
Tags
No Bake Muddy Buddy Protein Cookies
This No Bake Muddy Buddy Protein Cookies recipe makes perfectly juicy, tender, and flavorful steak every time! Serve with potatoes and a side salad for an unforgettable dinner in under 30 minutes.
Ingredients
Main
Instructions
Combine binder ingredients
In a medium bowl, mix the peanut butter, vanilla protein powder, honey, and vanilla extract until smooth. If peanut butter is very thick, warm briefly to ease mixing.
Add and break cereal
Stir in the Rice Chex and use a spoon to smash most pieces so the mixture holds together while retaining some crunch.
Portion and roll
Scoop tablespoonfuls with a cookie scoop and roll between palms to form balls. If sticky, chill the mixture briefly.
Melt chocolate
Place chocolate chips in a microwave-safe bowl and microwave in 45-second bursts, stirring until smooth. Use additional 15-second bursts if necessary.
Drizzle and finish
Transfer melted chocolate to a zip-top bag, snip a small corner, and drizzle over each ball. Dust with powdered sugar if desired. Serve immediately or chill to firm up.
Last Step: Please leave a rating and comment letting us know how you liked this recipe! This helps our business to thrive and continue providing free, high-quality recipes for you.
Nutrition
Did You Make This?
Leave a comment & rating below or tag
@savoryte on social media!
Categories:
You might also like...

Tilapia with Lemon Butter
Flaky pan-seared tilapia topped with a velvety lemon butter sauce. Quick to cook, bright with citrus, and weeknight-easy yet dinner-party special.

Healthy Egg Muffin Cups
Start your morning with veggie-loaded, protein-packed egg muffins at just 50 calories each. Perfect for make-ahead breakfasts, freezer-friendly, and easy to customize.

TikTok Breakfast Tortilla Fold
Crispy, cheesy, and ready in minutes, this viral tortilla fold layers bacon, egg, avocado, and melty cheese into a perfectly portable triangle.
Did You Make This?
Leave a comment & rating below or tag @savoryte on social media!
Rate This Recipe
Share This Recipe
Enjoyed this recipe? Share it with friends and family, and don't forget to leave a review!
Comments (1)
This recipe looks amazing! Can't wait to try it.
Comments are stored locally in your browser. Server comments are displayed alongside your local comments.

Hi, I'm Sophia!
What's Popular

30-Minute Meals!
Join to receive our email series which contains a round-up of some of our quick and easy family favorite recipes.