
>>

Layered no-bake cherry cheesecake parfaits that are creamy, tangy, and holiday-ready — simple to prepare and perfect for entertaining.
This no-bake cherry cheesecake parfait is one of those small delights that quickly became a holiday favorite in my kitchen. I first made these during a holiday potluck when I wanted something that tasted indulgent but required minimal oven time. The idea was to capture the classic cheesecake flavors but present them in pretty individual portions that travel well and look festive. The result was a creamy, tangy filling layered over crisp graham cracker crumbs and finished with a bright cherry topping. Everyone asked for the recipe and they have become my go-to dessert for gatherings and weeknight treats alike.
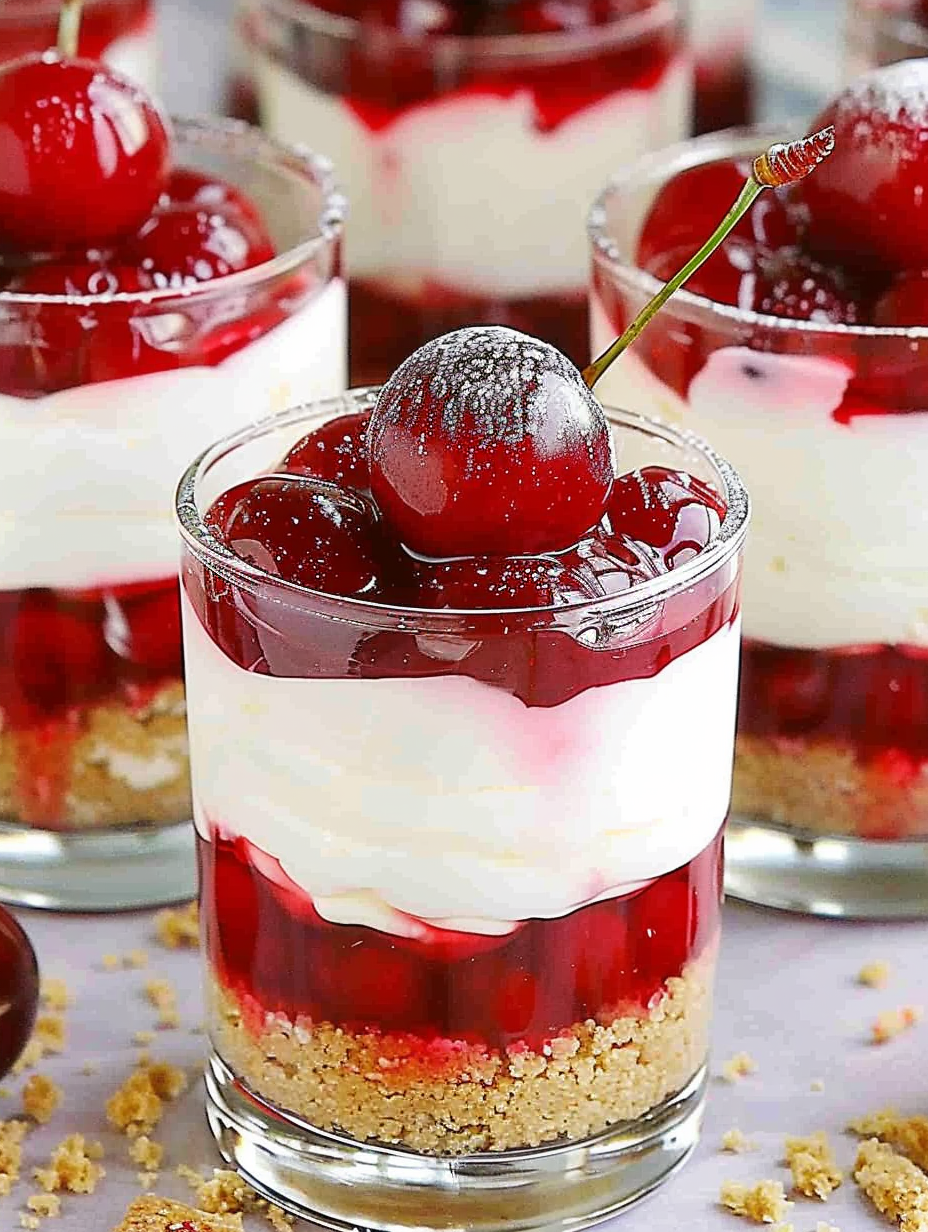
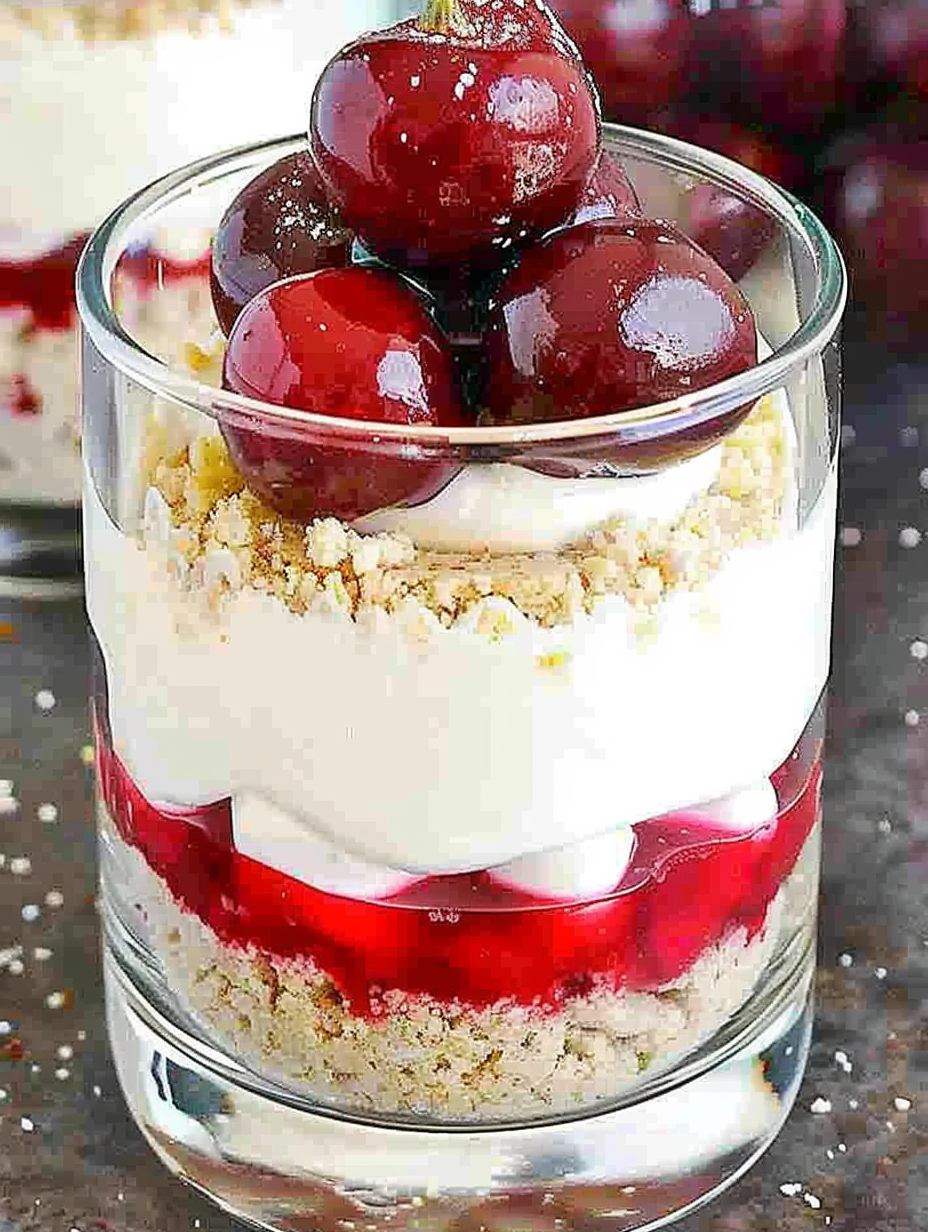
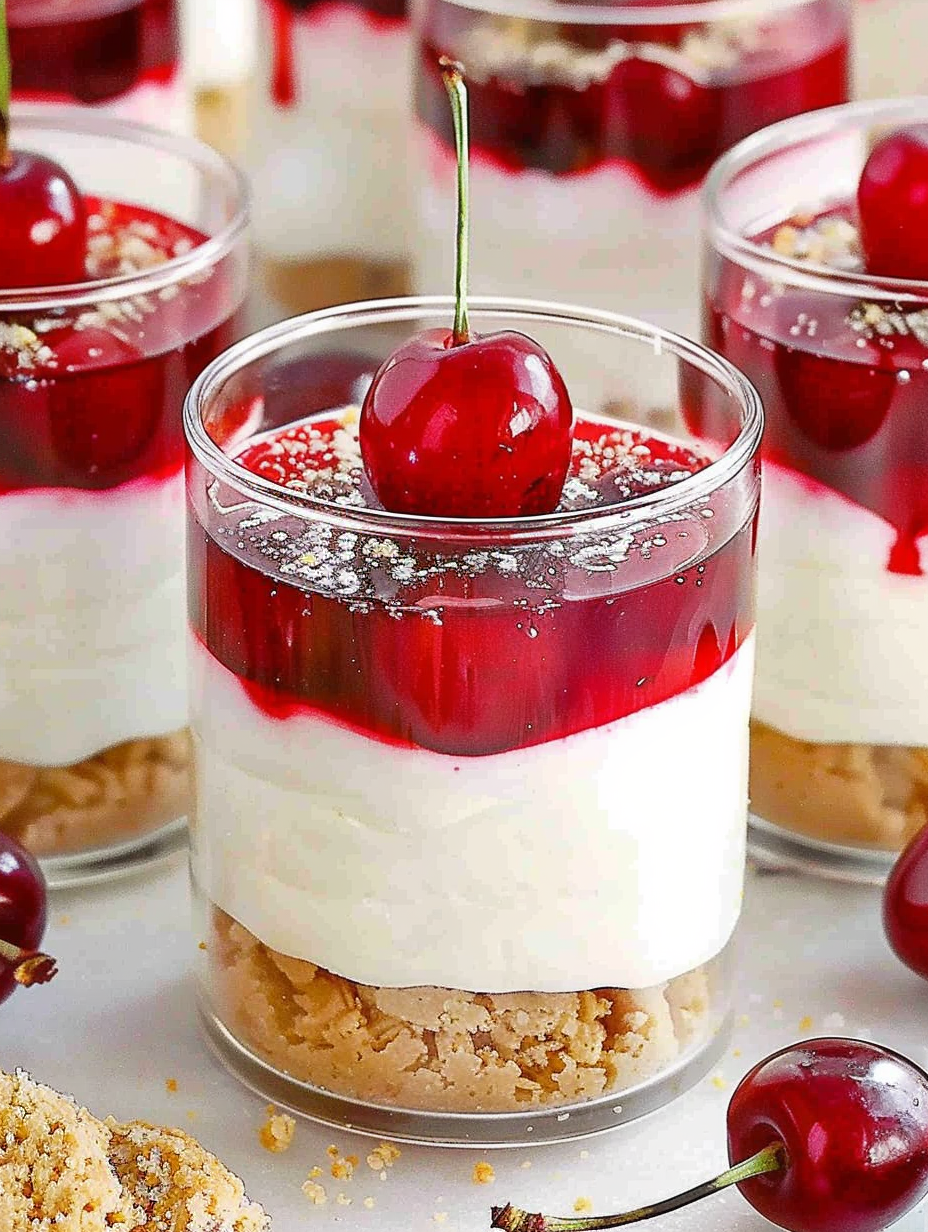
What makes these parfaits special is the balance between the silky cream cheese filling and the sweet-tart cherry pie topping. The texture plays a big role: crisp crumbs at the bottom, a cloudlike cheesecake layer, and glossy cherry topping that adds both color and a pop of acidity. I like to garnish each cup with a single canned cherry with a stem for a picture-perfect finish. They are straightforward to make, require no baking, and can be assembled ahead of time which is a real lifesaver when hosting. Whether you are making a dozen for a family dinner or preparing them as little gifts, these parfaits are reliable, impressive, and undeniably delicious.
I remember the first time I served these at a New Year gathering; the little cups disappeared before the fireworks. My mom told me they reminded her of a cherry cheesecake she loved when she was a child. That kind of reaction is why I keep this recipe in my entertaining rotation. It is forgiving, elegant, and much easier to scale than a whole baked cheesecake.
One of my favorite aspects is how quickly the texture develops — after four hours the filling achieves a cream-cheese mousse quality that is airy but holds its shape. Guests always comment on the glossy cherry top and the neat presentation. These cups are especially handy when you want to prep desserts ahead, freeing you to enjoy the party instead of fussing in the kitchen.
Store assembled cups in the refrigerator, covered, for up to three days. Use an airtight container or line a baking sheet and cover cups loosely with plastic wrap to avoid condensation. For longer storage, freeze assembled cups on a tray until solid, then transfer to a freezer-safe container and freeze for up to three months. Thaw overnight in the refrigerator. When reheating or refreshing, let chilled parfaits sit at room temperature for 10 to 15 minutes before serving to soften the filling slightly for the best texture.
If you need to alter ingredients, you can replace cherry pie filling with fresh macerated cherries or a berry compote; use a 3:1 ratio of fresh fruit to sugar, simmer briefly to thicken. For a gluten-free option substitute gluten-free graham-style crackers or crushed gluten-free shortbread. To make dairy-free parfaits, use a stabilized vegan cream and dairy-free cream cheese and check canned fillings for gelatin or dairy additives. Note that substitutions change texture and stability, so expect a slightly different mouthfeel.
Serve these cups on a tray with small spoons for easy passing at parties. Pair with espresso or a sweet dessert wine like Moscato for a classic combination. Garnish options include a light dusting of finely grated dark chocolate, a mint leaf for color contrast, or a sliver of toasted almond for crunch. For holiday presentation, arrange cups on a platter lined with seasonal greenery and scatter extra cherries for color.
In summer swap cherry topping for macerated peaches or a mixed berry compote to take advantage of ripe fruit. In autumn layer in a spiced apple compote with cinnamon and nutmeg, and add a pinch of allspice to the crumb base. For winter holidays, consider a cranberry-orange topping with a little orange zest folded into the filling for brightness. Small changes to the topping are the easiest way to adapt this dessert for different seasons while keeping the same reliable base.
This is an excellent make-ahead dessert. Prepare crumbs and filling the day before and refrigerate separately. On the day of serving, assemble and top with cherry filling, then chill for the required four hours. Use labeled containers when freezing to track dates and avoid freezer burn. When transporting to a potluck, place cups in a shallow box lined with a towel and keep chilled with ice packs until serving time.
These parfaits feel like a small celebration in a cup and are perfect for sharing. Try them once and you will have an easy, reliable dessert for holidays and casual dinners alike. Enjoy making them your own with seasonal toppings and garnishes.
Bring cream cheese to room temperature before beating to avoid lumps and ensure silky texture.
Chill the mixing bowl and beaters for the whipped cream to reach soft peaks faster and with better stability.
Fold whipped cream into the cream cheese in three additions to retain air and achieve a light mousse-like filling.
Use a pastry bag for neat, consistent portions; a plastic bag with the corner snipped works in a pinch.
Taste for sweetness after combining cream cheese and sugar; adjust if your cherry topping is very sweet.
This nourishing no-bake cherry cheesecake parfaits (easy to make) recipe is sure to be a staple in your kitchen. Enjoy every moist, high protein slice — it is perfect for breakfast or as a wholesome snack any time.
Chill at least 4 hours, overnight yields the best set and texture.
Yes, freeze assembled cups on a tray until solid then transfer to a freezer-safe container for up to 3 months. Thaw overnight in the refrigerator.
Use 2 tablespoons of graham cracker crumbs per cup for a crisp base; adjust slightly if you prefer a thicker crust layer.
This No-Bake Cherry Cheesecake Parfaits (Easy to Make) recipe makes perfectly juicy, tender, and flavorful steak every time! Serve with potatoes and a side salad for an unforgettable dinner in under 30 minutes.
Crush 6 graham crackers in a food processor until fine crumbs form. If you lack a processor, place crackers in a resealable bag and crush with a rolling pin. Reserve about 2 tablespoons per cup for the base.
Beat 8 ounces softened cream cheese with 1/4 cup sugar on high speed until smooth and sugar dissolves. Scrape the bowl sides to remove any lumps and ensure an even texture.
Whip 2 cups heavy whipping cream in a chilled bowl until soft peaks form. Be careful not to overbeat; the cream should be silky and hold shape gently.
Fold the whipped cream into the sweetened cream cheese in three additions using broad strokes to retain air and create a light, mousse-like filling.
Place 2 tablespoons of graham cracker crumbs into each cup, pipe or spoon the cream filling until cups are 3/4 full, then top with cherry pie filling and garnish with a canned cherry. Chill at least 4 hours before serving.
Last Step: Please leave a rating and comment letting us know how you liked this recipe! This helps our business to thrive and continue providing free, high-quality recipes for you.
Leave a comment & rating below or tag
@savoryte on social media!

Flaky pan-seared tilapia topped with a velvety lemon butter sauce. Quick to cook, bright with citrus, and weeknight-easy yet dinner-party special.

Start your morning with veggie-loaded, protein-packed egg muffins at just 50 calories each. Perfect for make-ahead breakfasts, freezer-friendly, and easy to customize.

Crispy, cheesy, and ready in minutes, this viral tortilla fold layers bacon, egg, avocado, and melty cheese into a perfectly portable triangle.
Leave a comment & rating below or tag @savoryte on social media!
Enjoyed this recipe? Share it with friends and family, and don't forget to leave a review!
This recipe looks amazing! Can't wait to try it.
Comments are stored locally in your browser. Server comments are displayed alongside your local comments.

Join to receive our email series which contains a round-up of some of our quick and easy family favorite recipes.
