
>>

A nostalgic, egg-free chocolate cake baked over glossy cherry pie filling—rich, simple, and perfect for sharing. Mom taught me this straightforward dessert and it still delights every time.
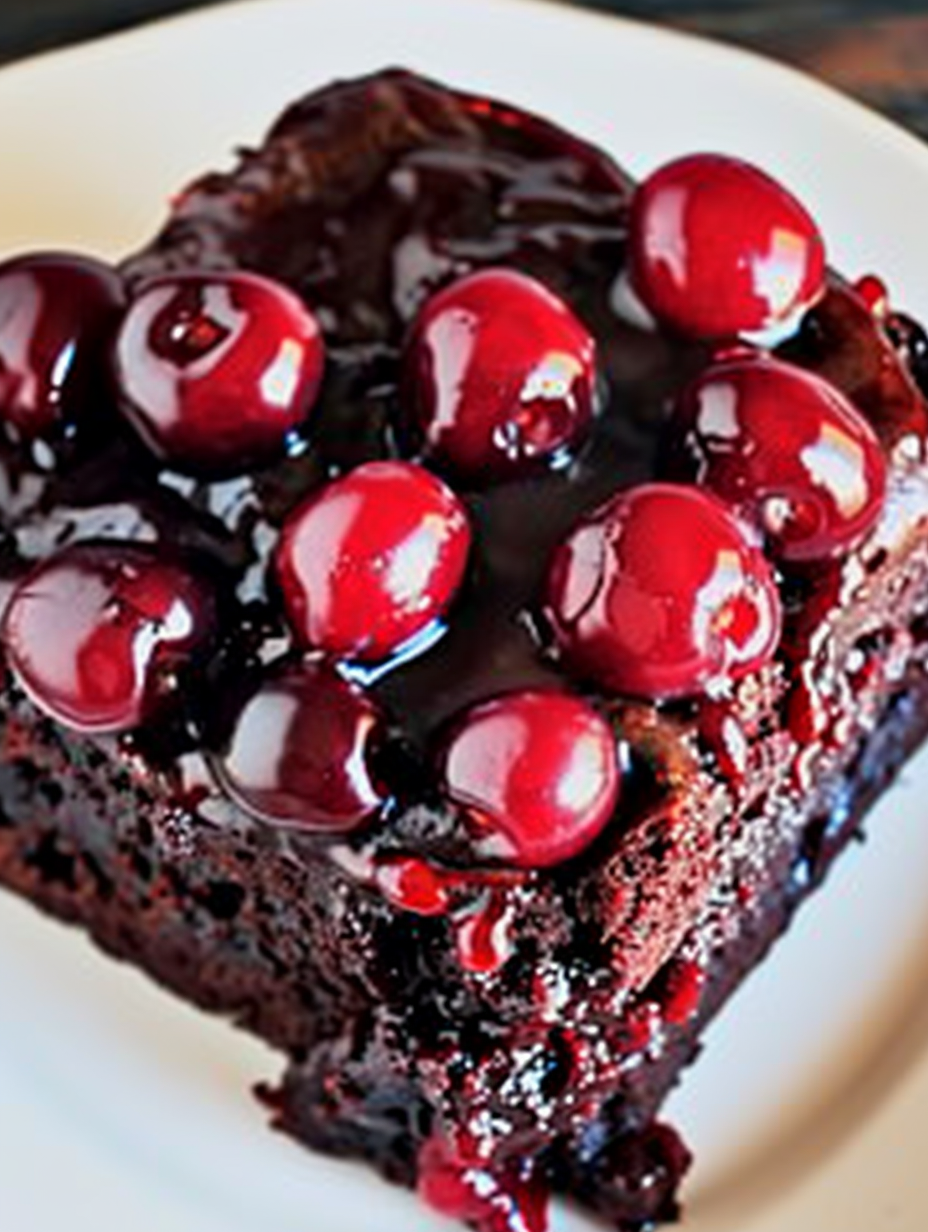
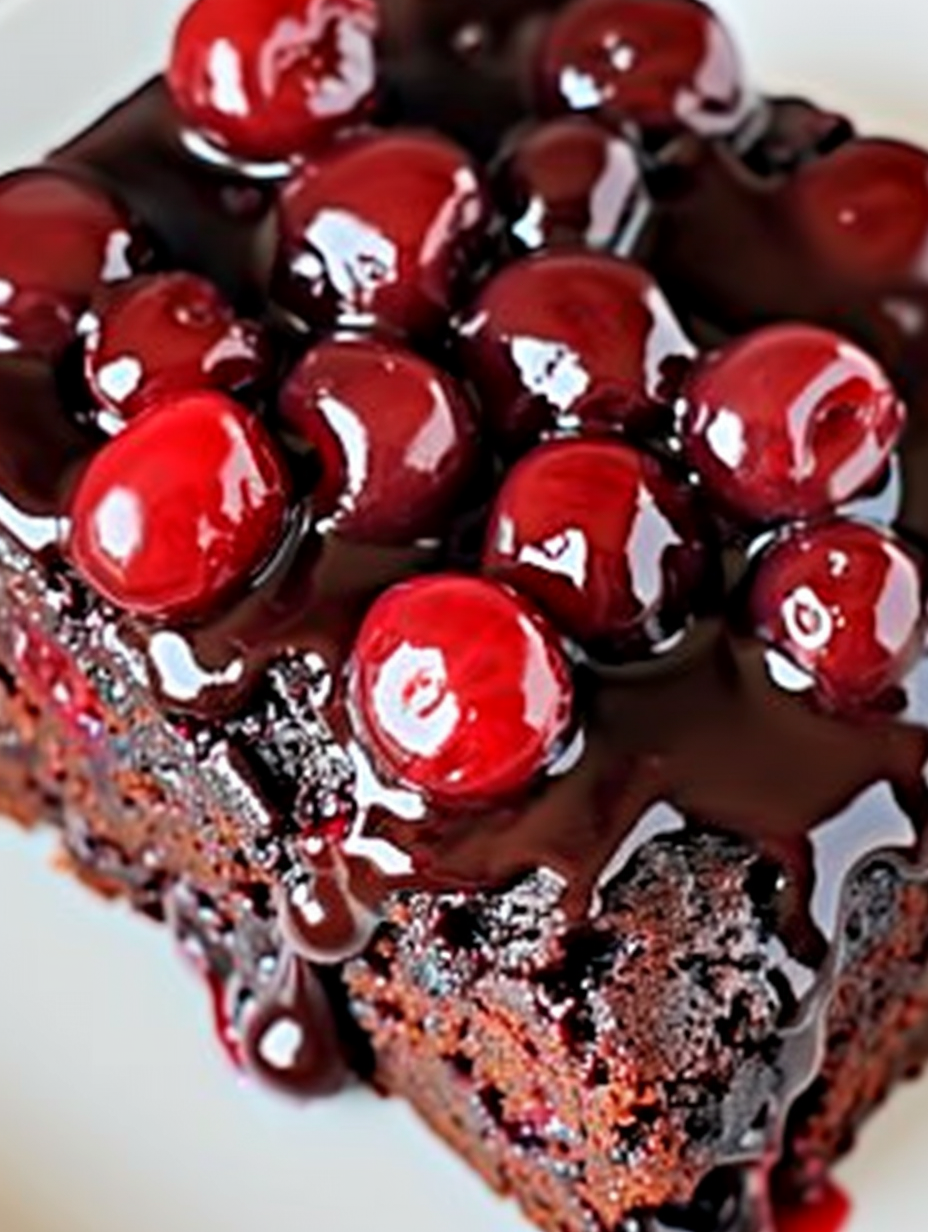
I remember my mother moving the cherries around with the back of a spoon until they lined up in a pleasing pattern at the bottom of the pan. That small ritual became part of the charm. Guests always smile when the pan is flipped and the cherries glisten in the light. It’s one of those simple recipes that invites people to gather close to the oven while it cools and to share stories while slicing generous pieces.
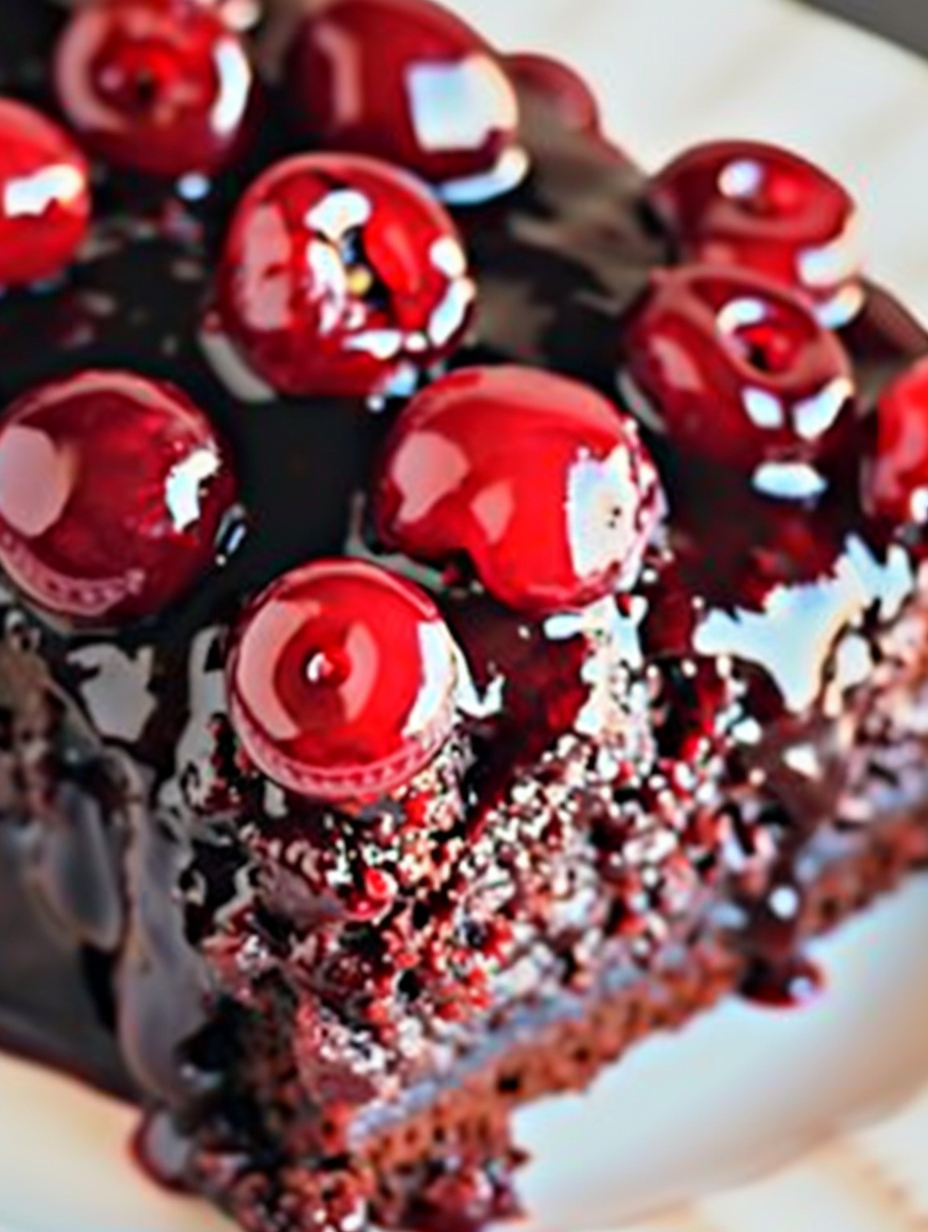
My favorite aspect is the reveal. When the pan flips and the cherries gleam, there’s always a tiny gasp from the kitchen. It reminds me of the small rituals that make food comforting: arranging cherries with care, the scent of cocoa baking, and everyone gathering for the first warm slice. That simple moment of serving has become as meaningful as the taste itself.
For short-term keeping, cover the cake tightly with plastic wrap or a lid and store at room temperature away from direct sunlight for up to two days. If you plan to keep it longer, refrigerate in an airtight container for up to five days; allow the cake to come back to room temperature for the best texture before serving. To freeze, wrap individual slices in plastic wrap and place them in a freezer bag; thaw overnight in the refrigerator and warm gently in a 300 degrees Fahrenheit oven for 10 to 12 minutes if you prefer it warm. Avoid leaving the dessert at room temperature for extended periods on warm days due to the fruit filling.
If you need a gluten-free version, substitute a 1-to-1 gluten-free flour blend designed for baking, but expect a slightly different crumb and faster browning. For a less sweet finish, use a reduced-sugar cherry filling or drain a tablespoon or two of syrup before spreading the cherries. Swap canola oil for melted coconut oil for a subtle coconut note, or use light olive oil for a fruitier aroma. If you need a vegan-certified sugar due to processing concerns, opt for organic cane sugar labeled vegan. For a bolder chocolate profile, replace one quarter cup of flour with an additional two tablespoons of cocoa and reduce water slightly to maintain batter consistency.
Serve slices warm with a scoop of vanilla ice cream or a spoonful of whipped coconut cream for a dairy-free option. A dusting of powdered sugar or a drizzle of warm dark chocolate sauce enhances the presentation. Pair with a strong coffee or a glass of milk for contrast. For a festive touch, garnish with fresh mint leaves and a few whole cherries. This dessert works well for potlucks—cut into squares and transport in a lined baking dish for easy serving.
Upside-down cakes have a long tradition in home baking, often built around fruit toppings like pineapple or apples. This chocolate-cherry version riffs on that classic technique, pairing rich cocoa with bright fruit. Cherries have been used in European desserts for centuries, and combining them with chocolate reflects a modern comfort-food adaptation that became popular in mid-20th-century home cooking. The technique of placing fruit beneath the batter ensures caramelization and dramatic presentation when inverted.
In summer, swap canned cherries for a layer of fresh pitted cherries tossed with a little sugar and cornstarch to thicken the juices, though you may need to reduce oven time slightly. For winter holidays, stir 1/4 teaspoon cinnamon into the batter and use cherry pie filling spiced with orange zest for a festive aroma. You can also top slices with toasted almonds or walnuts in autumn to add crunch and a nutty contrast.
This recipe is ideal for meal prep because it stores well and portions easily. Bake one pan for immediate serving and freeze another for later. Cut slices into individual portions, wrap them, and place them in single-serve containers for grab-and-go desserts. To reheat, microwave 20 to 30 seconds for a warm treat, or bake sealed slices at 300 degrees Fahrenheit for 10 minutes to refresh texture. Use shallow airtight containers to avoid crushing the glossy cherry top when stacking.
Whether you make it for weeknight comfort or a special occasion, this chocolate cherry upside-down cake is one of those recipes that invites sharing and conversation. I hope it brings you the same warm nostalgia and frequent requests for seconds that it always brings to my table.
Measure flour by spooning into the cup and leveling with a knife to avoid a dense cake.
Check baking soda freshness: a small test with vinegar should fizz; replace if inactive.
Allow the pan to cool for at least 10 minutes before inverting to avoid the topping running.
Use room-temperature water and ingredients for even mixing and consistent texture.
This nourishing mom's chocolate cherry upside-down cake recipe is sure to be a staple in your kitchen. Enjoy every moist, high protein slice — it is perfect for breakfast or as a wholesome snack any time.
This Mom's Chocolate Cherry Upside-Down Cake recipe makes perfectly juicy, tender, and flavorful steak every time! Serve with potatoes and a side salad for an unforgettable dinner in under 30 minutes.
Grease a 9x13-inch baking pan and spread the 21-ounce can of cherry pie filling evenly across the bottom, arranging cherries as desired for uniform coverage.
Whisk together 2 1/4 cups all-purpose flour, 1 1/2 cups granulated sugar, 3/4 cup cocoa, 1 1/2 teaspoons baking soda, and 3/4 teaspoon salt until evenly combined.
In a separate bowl whisk 1 1/2 cups water, 1/2 cup oil, 1/4 cup white vinegar, and 1 1/2 teaspoons vanilla until uniform.
Add the wet ingredients to the dry mixture all at once and stir until just combined; do not overmix to maintain a tender crumb.
Pour batter over the cherries in the pan, smooth the top, and bake at 350 degrees Fahrenheit for 35 to 40 minutes or until a wooden pick comes out clean.
Cool the pan for 10 to 15 minutes, run a knife around the edges, invert onto a serving platter, and adjust any cherries that may have stuck to the pan.
Last Step: Please leave a rating and comment letting us know how you liked this recipe! This helps our business to thrive and continue providing free, high-quality recipes for you.
Leave a comment & rating below or tag
@savoryte on social media!

Flaky pan-seared tilapia topped with a velvety lemon butter sauce. Quick to cook, bright with citrus, and weeknight-easy yet dinner-party special.

Start your morning with veggie-loaded, protein-packed egg muffins at just 50 calories each. Perfect for make-ahead breakfasts, freezer-friendly, and easy to customize.

Crispy, cheesy, and ready in minutes, this viral tortilla fold layers bacon, egg, avocado, and melty cheese into a perfectly portable triangle.
Leave a comment & rating below or tag @savoryte on social media!
Enjoyed this recipe? Share it with friends and family, and don't forget to leave a review!
This recipe looks amazing! Can't wait to try it.
Comments are stored locally in your browser. Server comments are displayed alongside your local comments.

Join to receive our email series which contains a round-up of some of our quick and easy family favorite recipes.
