
>>

Classic jelly thumbprint cookies studded with chopped peanuts and a sweet jam center — perfect for holiday cookie trays and kid-friendly baking sessions.
This batch of jelly thumbprint cookies has been my go-to whenever the cookie jar needs a cheerful refill. I first learned this variation the winter I wanted something festive that combined the salty crunch of peanuts with the bright sweetness of jam. The result felt like a grown-up peanut butter and jelly — buttery, tender dough, a delicate nutty crust, and a jewel-like center of jam that sets into a glossy, slightly chewy pocket as the cookies bake. They travel well, keep their shape, and always spark the same comment at family gatherings: "Who brought these? Save me one!"
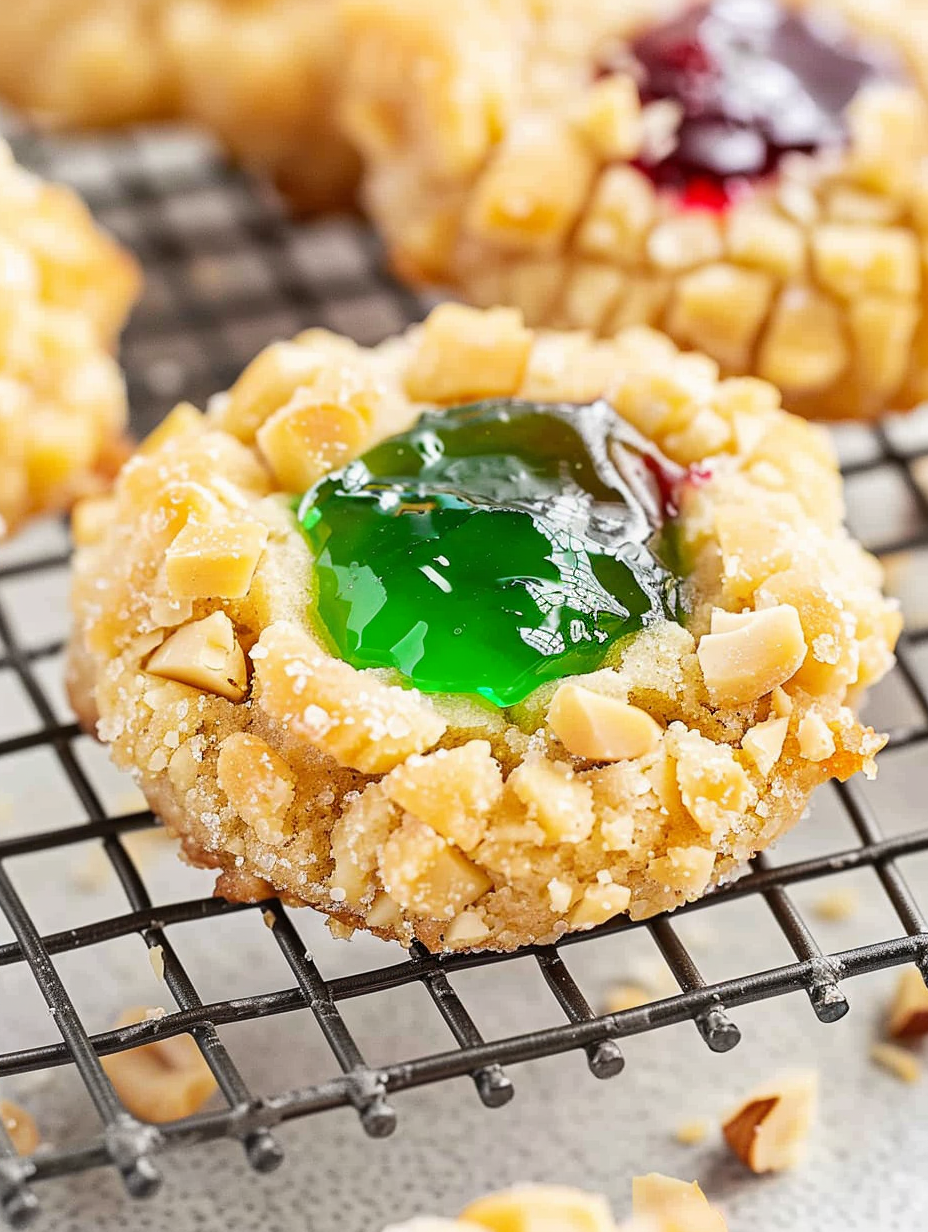
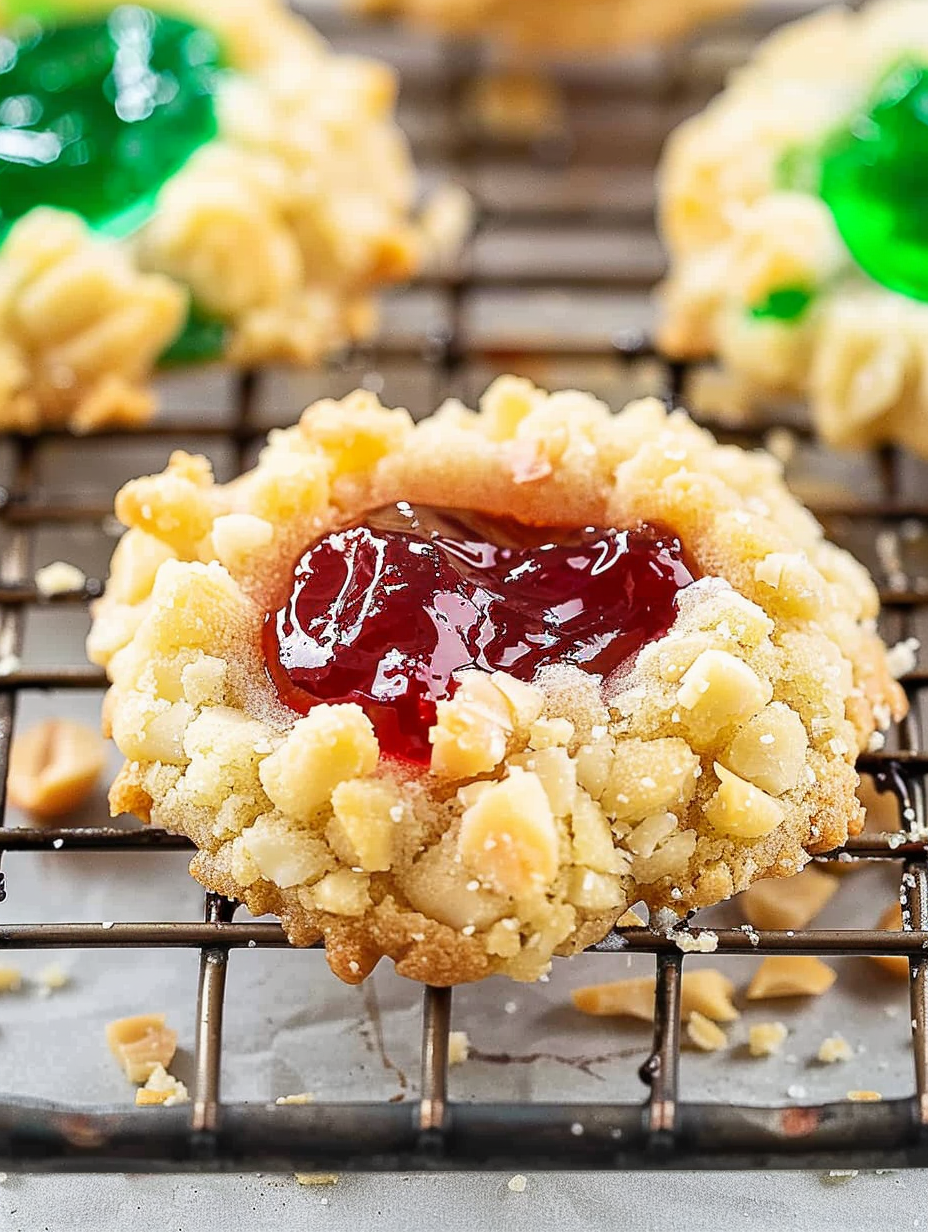
I discovered this combination while adapting a classic thumbprint to use pantry staples I already had. Peanuts add texture and a nutty flavor that cuts through the sweetness of the jam. The dough is rich but not heavy — thanks to a single egg yolk used in the dough — which lets the cookie stay soft around the edges while the nuts toast on the outside. These cookies are fun to make with kids because the thumbprinting step is hands-on and immediate, and little hands love spooning in the jam. I often make multiple colors of jam to give the tray a holiday look — ruby red strawberry alongside bright green apple jelly — and it always draws a smile.
From the first time I doubled this recipe for a holiday bake sale, I noticed how quickly they disappeared. Neighbors who usually prefer chocolate reached for a second cookie because the peanut crust gives a pleasant contrast to the jam. Over the years I've refined the size (one-inch dough balls are ideal) and the jam quantity (less is more — about one teaspoon per cookie), which prevents spillage and keeps the presentation tidy.
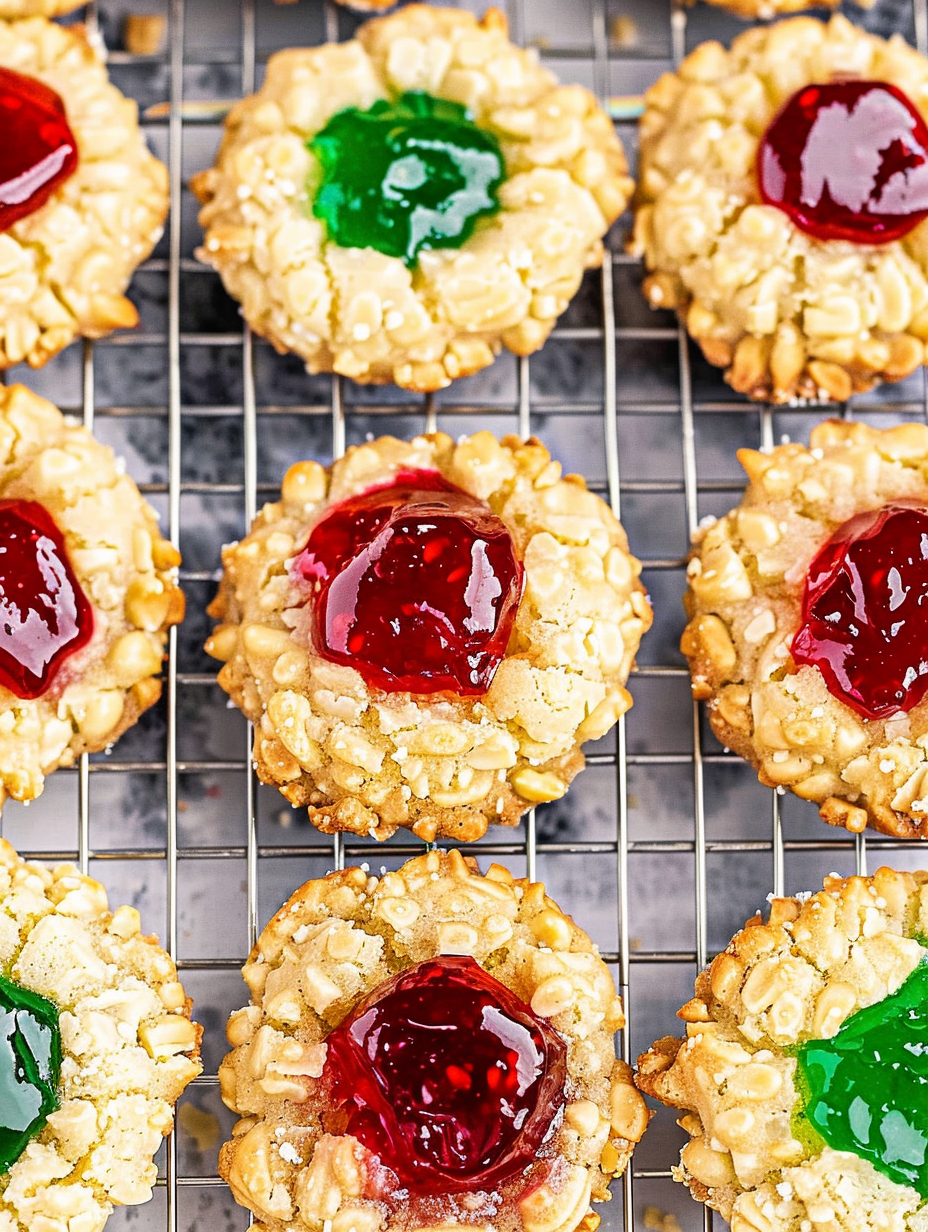
My favorite thing about this version is how the peanuts transform a classic thumbprint into something slightly savory and very moreish. The toast of the nuts balances the jam's sweetness, and every holiday season I pair two jam colors for a cheerful platter. These cookies are one of the few recipes where I encourage a little imperfection — uneven thumbprints and rustic nut coatings make for a charming homemade look.
Store completely cooled cookies in an airtight container layered with parchment to prevent sticking. At room temperature they stay fresh for up to five days; if you need longer, freeze in a single layer on a tray until firm, then transfer to a freezer-safe container with parchment between layers. Thaw at room temperature for 30 to 60 minutes before serving. For travel or gifting, place a sheet of wax paper between layers and include a small slip of tissue to absorb any moisture. Reheat briefly in a 300°F oven for 5 minutes if you prefer the jam slightly softened.
For a dairy-free option, substitute a stick of vegan butter (measured 1/2 cup) and check brands for similar water content. If someone in the group is allergic to peanuts, swap in chopped roasted almonds or pecans, keeping in mind the flavor shift — pecans add buttery richness while almonds bring a firmer crunch. To make a gluten-free version, replace the all-purpose flour with a 1:1 gluten-free baking blend and add a teaspoon of xanthan gum if your blend doesn't already contain it. Vanilla extract can replace almond extract if you prefer a less pronounced nutty aroma.
Serve these cookies on a festive platter with complementary flavors: salted caramel pecans, dark chocolate squares, or a simple dusting of powdered sugar for presentation. They pair beautifully with hot tea (Earl Grey or black tea) and coffee, and are a bright contrast to richer holiday treats like fudge. For a party, arrange cookies by jam color for an eye-catching display — alternate red and green to echo classic holiday tones. They also make a thoughtful addition to cookie exchange boxes because their nut exterior helps protect the jam center during transport.
Thumbprint-style cookies have deep roots in Northern European baking traditions, where small wells in dough were filled with fruit preserves or nut pastes. They became a holiday staple in both Scandinavian and Central European households and evolved regionally with local nuts and jams. In the United States, variations with peanut coatings emerged as peanuts became more widely available and popular in the 20th century, combining American peanut flavors with an old-world jam-filled technique. This version marries those two influences into a simple, celebratory cookie.
For winter holidays, use cranberry-orange or cherry jam and decorate the rim with finely chopped pistachios for a festive red-and-green look. Spring or summer gatherings benefit from light, floral jams such as apricot or raspberry. For a fall twist, swap almond extract for a pinch of ground cinnamon and fill centers with apple butter or pumpkin butter. Small changes in jam flavor and nut type let you adapt this template to any season while keeping the same beloved technique.
To prepare ahead, make the dough and roll into balls, then freeze the unbaked coated balls on a tray until firm. Transfer to a freezer bag and bake from frozen, adding 1 to 2 minutes to the baking time. Alternatively, bake the cookies fully and freeze the cooled cookies in layers separated by parchment; thaw at room temperature when needed. For large batches, line multiple baking sheets and rotate them through the oven for efficient baking. Keep measuring tools and toppings prepped in small bowls to streamline assembly if you're making multiple flavors of jam.
These cookies are a wonderful blend of texture and nostalgia: a crisp, nutty exterior, a tender buttery base, and a jewel-like jam center. Whether you bake them for a holiday tray, a school party, or a quiet afternoon treat, they bring a comforting, homemade touch to any table. Give them a try and tweak the jam and nut choices to make them your own — this template is forgiving and endlessly adaptable.
Use room-temperature butter so the sugar dissolves properly and the dough mixes smoothly.
Measure flour by spooning into the cup and leveling to avoid dense cookies.
Chill dough briefly if it becomes too soft to shape, about 10 minutes in the refrigerator.
Rotate baking sheets halfway through to ensure even browning of the peanut coating.
This nourishing jelly thumbprint cookies recipe is sure to be a staple in your kitchen. Enjoy every moist, high protein slice — it is perfect for breakfast or as a wholesome snack any time.
Yes — you can freeze baked cookies for up to 3 months in an airtight container; thaw at room temperature before serving.
Use about 1 teaspoon of jam per cookie; too much jam will overflow and may burn during baking.
This Jelly Thumbprint Cookies recipe makes perfectly juicy, tender, and flavorful steak every time! Serve with potatoes and a side salad for an unforgettable dinner in under 30 minutes.
Cream the softened butter and brown sugar until light. Beat in the egg yolk and almond extract. Add flour and salt and mix until combined. Chill briefly if the dough is too soft to handle.
Use a tablespoon or one-inch cookie scoop to portion dough into uniform balls. Roll between palms to smooth edges before coating.
Whisk the reserved egg white until frothy. Dip each ball into the white, then roll in chopped peanuts, pressing gently so nuts adhere. Place on a parchment-lined sheet.
Press an indentation into each ball about halfway through and fill with about one teaspoon of jam; too much jam may overflow during baking.
Bake at 350°F for 12 to 14 minutes until nuts begin to brown and edges are set. Cool on the pan until jam sets, then transfer to a wire rack.
Last Step: Please leave a rating and comment letting us know how you liked this recipe! This helps our business to thrive and continue providing free, high-quality recipes for you.
Leave a comment & rating below or tag
@savoryte on social media!

Flaky pan-seared tilapia topped with a velvety lemon butter sauce. Quick to cook, bright with citrus, and weeknight-easy yet dinner-party special.

Start your morning with veggie-loaded, protein-packed egg muffins at just 50 calories each. Perfect for make-ahead breakfasts, freezer-friendly, and easy to customize.

Crispy, cheesy, and ready in minutes, this viral tortilla fold layers bacon, egg, avocado, and melty cheese into a perfectly portable triangle.
Leave a comment & rating below or tag @savoryte on social media!
Enjoyed this recipe? Share it with friends and family, and don't forget to leave a review!
This recipe looks amazing! Can't wait to try it.
Comments are stored locally in your browser. Server comments are displayed alongside your local comments.

Join to receive our email series which contains a round-up of some of our quick and easy family favorite recipes.
