
>>

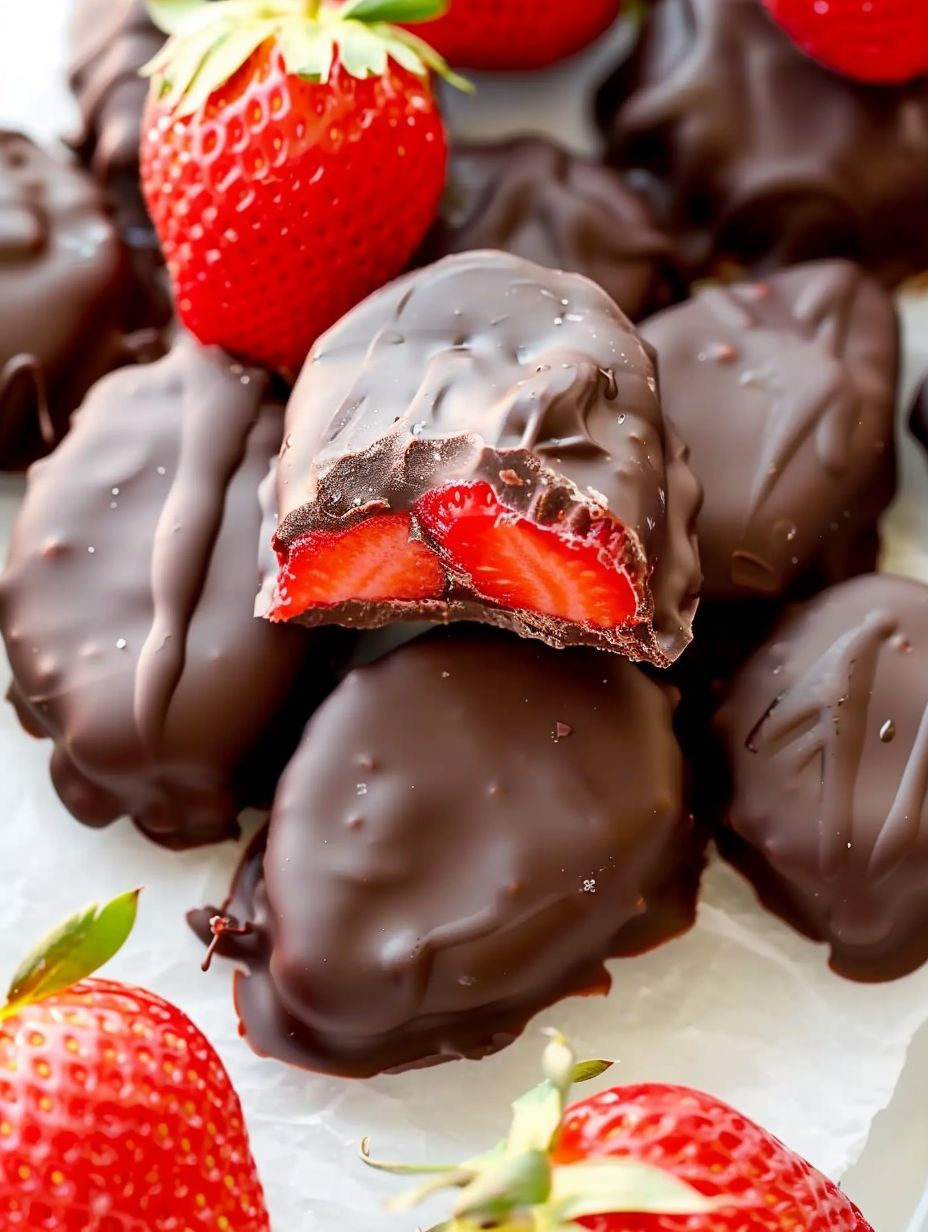
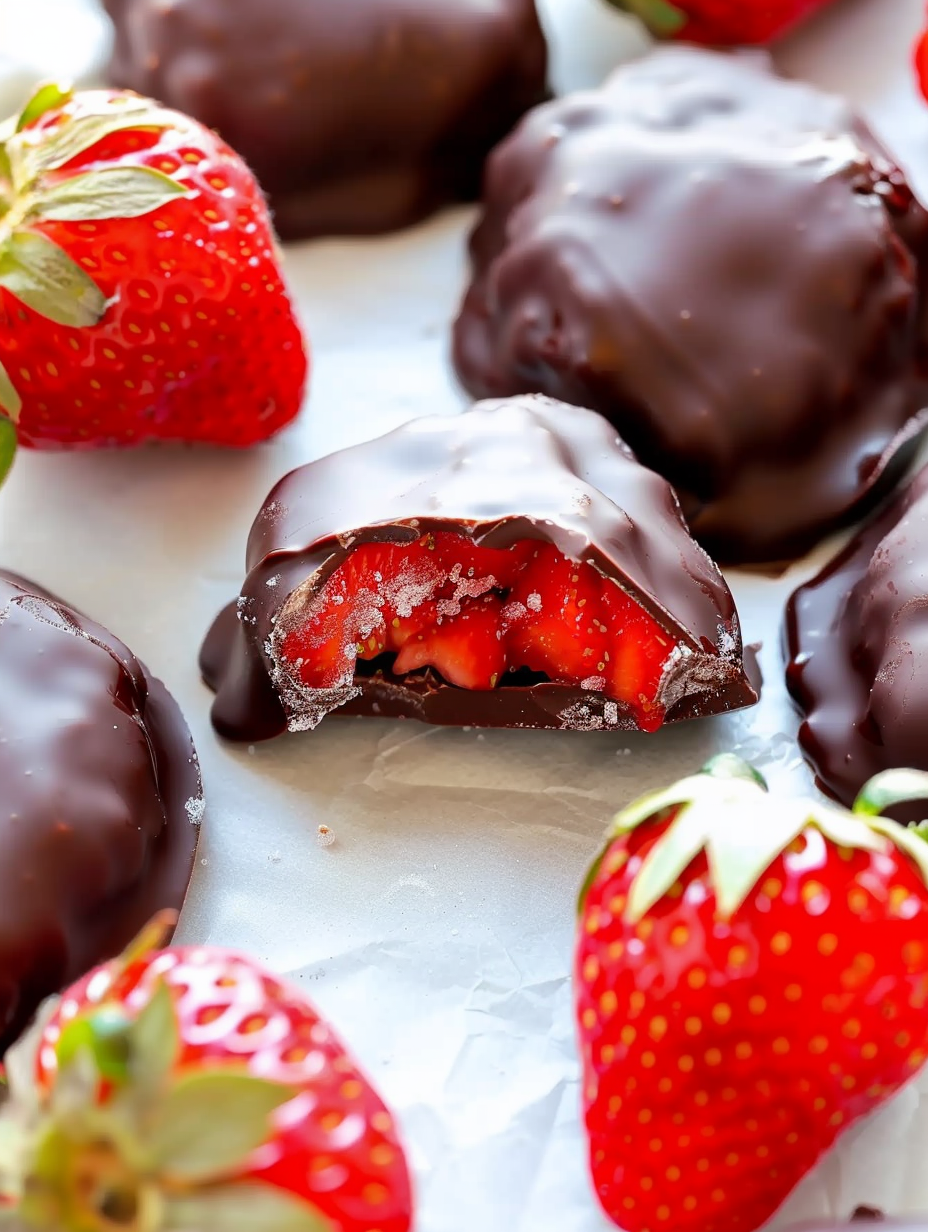
Sweet, refreshing frozen strawberry bites dipped in chocolate — a simple, crowd-pleasing dessert that’s easy to make, freezer-friendly, and perfect for warm days.

In my kitchen these have become a go-to for summer entertaining. I’ve watched neighborhood kids cluster around the freezer door, eyes wide at the shiny chocolate, and I’ve brought them to potlucks where they were declared “fancy” despite the short ingredient list. The simplicity is part of the charm — and the best gatherings have the simple things disappearing first.
What I love most is how versatile these bites are. I’ve taken them to summer barbecues, holiday cookie swaps (they stand out among dense cookies), and simple weekday desserts. Guests often assume there are more complex techniques involved because they look polished. The truth is that the science is simple: cold centers and melted coating equal a satisfying snap and a refreshing burst of strawberry with every bite.
Store finished bites in a single layer on a parchment-lined tray in the freezer until fully firm, then transfer to an airtight container or freezer bag to save space. Place parchment between layers to prevent sticking. For best quality, consume within 3 months; after that they’re still safe but may pick up freezer flavors or develop slight ice crystals. Thaw briefly at room temperature for 3–5 minutes before serving — too long and the chocolate will sweat. If crystals form, a quick re-freeze on a tray can smooth the texture.
If you don’t have candy coating, you can use a good-quality chocolate bar (milk, dark, or white). Break into pieces and melt slowly; if using real chocolate, add 1 teaspoon of neutral oil per cup to improve flow. For a lower-sugar option, choose a dark chocolate 70% cacao or sugar-free coating. If fresh strawberries aren’t available, defrosted frozen strawberries work but will be wetter — strain for 10–15 minutes to remove excess juice before mashing to avoid icy puddles inside the bites.
These bites are elegant on a dessert platter alongside mint sprigs and lemon wedges. For parties, arrange on a chilled serving tray or layer with paper cups. They pair beautifully with sparkling wine, iced coffee, or a dollop of mascarpone on the side. For a kid-friendly twist, drizzle with white chocolate and sprinkle with colorful nonpareils just before the coating sets. For grown-up gatherings, finish with flaky sea salt or a dusting of freeze-dried raspberry powder.
Chocolate-covered fruit is a timeless pairing found across many cuisines, rooted in the simple contrast of sweet and tart. Strawberries dipped in chocolate became particularly popular in Western confectionery in the 20th century as chocolate production scaled up and refrigeration became widespread. Individual bite-sized treats like these echo European petit fours traditions and modern American party foods, combining convenience with an elegant flavor profile that feels special without fuss.
Make these year-round by adjusting fruit and coating: in winter, try mashed raspberries or thawed cherries with dark chocolate and a dash of warming spices like cinnamon; in late spring add chopped basil or mint to the mash for a fresh herbal note. For holiday parties, dip half in dark chocolate and half in white chocolate, finishing with crushed pistachios or crushed candy canes for festive color and texture.
For easy grab-and-go snacks, portion into small freezer-safe containers or stack between parchment in a resealable bag. Assemble several trays at once: mash a large batch of berries, portion and freeze on multiple sheets, then dip in shifts so the melting chocolate stays fluid. Label containers with the date and coating type. For gifting, pack in insulated boxes with cold packs to keep the chocolate from melting during transit.
These little frozen bites combine the best of fruit and chocolate with minimal effort and maximum charm. They’re a reminder that sometimes the simplest techniques — freezing, coating, and a good chocolate — create the most memorable treats. I hope they become one of your go-to make-ahead desserts for warm weather and beyond.
Freeze the mashed strawberry piles until fully solid before dipping to prevent chocolate sliding or cracking.
Use a microwave in short bursts (20–30 seconds) and stir between heating cycles to melt coating evenly without burning.
Work in small batches when dipping so the chocolate stays fluid; reheat briefly if it thickens.
Line trays with parchment and use a fork for dipping to let excess chocolate drip back into the bowl.
Label frozen containers with the date and type of coating; consume within 3 months for best quality.
This nourishing frozen chocolate covered strawberry bites recipe is sure to be a staple in your kitchen. Enjoy every moist, high protein slice — it is perfect for breakfast or as a wholesome snack any time.
This Frozen Chocolate Covered Strawberry Bites recipe makes perfectly juicy, tender, and flavorful steak every time! Serve with potatoes and a side salad for an unforgettable dinner in under 30 minutes.
Hull and rinse 16 ounces of strawberries, pat dry, sprinkle with 1 tablespoon sugar and mash to a chunky purée. Optionally add a pinch of salt or lemon zest. The mash should be spoonable and slightly thick.
Line a baking sheet with parchment and spoon roughly 2 tablespoons of mash per pile, spacing items 1 inch apart to allow easy dipping.
Freeze the tray for 3–4 hours until the piles are completely frozen. A fully frozen center prevents the coating from slipping off during dipping.
Melt 16 ounces of candy coating in the microwave in short bursts or over a double boiler until smooth and pourable, keeping temperature moderate.
Dip each frozen cluster into the melted chocolate, let excess drip back, then place on parchment. Work in small batches so the chocolate remains fluid.
Return the dipped pieces to the freezer until chocolate has hardened (about 10–20 minutes). Store in an airtight container in the freezer for up to 3 months.
Last Step: Please leave a rating and comment letting us know how you liked this recipe! This helps our business to thrive and continue providing free, high-quality recipes for you.
Leave a comment & rating below or tag
@savoryte on social media!

Flaky pan-seared tilapia topped with a velvety lemon butter sauce. Quick to cook, bright with citrus, and weeknight-easy yet dinner-party special.

Start your morning with veggie-loaded, protein-packed egg muffins at just 50 calories each. Perfect for make-ahead breakfasts, freezer-friendly, and easy to customize.

Crispy, cheesy, and ready in minutes, this viral tortilla fold layers bacon, egg, avocado, and melty cheese into a perfectly portable triangle.
Leave a comment & rating below or tag @savoryte on social media!
Enjoyed this recipe? Share it with friends and family, and don't forget to leave a review!
This recipe looks amazing! Can't wait to try it.
Comments are stored locally in your browser. Server comments are displayed alongside your local comments.

Join to receive our email series which contains a round-up of some of our quick and easy family favorite recipes.
