
Extra Crispy Fried Chicken Tenders

These extra crispy fried chicken tenders deliver restaurant-quality crunch and juicy meat—learn the chef tricks for a perfectly seasoned, crunchy coating at home.
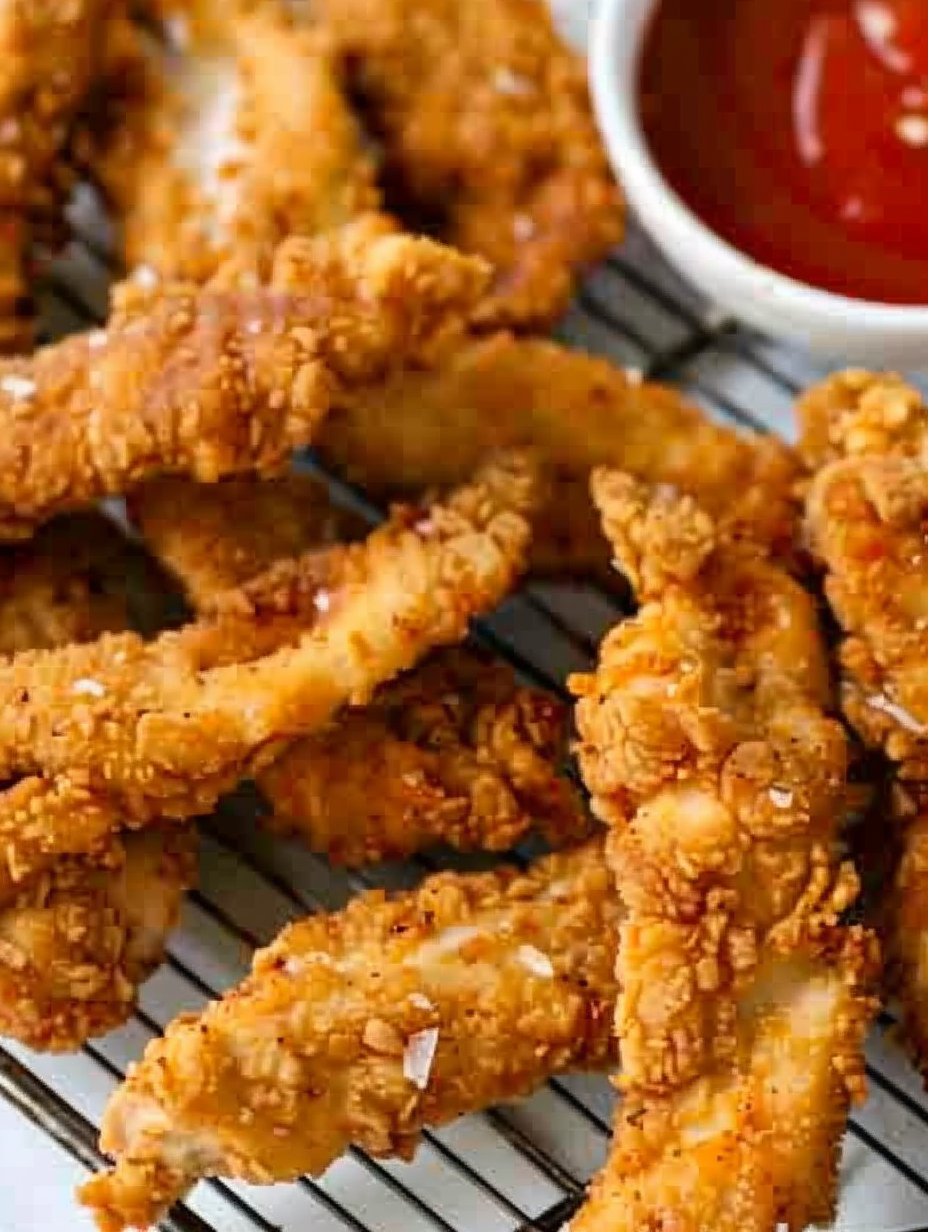
This recipe is my answer to every weeknight desire for something crunchy, salty, and utterly comforting: extra crispy fried chicken tenders that taste like they came from my favorite diner. I first perfected this combination during a weekend of testing ideas for a family picnic. I wanted tenders that held up on a platter, stayed crunchy for transport, and had a seasoned crust that wasn’t just flour — something with real texture and a little personality. The result was so beloved that it became our default for casual gatherings and movie nights. The crust is deeply seasoned and crackly, while the interior remains juicy and tender thanks to a few simple techniques that professionals use.
I adapted the method to be reproducible for home cooks: three egg whites beaten to a froth, a seasoned flour mix with breadcrumbs for extra crunch, and careful oil temperature control so the exterior crisps without overcooking the meat. These tenders have a memorable mouthfeel — a crisp shell that gives way to warm, tender chicken — and they reheat beautifully, too. Over the years I’ve learned small adjustments that make a big difference, like lightly pounding the meat to create small crevices for the breading to cling to and resting cooked pieces on a wire rack so steam doesn’t soften the crust. If you’re looking for a sure-fire way to make restaurant-style tenders at home, this is it.
Why You'll Love This Recipe
- Reliable restaurant-style crunch with an easy home method: a flour-and-breadcrumb mix plus beaten egg whites creates a textured coating that browns evenly.
- Fast to prepare: active prep is about 15 minutes and total cook time is roughly 30 minutes, making it great for weeknights and last-minute guests.
- Uses pantry staples: all-purpose flour, plain breadcrumbs, basic spices, and canola oil — no specialty ingredients required.
- Make-ahead friendly: dry brining in the fridge will deepen flavor and help the breading adhere; cooked tenders hold well for reheating.
- Kid-friendly and crowd-pleasing: mild, savory flavor with optional spice tweaks for adults; perfect for dipping sauces like honey mustard.
- Flexible cooking: deep fried for the best texture, with an air fryer method included for a lighter option.
When I first served these at a summer barbecue, the platter emptied within minutes — neighbors kept asking for the recipe. I love that the method is easy enough for a beginner but yields a result that even seasoned cooks admire. It’s become a dish that brings people together around crunchy, comforting food.
Ingredients
- Chicken: 2 large boneless, skinless chicken breasts (about 1 1/2 pounds total). Look for even-sized breasts so strips cook uniformly; if breasts are very large, halve them first. Fresh or fully thawed frozen works fine.
- Salt and Pepper: Kosher salt and freshly ground black pepper to season the meat. I recommend Diamond Crystal or Morton for kosher salt; use about 1/4 to 1/2 teaspoon coarse salt per pound of chicken for a balanced seasoning.
- Egg Whites: 3 large egg whites, beaten until frothy. Beating introduces air and helps the breading cling for an extra-crisp finish—save yolks for another dish.
- Oil for Frying: 48 fluid ounces (about 6 cups) of canola oil. Canola has a high smoke point and neutral flavor; peanut or vegetable oil are acceptable substitutes.
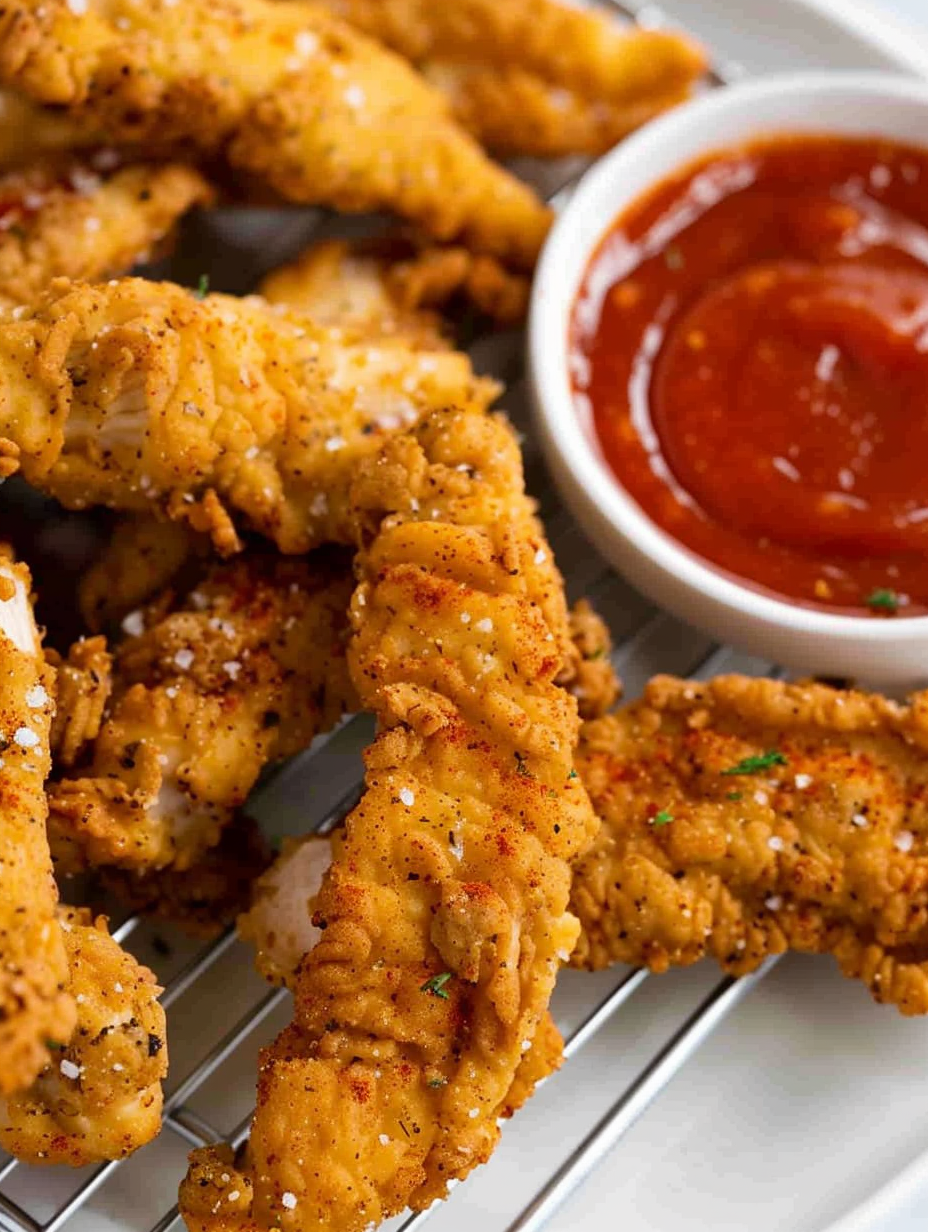
- Breading: 1 cup all-purpose flour; 1/3 cup plain or Italian breadcrumbs; 1 1/2 teaspoons seasoned salt (or replace with 1 1/2 teaspoons kosher salt plus 1/2 teaspoon garlic powder); 1/2 teaspoon paprika; 1/4 teaspoon cayenne pepper for a gentle heat note; 1 teaspoon freshly ground black pepper. Breadcrumbs add crunch and structure to the coating, while seasoned salt and paprika provide savory depth and color.
Instructions
Prepare Your Cooling Station: Set two cooling racks over a rimmed baking sheet so oil can drip away from the tenders and air can circulate on all sides. This prevents steaming and keeps the crust crisp. Line an extra sheet with paper towels for quick blotting if needed. Cut and Season the Chicken: Slice each breast into strips roughly 3/4 inch thick and 5 inches long for uniform tenders. Pat the strips completely dry with paper towels to remove surface moisture — dry meat yields better adhesion for breading. Lightly season both sides with kosher salt and black pepper (about 1/4 to 1/2 teaspoon salt per pound of meat). Optional — Dry Brine: For deeper flavor and drier surface, place seasoned strips uncovered on a plate on the bottom shelf of the fridge for up to 4 hours. This dry brine lets salt penetrate and helps the exterior dry, improving breading adhesion. Prepare Breading and Egg Whites: In a shallow bowl, whisk together flour, breadcrumbs, seasoned salt, paprika, cayenne, and black pepper. In another bowl, gently beat the 3 egg whites until foamy and slightly thickened; you don’t need stiff peaks — a frothy texture is ideal to capture breading. Pound for Texture: Cover each strip with plastic wrap and lightly pound the meat on the rough side of a meat mallet. The goal is not to flatten the chicken but to create tiny crevices and a more even thickness so the breading grips and the tenders cook evenly. Coat the Chicken: Dip each strip into the beaten egg whites, letting excess drip back into the bowl. Immediately press into the flour-and-breadcrumb mixture, turning to ensure every nook is covered. For extra adhesion, press the breading onto the surface — a confident press helps the coating stick into the textured meat. Heat the Oil: Add oil to a heavy Dutch oven or deep pot, filling no more than halfway. Heat the oil to 350 to 375°F (use a candy or frying thermometer). Maintaining this range is crucial: too cool and the tenders absorb oil; too hot and the crust burns before the interior cooks. Fry in Batches: Fry the breaded strips in small batches so the oil temperature remains steady. Each side will take about 3.5 to 4 minutes to reach an even golden brown. Use tongs to turn once. Cook time varies slightly with thickness; aim for an internal temperature of 165°F before removing. Rest and Keep Warm: Transfer cooked tenders to the prepared wire racks to drain and remain crisp. If keeping warm while frying remaining batches, place the rack in a 200°F oven — this prevents the crust from softening and keeps everything ready to serve.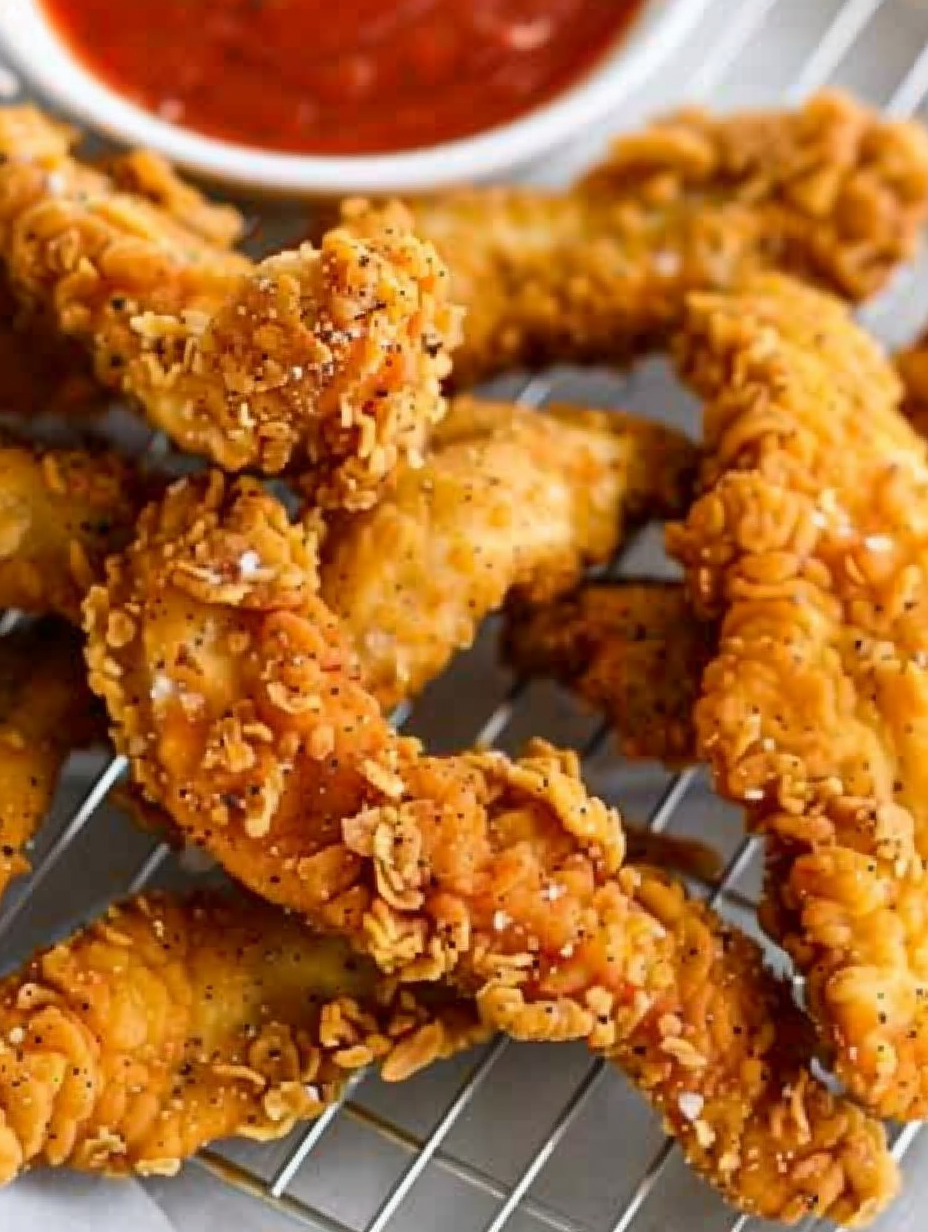
You Must Know
- Keep the oil between 350°F and 375°F for the best crust-to-center balance; use a thermometer for accuracy.
- Drying and lightly pounding the chicken helps the breading cling and creates a textured surface for exceptional crispiness.
- These tenders freeze well for up to 3 months — flash-freeze on a tray then transfer to a freezer bag to preserve the crust.
- Check internal temperature with a probe thermometer; remove at 165°F for safe, juicy meat.
- Using egg whites keeps the coating light while still providing strong adhesion; yolks can be reserved for another recipe.
My favorite part is how reliably these tenders come out: consistently golden crust and moist inside. During a holiday football game, friends tested them against takeout and the homemade version won every round. The method lets you scale up easily for large crowds without sacrificing quality; maintain oil temperature and keep batches small for the best results.
Storage Tips
Store cooled tenders in an airtight container lined with paper towels in the refrigerator for up to 3 days. To freeze, arrange cooked pieces in a single layer on a sheet tray and flash-freeze for 1 hour, then transfer to a freezer-safe bag or container for up to 3 months. Reheat from frozen in a preheated 375°F oven on a wire rack set over a baking sheet for 12 to 18 minutes, flipping once, until hot and crisp. Avoid microwaving, which will soften the crust. For best texture, re-crisp under the broiler for a minute at the end if needed.
Ingredient Substitutions
If you prefer a richer crust, substitute plain breadcrumbs with panko for extra light, airy crunch. For a dairy-free profile (already dairy-free), keep the same ingredients; to make it gluten-free, swap all-purpose flour and breadcrumbs for a 1-to-1 gluten-free flour blend and gluten-free panko or crushed rice cereal. Swap canola oil for peanut oil for more richness if allergies aren’t a concern. To add tang, replace half the egg whites with 1/4 cup buttermilk and 2 egg whites for a buttermilk-brined style—this will tenderize the meat and add subtle tang.
Serving Suggestions
Serve these tenders with classic condiments like honey mustard, ranch, or a simple barbecue sauce. They pair beautifully with crisp coleslaw, buttery corn on the cob, or a tangy potato salad for picnic-style meals. For a dinner plate, add mashed potatoes and steamed green beans. Garnish with chopped parsley and lemon wedges to brighten the flavors. For parties, present them on a platter with an assortment of dipping bowls to accommodate different tastes.
Cultural Background
Fried chicken tenders are a modern American comfort-food staple with roots in Southern fried chicken traditions. The technique of breading and frying poultry has global cousins—from Japanese karaage to British fried chicken shops—but the tender strip format became popularized through fast-casual dining and catering because of its portability and ease for dipping. Over time home cooks have borrowed techniques from chefs—like dry brining and double-textured coatings—to elevate this humble format into something both nostalgic and refined.
Seasonal Adaptations
In spring and summer, lighten the meal with an herb-forward slaw and lemon-garlic aioli. In autumn, serve with roasted root vegetables and a maple-mustard dip for seasonal sweetness. For winter entertaining, spice the breading with a pinch more cayenne and smoked paprika, and offer warm dipping sauces like chipotle honey. Small seasoning tweaks let the same method suit any season or holiday table.
Meal Prep Tips
For efficient meal prep, slice and season chicken the day before, then dry brine uncovered in the fridge. Mix the breading and keep refrigerated. On the day you plan to serve, do the light pounding, bread a single batch at a time, and fry just before guests arrive. Cooked tenders reheat very well, so you can prepare several batches ahead and re-crisp in a hot oven. Label frozen portions by date and reheating time for easy use later.
These tenders are more than a dish — they’re a crowd-friendly ritual. Whether you’re feeding a family, packing picnic boxes, or hosting a game day, the reliable crunch and juicy interior make this one of my most-requested recipes. Try the method once and you’ll find small tweaks that make it yours. Happy frying!
Pro Tips
Pat chicken completely dry before breading to improve adhesion and crispness.
Keep oil temperature between 350°F and 375°F; use a thermometer to prevent soggy or burnt crust.
Fry in small batches so oil temperature recovers quickly and pieces cook evenly.
Rest cooked tenders on a wire rack, not paper towels, to avoid steaming the crust.
For extra crunch, use panko breadcrumbs or add 1/4 cup crushed cornflakes to the breading.
This nourishing extra crispy fried chicken tenders recipe is sure to be a staple in your kitchen. Enjoy every moist, high protein slice — it is perfect for breakfast or as a wholesome snack any time.
Tags
Extra Crispy Fried Chicken Tenders
This Extra Crispy Fried Chicken Tenders recipe makes perfectly juicy, tender, and flavorful steak every time! Serve with potatoes and a side salad for an unforgettable dinner in under 30 minutes.
Ingredients
Chicken & Seasoning
Oil
Breading
Instructions
Prepare cooling racks
Set cooling racks over a rimmed baking sheet so oil drains and the crust stays crisp. Line an extra tray with paper towels for quick blotting.
Cut and season the chicken
Slice breasts into 3/4-inch-thick, 5-inch-long strips. Pat dry and season both sides with kosher salt and black pepper to taste.
Optional dry brine
Place seasoned strips uncovered in the refrigerator for up to 4 hours to dry the surface and let salt penetrate, improving flavor and breading adhesion.
Mix breading and beat egg whites
Combine flour, breadcrumbs, seasoned salt, paprika, cayenne, and black pepper in a shallow bowl. Beat 3 egg whites until frothy in a separate bowl.
Pound for texture
Cover each strip with plastic wrap and lightly pound on the rough side of a meat mallet to create small crevices that help the breading cling.
Bread the chicken
Dip a strip into egg whites, then press into the breading mixture until fully coated. Repeat for all pieces, pressing the coating gently to adhere.
Heat oil
Fill a heavy pot with oil no more than halfway and heat to 350–375°F. Use a thermometer to monitor temperature for consistent frying.
Fry in batches
Fry chicken strips in small batches so oil temperature remains steady, about 3.5–4 minutes per side until golden brown and internal temp reaches 165°F.
Rest and serve
Transfer to wire racks to drain and keep crisp. Optionally hold in a 200°F oven while finishing remaining batches and serve hot with desired dips.
Last Step: Please leave a rating and comment letting us know how you liked this recipe! This helps our business to thrive and continue providing free, high-quality recipes for you.
Nutrition
Did You Make This?
Leave a comment & rating below or tag
@savoryte on social media!
Categories:
You might also like...

Tilapia with Lemon Butter
Flaky pan-seared tilapia topped with a velvety lemon butter sauce. Quick to cook, bright with citrus, and weeknight-easy yet dinner-party special.

Healthy Egg Muffin Cups
Start your morning with veggie-loaded, protein-packed egg muffins at just 50 calories each. Perfect for make-ahead breakfasts, freezer-friendly, and easy to customize.

TikTok Breakfast Tortilla Fold
Crispy, cheesy, and ready in minutes, this viral tortilla fold layers bacon, egg, avocado, and melty cheese into a perfectly portable triangle.
Did You Make This?
Leave a comment & rating below or tag @savoryte on social media!
Rate This Recipe
Share This Recipe
Enjoyed this recipe? Share it with friends and family, and don't forget to leave a review!
Comments (1)
This recipe looks amazing! Can't wait to try it.
Comments are stored locally in your browser. Server comments are displayed alongside your local comments.

Hi, I'm Sophia!
What's Popular

30-Minute Meals!
Join to receive our email series which contains a round-up of some of our quick and easy family favorite recipes.