
>>

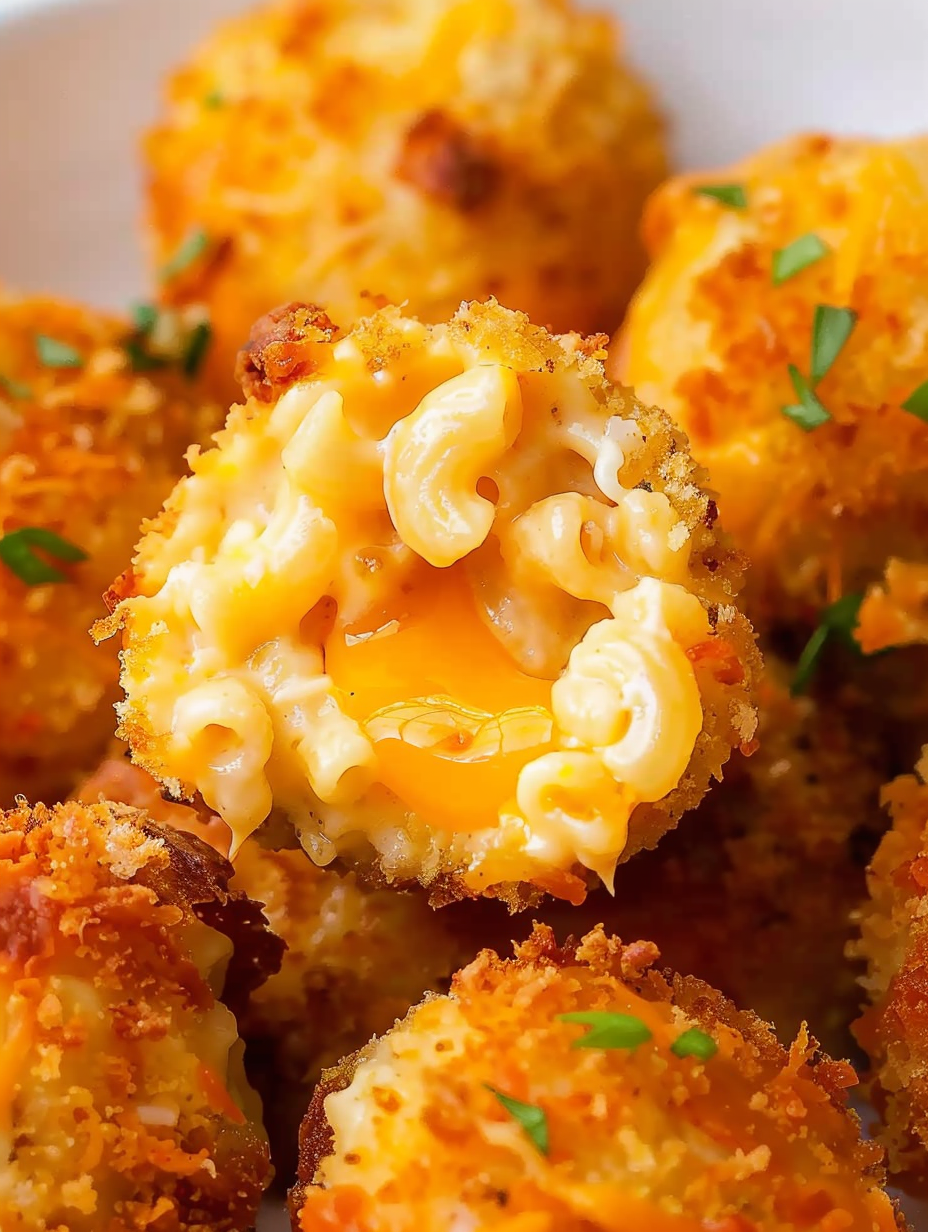
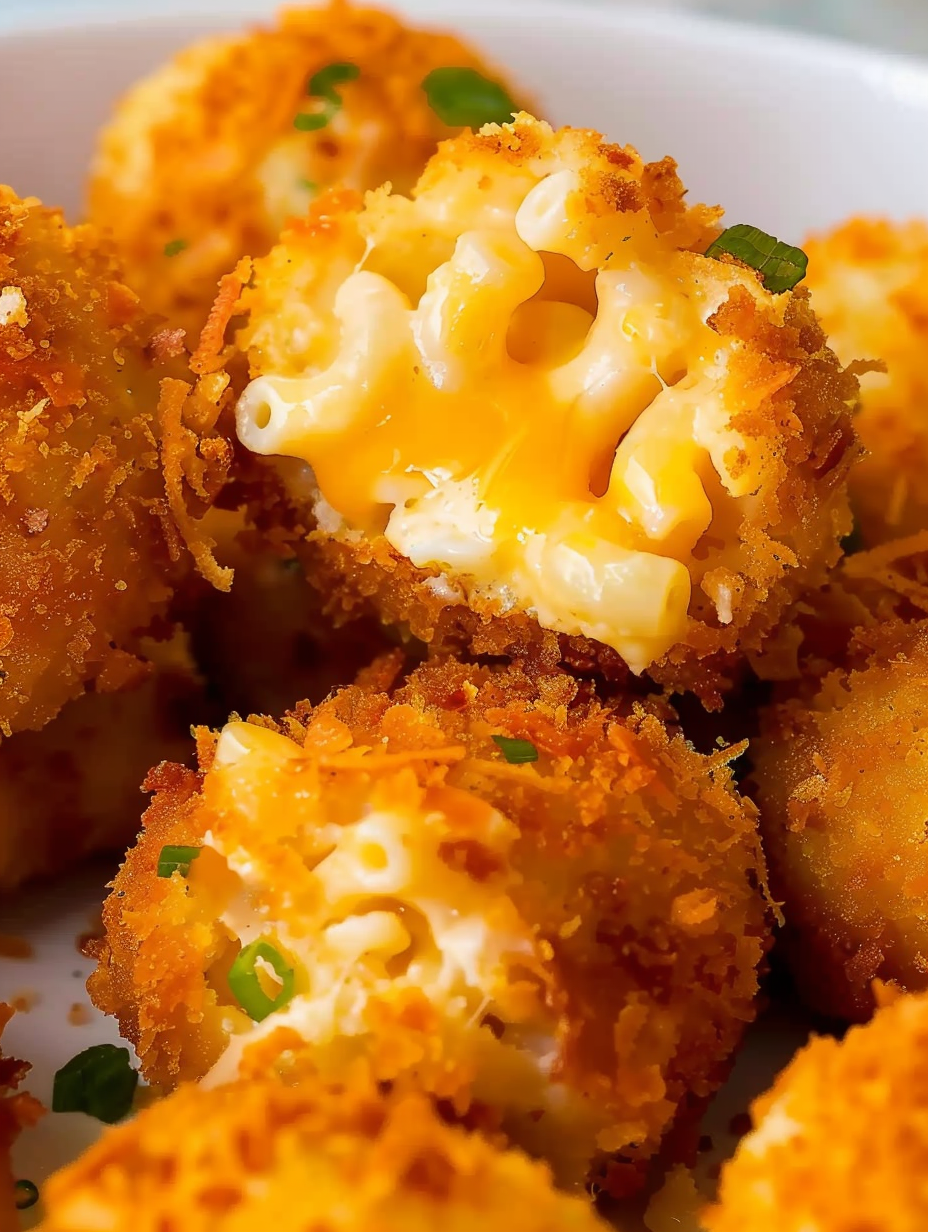
Leftover mac and cheese transformed into golden, crunchy bites with molten cheese centers—perfect for appetizers, snacks, or a fun main.
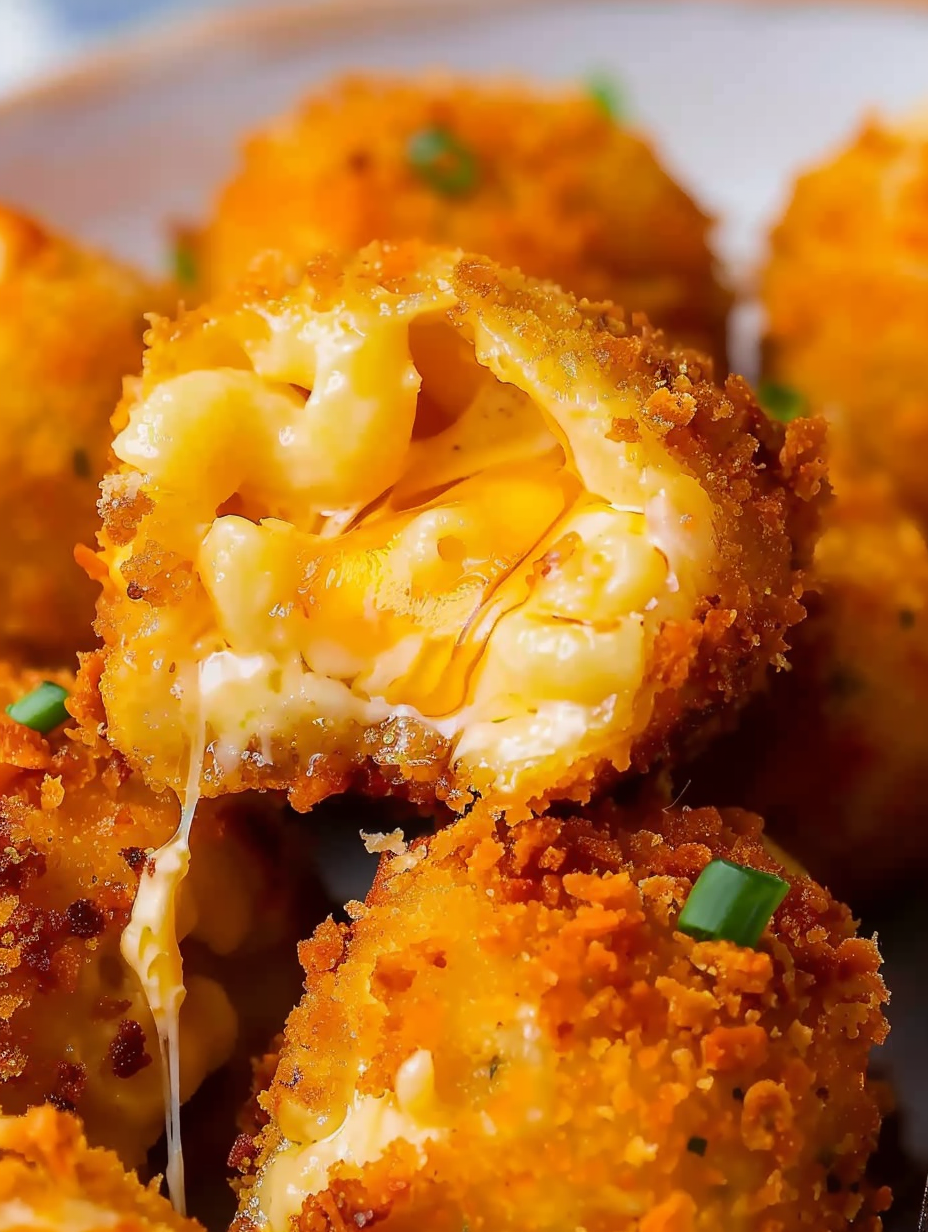
This recipe for Crispy Mac and Cheese Balls grew out of one of those kitchen moments when I refused to let perfectly good mac and cheese go to waste. I discovered this method on a rainy afternoon when I had a generous pan of leftovers and a house full of hungry friends. The first batch rolled out a little rough, but after I learned how long to chill the mac, which breadcrumbs crisp the best, and the right oil temperature, they became an instant crowd-pleaser. The contrast between the crunchy exterior and the gooey interior is what makes these irresistible: a satisfying crack when bitten and a ribbon of melted cheese that keeps everyone coming back.
What makes this particular approach special is the balance of textures and the simplicity. Using a mix of sharp cheddar with salty parmesan adds depth to the flavor, while a light panko coating gives perfect crunch without tasting heavy. They reheated beautifully the next day and made an excellent party snack, a playful side to a weeknight meal, or a fun main course served with a simple green salad. I often think of these as tiny comfort-food parcels that are as much about memory and sharing as they are about cheese and breadcrumbs.
I remember serving these at a small game-night gathering; they vanished so quickly that someone asked for the recipe on the spot. My niece declared them "the best cheesy balls ever," which, admittedly, is the highest compliment in my family. Over time I refined chilling times and coating technique, and now they come out consistently crispy and gooey every single time.
My favorite part of these is the playful, communal way they’re eaten—kids use their hands, adults debate dips, and everyone ends up laughing with cheese on their fingers. One holiday I made a double batch and labeled each dip; the variety turned a simple appetizer into a full-on tasting event that people still reference.
Store leftovers in an airtight container in the refrigerator for up to 3 days. To reheat, place on a wire rack over a baking sheet and warm in a 375°F oven for 8–10 minutes to revive the crust; avoid microwaving if you want to keep them crisp. For longer storage, freeze cooked or breaded-but-unfried balls on a tray until solid, then transfer to a freezer bag for up to 3 months. Fry directly from frozen; increase oil time by 1–2 minutes and monitor carefully so the exterior doesn’t overbrown before the center is warm.
If you need dairy-free or lower-fat options, try a plant-based cheese that melts well and use a flaxseed "egg" (1 tablespoon ground flax + 3 tablespoons water per egg) for the wash. For gluten-free, substitute gluten-free panko or crushed gluten-free crackers. Swap cheddar for smoked gouda to introduce a smoky note, or mix in a tablespoon of cream cheese for extra silkiness. Remember, substitutions will change melt behavior and binding, so you may need an extra egg or a little cornstarch to help with structure.
Serve these as an appetizer with a trio of dips—classic marinara, spicy sriracha mayo, and a honey mustard—for variety. For a main-course presentation, tuck them alongside a peppery arugula salad dressed with lemon and olive oil, or pile them on a platter with roasted vegetables for a shareable plate. Garnish with finely chopped chives or a light dusting of grated parmesan to add color and a fresh burst of flavor.
In autumn, fold in roasted butternut squash puree or a spoonful of pumpkin spice-seasoned ricotta for a seasonal twist. For summer gatherings, add finely chopped roasted red peppers and basil to brighten the filling. Around holidays, add a pinch of nutmeg or use a smoked cheddar to make them feel festive. These small changes adapt the flavor profile to the season without altering the beloved crispy-cheesy contrast.
To streamline party prep, assemble and bread the balls a day ahead and keep them chilled on a tray lined with parchment. For frozen make-ahead, shape and bread, then freeze on a sheet before bagging. Label bags with the date and any dip suggestions. When it's time to serve, start heating the oil only when guests arrive so the bites are hot and fresh. Keep a tray lined with paper towels and a cooling rack nearby to drain and serve immediately.
I once brought these to a neighborhood potluck and a neighbor who claimed to dislike mac and cheese declared them "game-changing." At a kid’s birthday, I made smaller bite-sized balls and they became the centerpiece of the snack table—parents appreciated the portion control and kids loved the cheesy pull. Each positive reaction helped me refine the recipe, especially the ideal chill time and breadcrumb choice.
These golden orbs are about more than convenience; they’re a small celebration of comfort and clever reuse. Whether you’re feeding a crowd or turning leftovers into something festive, these will become one of your go-to tricks for quick, satisfying bites. Try them with different cheese combinations and dips—you might discover your own signature version.
Refrigerate the mac and cheese at least 3 hours or overnight so it firms up and is easy to shape.
Use panko breadcrumbs for the crispiest exterior; combine with regular crumbs for better adhesion.
Maintain oil temperature at about 350°F and fry in small batches to avoid temperature drop.
Flash-freeze breaded balls on a tray before storing to prevent sticking and to maintain shape.
This nourishing crispy mac and cheese balls recipe is sure to be a staple in your kitchen. Enjoy every moist, high protein slice — it is perfect for breakfast or as a wholesome snack any time.
This Crispy Mac and Cheese Balls recipe makes perfectly juicy, tender, and flavorful steak every time! Serve with potatoes and a side salad for an unforgettable dinner in under 30 minutes.
Refrigerate leftover mac and cheese for at least 3 to 4 hours (or overnight) so it firms up and can be shaped without falling apart.
In a large bowl, stir in shredded cheddar and parmesan to the chilled mac. Add extra cheese if the mixture is too loose and needs more body.
Whisk 1 egg with 3 tablespoons milk in a shallow bowl for the egg wash. Place breadcrumbs or panko in another shallow bowl and set out a parchment-lined tray.
Portion the mixture with an ice cream scoop or tablespoon and roll into balls with lightly moistened hands for smooth spheres; aim for about 15 balls.
Dip each ball into the egg wash, coat fully in breadcrumbs, place on the tray, and refrigerate for at least 30 minutes to set the coating.
Heat oil to 350°F in a Dutch oven. Fry balls in small batches for 3–5 minutes until golden and crisp, then transfer to paper towels or a wire rack to drain.
Serve immediately with dipping sauces such as marinara, spicy mayo, or honey mustard for best texture and flavor.
Last Step: Please leave a rating and comment letting us know how you liked this recipe! This helps our business to thrive and continue providing free, high-quality recipes for you.
Leave a comment & rating below or tag
@savoryte on social media!

Flaky pan-seared tilapia topped with a velvety lemon butter sauce. Quick to cook, bright with citrus, and weeknight-easy yet dinner-party special.

Start your morning with veggie-loaded, protein-packed egg muffins at just 50 calories each. Perfect for make-ahead breakfasts, freezer-friendly, and easy to customize.

Crispy, cheesy, and ready in minutes, this viral tortilla fold layers bacon, egg, avocado, and melty cheese into a perfectly portable triangle.
Leave a comment & rating below or tag @savoryte on social media!
Enjoyed this recipe? Share it with friends and family, and don't forget to leave a review!
This recipe looks amazing! Can't wait to try it.
Comments are stored locally in your browser. Server comments are displayed alongside your local comments.

Join to receive our email series which contains a round-up of some of our quick and easy family favorite recipes.
