
>>

No-bake, chewy chocolate peanut butter bars loaded with candy pieces — dense, soft, and irresistibly nostalgic.
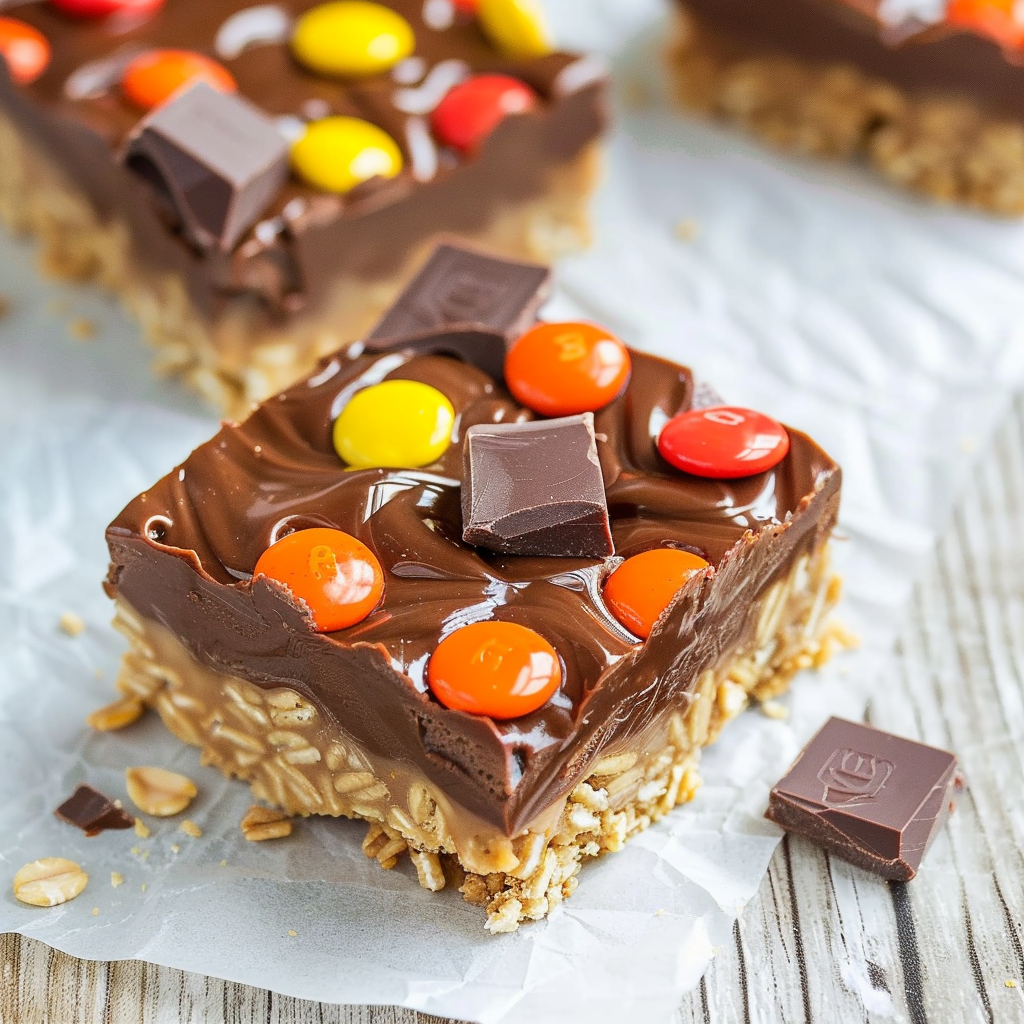
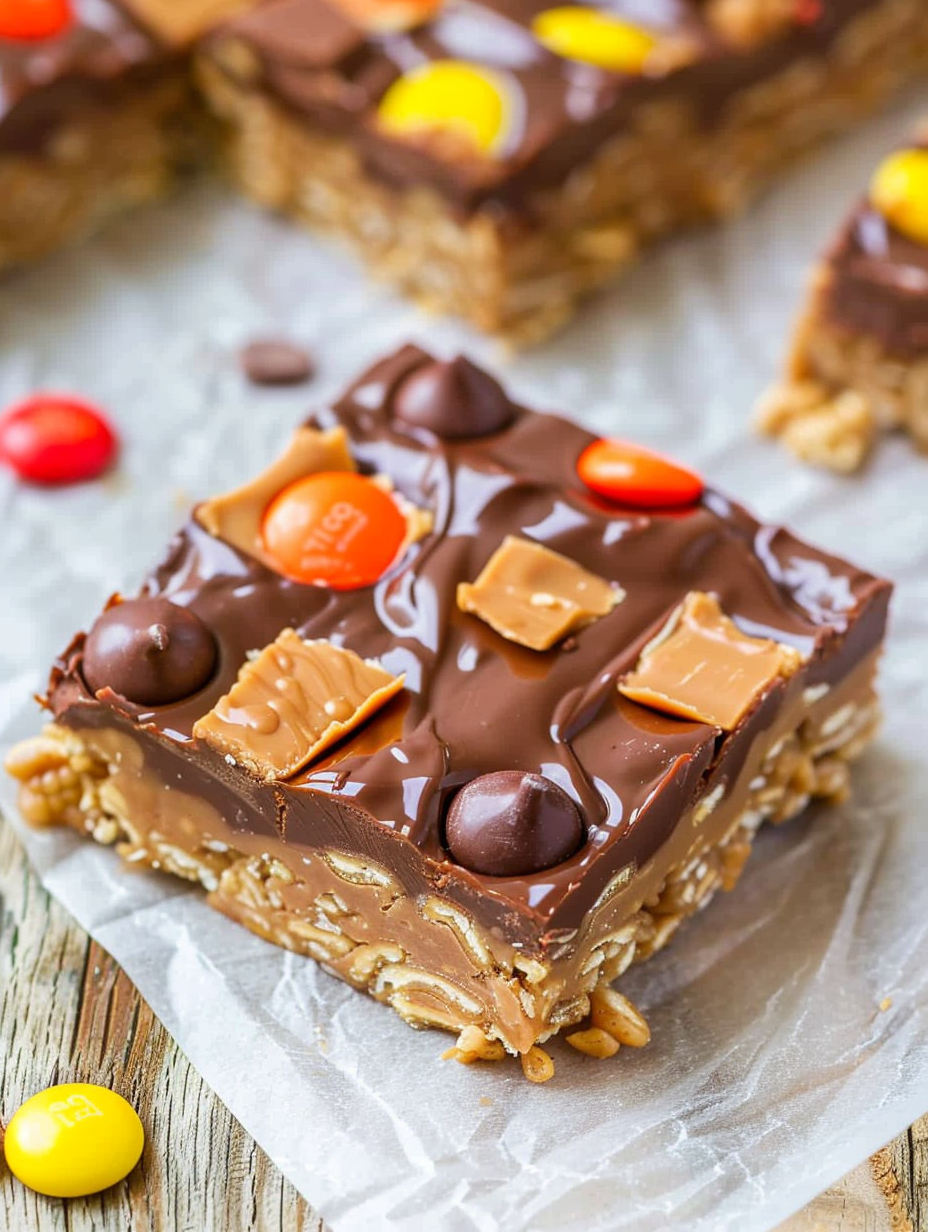
These chocolate peanut butter candy bars are my idea of pure comfort and nostalgia. I first made a version of these during a busy holiday season when I needed a quick, no-bake treat that held up on a candy table and satisfied everyone who walked by. What started as a last-minute assembly of pantry staples turned into a family favorite. The bars are soft, very dense, and chewy with bold peanut butter flavor and a generous chocolate topping studded with candy pieces. They travel well, store easily, and everyone always asks where I bought them rather than how simple they were to make.
I love this recipe because it hits multiple textures and cravings at once. The base is both tender and chewy thanks to an ultra-creamy peanut butter and a crisp cereal that keeps the structure light but satisfying. The chocolate topping adds richness, while the mix of bite-sized candies gives bursts of additional flavor and crunch. I tend to customize the candy layer depending on what’s in my pantry, which keeps these bars interesting every time I make them. If you want a retro, crowd-pleasing dessert that requires no oven and minimal active time, these are the bars to make.
I remember bringing a pan of these to a neighborhood potluck and watching them disappear in record time. My nephew declared them his favorite candy bar and asked for the leftovers to take home. That kind of immediate approval is why I keep this quick method in heavy rotation, especially during busy seasons when I want something sweet and comforting without a big time commitment.

My favorite thing about these bars is how forgiving they are. If the mixture feels slightly warm and sticky when you press it into the pan, it will still set beautifully. I also enjoy switching the candy mix depending on what is on sale or what candy I have leftover from Halloween. Family and friends always appreciate the variety of textures and the nostalgic candy bar feel.
Store the bars in an airtight container at room temperature for up to one week. Use parchment between layers to prevent sticking. If you prefer a firmer texture, refrigerate for up to one month. When freezing, wrap the whole slab tightly in plastic wrap and then foil, or freeze individual bars in single layers separated by parchment. Thaw in the refrigerator or at room temperature; avoid rapid temperature changes to prevent condensation forming on the chocolate surface.
If you need a gluten-free version, substitute Special K with a certified gluten-free crisp rice or corn flake cereal in a 1 to 1 swap. For a nut-free alternative, swap peanut butter with a sunflower seed butter that is stable and creamy. Use dairy-free and soy-free chocolate chips if avoiding dairy or soy, but note that flavor and texture will change slightly. If you want less sweetness, reduce granulated sugar by 2 tablespoons and reduce brown sugar by 1 tablespoon but expect a slightly less chewy texture.
Serve bars at room temperature for the best mouthfeel. Cut into squares and place on a simple platter with a sprinkling of extra chopped candy or a light dusting of cocoa powder for presentation. Pair with a cold glass of milk, coffee, or a scoop of vanilla ice cream for an indulgent dessert. These also work well as part of a dessert board with cookies and fruit.
This style of no-bake candy bar is rooted in American pantry-style confectionery where convenience meets nostalgia. Combining peanut butter and chocolate is a classic American flavor pairing that has been popularized by packaged candies and homemade bars alike. Using cereal to build structure goes back to mid-20th century home baking traditions when quick, no-oven desserts were favored for busy households and summer months.
For holidays, swap the candy pieces for seasonal varieties such as peppermint patties and crushed candy canes for winter, or pastel-colored candies for spring. Add toasted chopped nuts in autumn for a harvest twist. In summer, omit refrigeration to avoid condensation; assemble early in the day and allow ample setting time at room temperature.
Make a full batch and slice it into individual portions for grab-and-go treats. Wrap bars individually in parchment and store in one airtight container or freezer bag so you can pull a single portion as needed. If gifting, stack two or three with a square of parchment between them and package in a small box for a homemade edible gift.
These candy bars are the sort of simple, delicious treat that becomes a staple because they are reliable, flexible, and always well received. They feel both homemade and indulgent, which is a combination I always aim for when I bake for friends and family.
Final tip: be generous with the candy pieces on top. They make these bars fun, give visual appeal, and add that extra burst of candy joy that keeps everyone coming back for another piece.
Use a stable creamy peanut butter like Jif or Skippy to prevent oil separation and ensure a smooth texture.
Press the base firmly into the pan so the bars hold together when cut; use the back of a measuring cup for even pressure.
Warm the knife under hot water and dry it between cuts for clean slices through the chocolate topping.
If the mixture cools and becomes hard to press, microwave for 10 to 20 seconds to regain pliability.
This nourishing chocolate peanut butter candy bars recipe is sure to be a staple in your kitchen. Enjoy every moist, high protein slice — it is perfect for breakfast or as a wholesome snack any time.
Yes. Store airtight at room temperature for up to one week, refrigerate up to one month, or freeze up to six months.
Use a sharp knife warmed under hot water and dried between cuts for clean slices.
This Chocolate Peanut Butter Candy Bars recipe makes perfectly juicy, tender, and flavorful steak every time! Serve with potatoes and a side salad for an unforgettable dinner in under 30 minutes.
Line an 8x8 inch pan with aluminum foil and spray with cooking spray so bars release easily once set.
In a large microwave-safe bowl combine peanut butter, corn syrup, granulated and brown sugar. Microwave in increments until smooth, then stir in vanilla.
Fold in Special K cereal until evenly coated, turn into prepared pan, and press down firmly to form an even layer.
Combine chocolate chips and 1/4 cup peanut butter in a medium microwave-safe bowl and melt in short increments, stirring until glossy and smooth.
Pour chocolate over the base, scatter bite-sized candies on top, cover, and allow to set at room temperature for about four hours before slicing.
Last Step: Please leave a rating and comment letting us know how you liked this recipe! This helps our business to thrive and continue providing free, high-quality recipes for you.
Leave a comment & rating below or tag
@savoryte on social media!

Flaky pan-seared tilapia topped with a velvety lemon butter sauce. Quick to cook, bright with citrus, and weeknight-easy yet dinner-party special.

Start your morning with veggie-loaded, protein-packed egg muffins at just 50 calories each. Perfect for make-ahead breakfasts, freezer-friendly, and easy to customize.

Crispy, cheesy, and ready in minutes, this viral tortilla fold layers bacon, egg, avocado, and melty cheese into a perfectly portable triangle.
Leave a comment & rating below or tag @savoryte on social media!
Enjoyed this recipe? Share it with friends and family, and don't forget to leave a review!
This recipe looks amazing! Can't wait to try it.
Comments are stored locally in your browser. Server comments are displayed alongside your local comments.

Join to receive our email series which contains a round-up of some of our quick and easy family favorite recipes.
