
>>

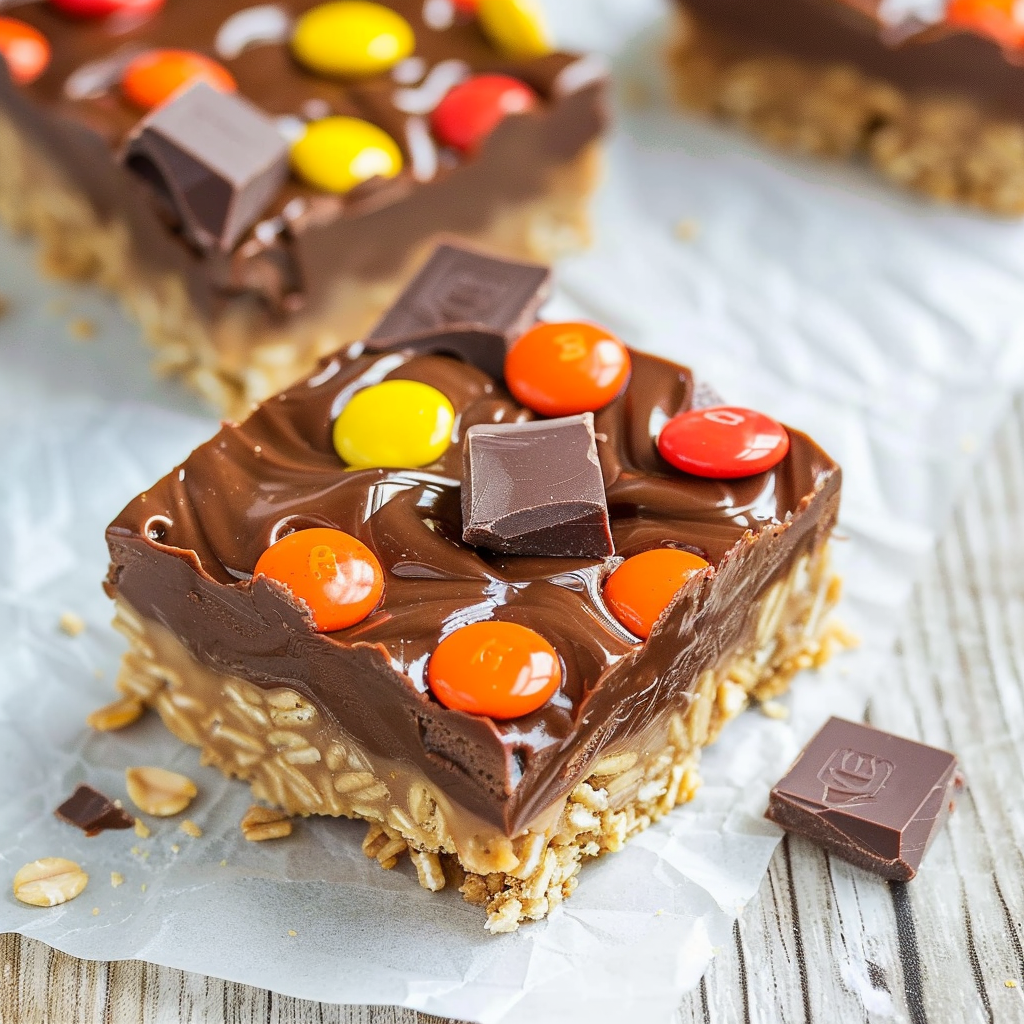
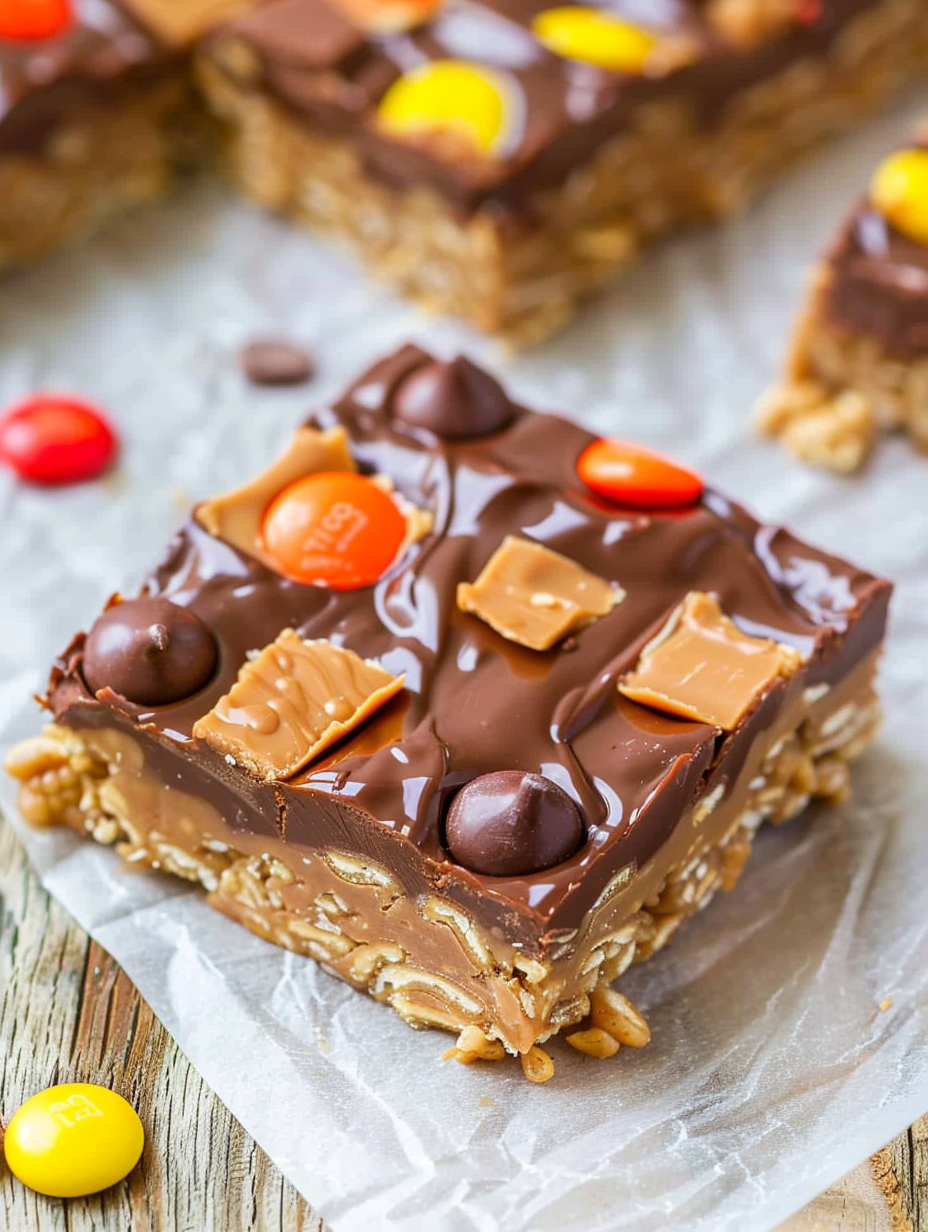
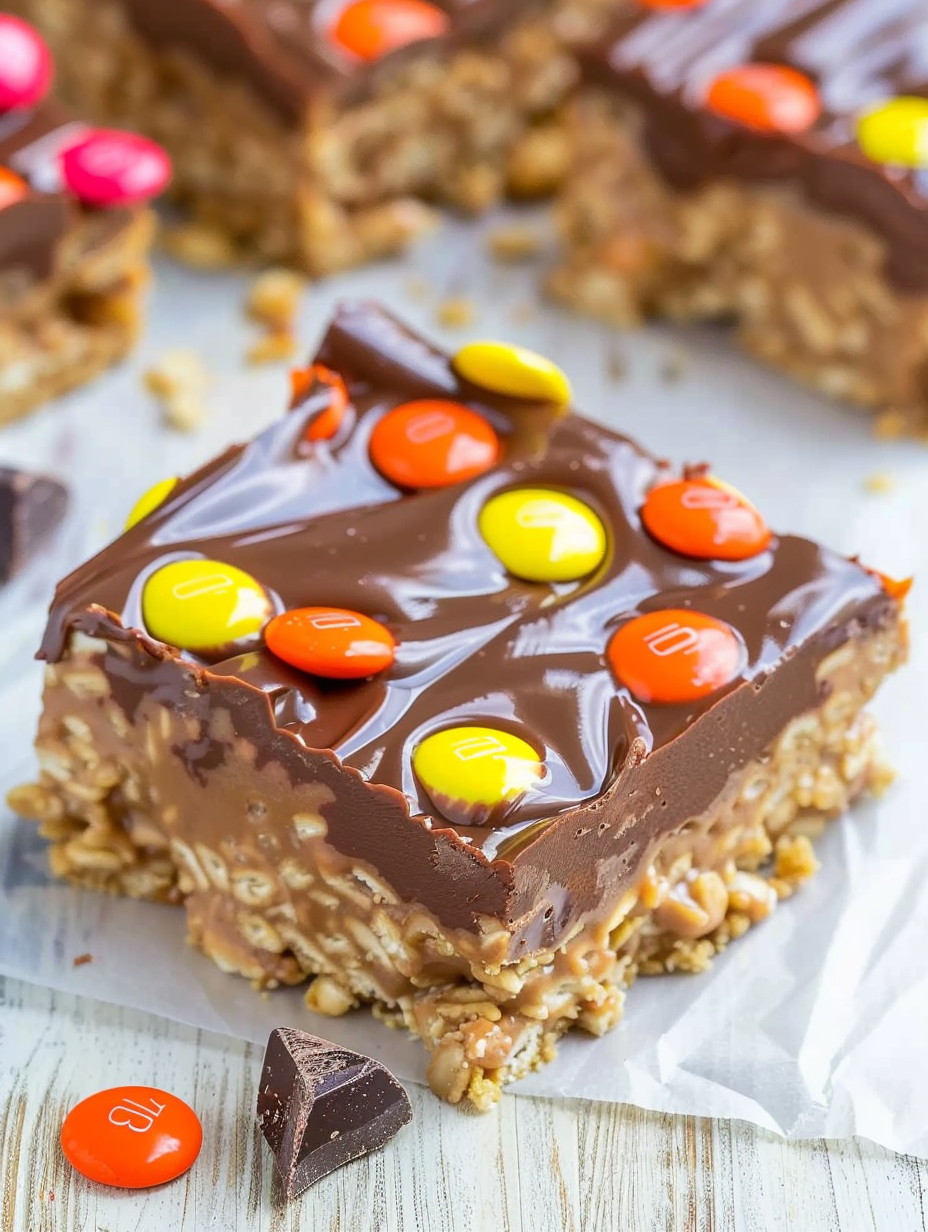
No-bake chocolate peanut butter bars that are dense, chewy, and packed with bold peanut butter flavor topped with lots of chocolate and your favorite candy pieces.
This recipe for chocolate peanut butter candy bars is one of those joyful, slightly indulgent treats that always makes an appearance at family gatherings, potlucks, and lazy weekend baking sessions. I discovered this combination when I wanted a fast, no-bake dessert that delivered maximum comfort without turning my kitchen into a flour storm. The result is a dense, chewy base loaded with creamy peanut butter flavor, finished with a glossy chocolate layer and a generous scattering of bite-sized candy pieces. Each bar is rich and satisfying, delivering a balance of sweet chocolate and salty-sweet peanut butter in every bite.
These bars are noteworthy because they require no oven and very little active time. I first made them on a humid summer afternoon when turning on the oven was the last thing I wanted to do — the no-bake approach meant the whole family could enjoy something decadent without heating the house. The texture is soft and slightly chewy with a compact density that holds together well when sliced. The candy pieces on top add pops of texture and nostalgia; I use a mix of Rolos, mini peanut butter cups, Reese's Pieces, and Butterfinger Cups for variety. These candy bars have become a go-to when I need something crowd-pleasing that everyone remembers.
My family always cheers when I bring these out. I remember one picnic where the bars disappeared so fast a neighbor asked for the recipe on the spot. I love how flexible the topping is—you can get creative and tailor each batch to the crowd. The combination of smooth peanut butter and melty chocolate is an instant hit with kids and adults alike.
I especially love how forgiving this method is: small timing variations in the microwave don't ruin the end product. The visual cue I use is when the peanut butter mixture looks shiny and the sugar feels dissolved when stirred. Family members always request the candy-heavy top—my youngest insists on at least three different candies on each bar.
Store the bars in an airtight container layered with parchment paper to prevent sticking. At room temperature they remain soft and chewy for up to one week; if your kitchen is warm you may prefer refrigeration, where they will keep up to one month. For freezing, wrap the slab tightly in plastic wrap then foil and place in a freezer-safe bag. Thaw in the refrigerator overnight before bringing to room temperature; avoid rapid thawing to reduce sweat on the chocolate. When reheating a single bar, allow it to sit at room temperature for 20 to 30 minutes rather than microwaving, which can change the texture.
If you need to adapt the recipe, swap Special K for puffed rice cereal for a different crunch profile; note the texture will be airier. Use granulated sugar alternatives at your discretion but expect changes in chewiness—brown sugar is essential for moisture. For a gluten-free version select a certified gluten-free crisp rice or corn cereal. Nut-free variation: substitute sunflower seed butter for peanut butter and use allergy-friendly chocolate and candies. If you prefer a darker chocolate flavor, use bittersweet chips, but keep the peanut butter in the topping to maintain that creamy contrast.
These bars are fantastic on a dessert platter paired with fresh berries to cut the richness, or alongside a scoop of vanilla ice cream for a decadent treat. For parties, cut into smaller squares and arrange on parchment to make them bite-size. Garnish with flaky sea salt for a grown-up contrast or drizzle warmed white chocolate over the top for a decorative finish. They also travel well in lunchboxes as an occasional treat and make thoughtful homemade gifts when wrapped in cellophane tied with a ribbon.
Peanut butter and chocolate is a classic American pairing that dates back to the early 20th century when commercial peanut butter became widely available. Many no-bake bars evolved out of convenience—home cooks blending pantry staples into portable sweets. The addition of bite-sized candy as a topping is a modern twist that plays on nostalgic candy bars, combining textures and brands people grew up with. This recipe channels the American tradition of easy, cookie-like bars made without an oven, ideal for picnics and potlucks.
For holidays, swap candies for seasonal varieties—mini peppermint cups at Christmas, caramel-filled chocolates for autumn, or pastel candies for spring. In summer, consider topping with toasted coconut flakes instead of candy for a lighter finish. During back-to-school season, portion bars into snack-sized pieces for quick grab-and-go treats. If you want a festive look, press colored sprinkles into the chocolate before it sets for birthdays or celebrations.
Make a batch on Sunday and slice it into nine portions for dessert throughout the week. Store individual bars in wax paper and stack them in a single container for convenience. To speed up assembly on busy days, pre-measure candy toppings and keep chocolate chips and peanut butter ready to melt. If making multiple batches, line pans back-to-back so one batch can cool while you assemble the next. The base keeps well, so you can even prepare the cereal slab ahead and add the chocolate and candy later for fresher toppings.
These chocolate peanut butter candy bars combine comfort and convenience in a way that brings people together. They’re easy to adapt, simple to prepare, and always a crowd-pleaser. Make a batch, share with neighbors, and enjoy the smiles that come with each chewy, chocolate-topped bite.
Use a sturdy creamy peanut butter like Jif or Skippy for best binding and texture; avoid natural peanut butter that separates.
Warm the chocolate gently and stop heating when a few chips remain; stirring will melt residual chips without scorching.
Press the cereal layer firmly into the pan to ensure clean slices and bars that hold together well.
If you must refrigerate to speed cooling, expect possible surface bloom on chocolate; this is cosmetic and does not affect flavor.
This nourishing chocolate peanut butter candy bars recipe is sure to be a staple in your kitchen. Enjoy every moist, high protein slice — it is perfect for breakfast or as a wholesome snack any time.
This Chocolate Peanut Butter Candy Bars recipe makes perfectly juicy, tender, and flavorful steak every time! Serve with potatoes and a side salad for an unforgettable dinner in under 30 minutes.
Line an 8x8-inch square pan with aluminum foil and spray lightly with cooking spray so the slab can be lifted out after setting.
In a large microwave-safe bowl, combine peanut butter, corn syrup, granulated sugar, and brown sugar. Microwave on high for 1 minute, stir, microwave 1 more minute and stir, then microwave 30 seconds and stir until cohesive and glossy.
Stir in vanilla extract, fold in Special K cereal until evenly coated, then turn mixture into the prepared pan and press down firmly to form an even layer.
In a medium microwave-safe bowl, combine chocolate chips and peanut butter and heat in 20- to 30-second increments, stirring between each, until smooth and shiny.
Pour chocolate over the cereal layer, smooth lightly, and scatter bite-sized candy pieces evenly across the top, pressing lightly to adhere.
Cover and allow the bars to cool at room temperature until the chocolate is set, about 4 hours. Lift from pan using foil and slice into 9 bars with a sharp knife.
Last Step: Please leave a rating and comment letting us know how you liked this recipe! This helps our business to thrive and continue providing free, high-quality recipes for you.
Leave a comment & rating below or tag
@savoryte on social media!

Flaky pan-seared tilapia topped with a velvety lemon butter sauce. Quick to cook, bright with citrus, and weeknight-easy yet dinner-party special.

Start your morning with veggie-loaded, protein-packed egg muffins at just 50 calories each. Perfect for make-ahead breakfasts, freezer-friendly, and easy to customize.

Crispy, cheesy, and ready in minutes, this viral tortilla fold layers bacon, egg, avocado, and melty cheese into a perfectly portable triangle.
Leave a comment & rating below or tag @savoryte on social media!
Enjoyed this recipe? Share it with friends and family, and don't forget to leave a review!
This recipe looks amazing! Can't wait to try it.
Comments are stored locally in your browser. Server comments are displayed alongside your local comments.

Join to receive our email series which contains a round-up of some of our quick and easy family favorite recipes.
