
Cheesecake Tacos

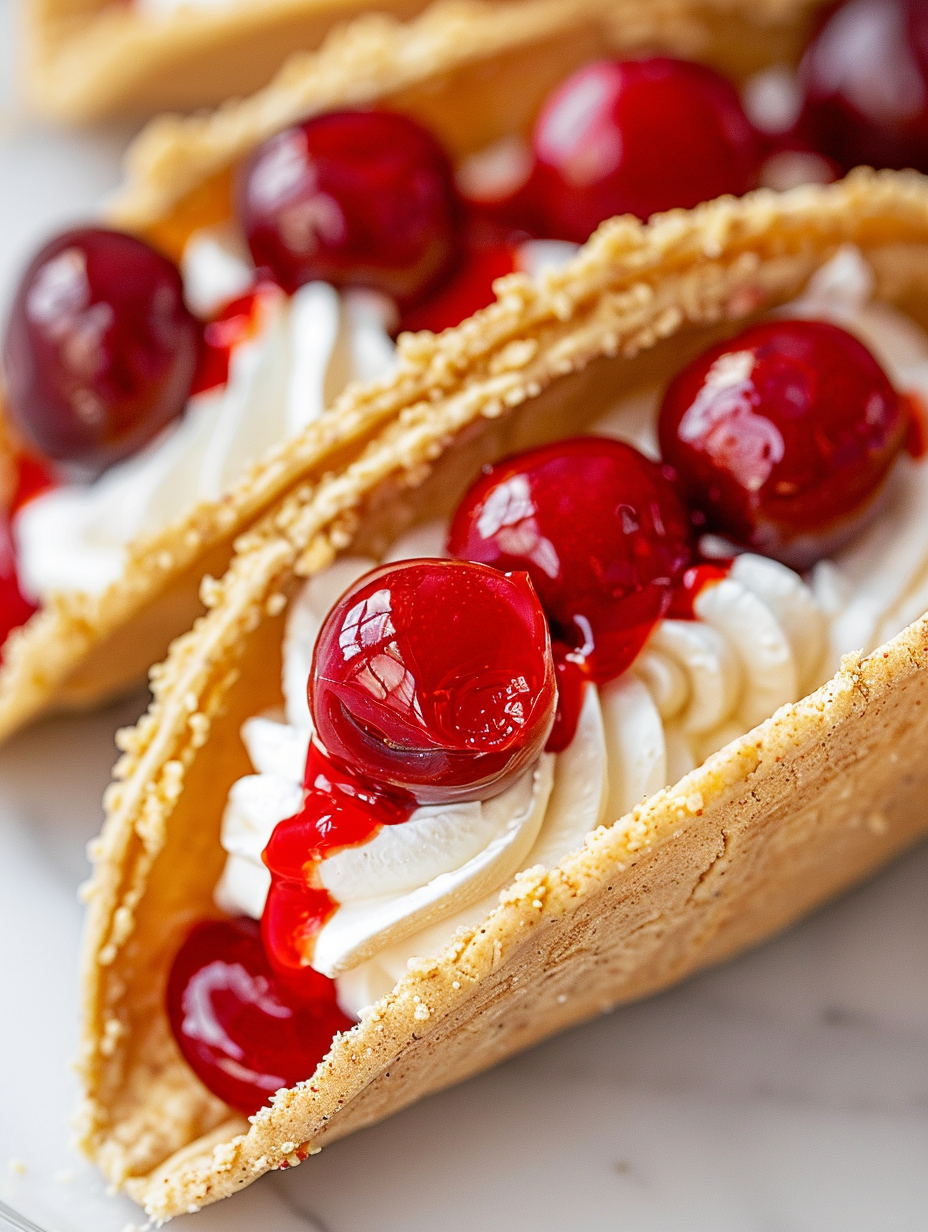
Crunchy graham-coated tortilla shells filled with a light cheesecake cream and topped with glossy cherry pie filling — a playful, easy dessert everyone loves.
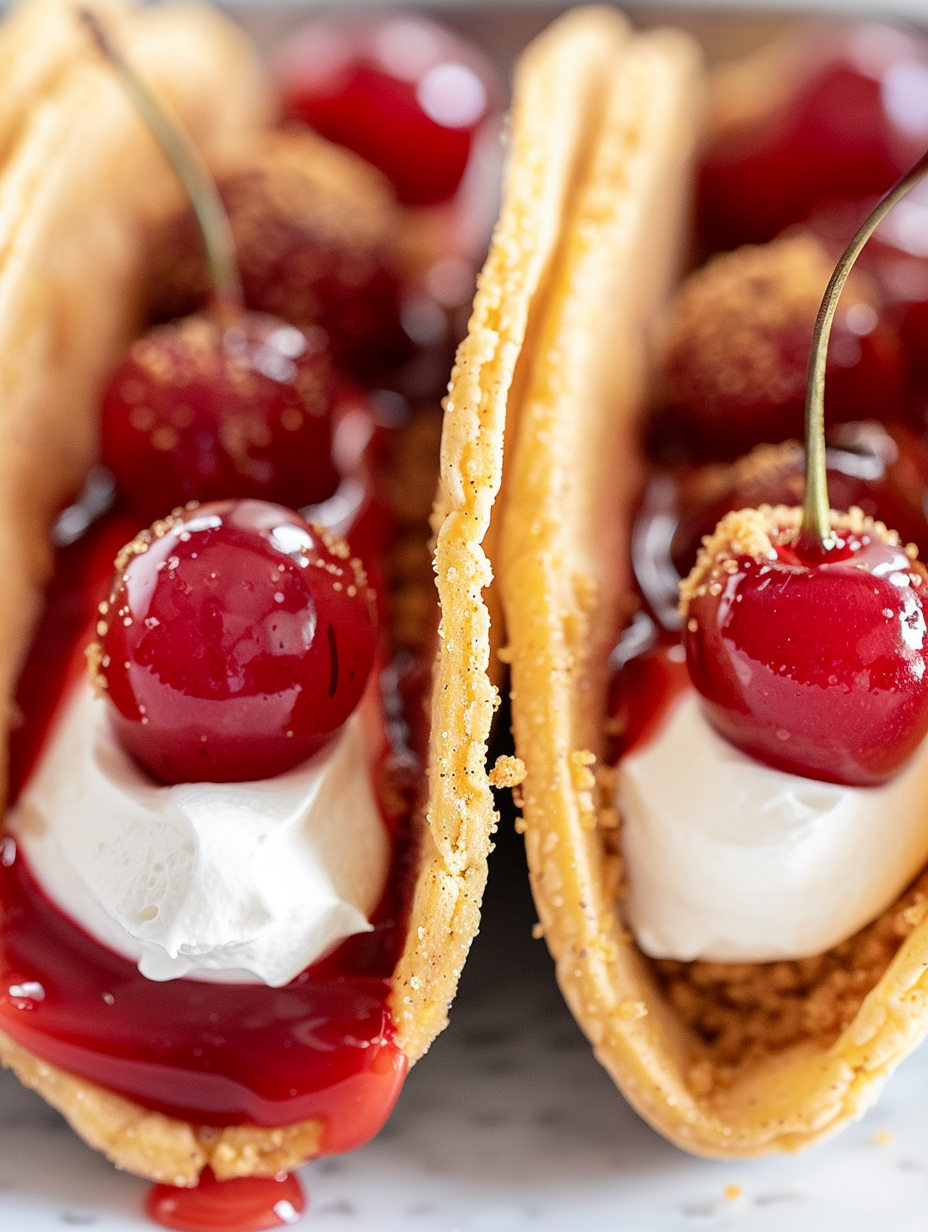
This playful dessert came into my life the first summer I hosted a neighborhood potluck. I wanted something portable, nostalgic, and a little unexpected — a dessert that felt like a party but was effortless to make. The result was these cheesecake tacos: crispy, golden taco shells rolled in graham crumbs and butter, filled with a silky cheesecake cream, and finished with bright cherry pie filling. They immediately became the most requested dish at gatherings because they combine the familiar flavors of cheesecake and cherry pie in a fun, handheld format.
The texture balance is what sold me: a crunchy shell that gives way to a cool, airy filling, then a burst of syrupy cherries. I discovered that using street-taco-size flour tortillas makes the shells perfectly wallet-sized and easy to bite, but if you only have larger tortillas you can trim circles and press them into a pan. Over the years I refined a few technique tips — like piercing the tortillas to prevent bubbles and chilling the filling briefly so it holds its shape — that transform this from a cute idea into a reliably excellent dessert.
Why You'll Love This Recipe
- Handheld and portable: bite-sized portions make it perfect for potlucks, parties, or a casual dessert that doesn’t require forks or plates.
- Quick to prepare: active prep is under 20 minutes and baking is just 10–11 minutes — ready in about 25 minutes total.
- Pantry-friendly ingredients: uses common staples like flour tortillas, graham crumbs, cream cheese, and canned cherry pie filling.
- Make-ahead friendly: shells can be made a day ahead and filling can be refrigerated; assembly just before serving keeps shells crisp.
- Customizable: swap berries or lemon curd for the cherry topping, or add toasted nuts for texture contrast.
- Crowd-pleaser: the combination of buttery graham, tangy cream cheese, and sweet cherries hits multiple cravings at once.
When I first served these, my neighbor joked they were the cutest dessert she’d ever eaten. Kids loved holding them, and adults appreciated the familiar cheesecake flavor without the commitment of a whole slice. Over time I've learned small tweaks — like using a light hand with the filling so shells don’t sog — that make them consistently successful at every gathering.
Ingredients
- Street-size flour tortillas (18): These are the ideal size for taco-shaped desserts. Look for the small 6-inch tortillas labeled "street taco" in many grocery stores; their pliability and size make them perfect for shaping and baking.
- Graham cracker crumbs (1 cup): Finely ground crumbs create the classic graham taste. Use store-bought crumb packs or pulse whole graham crackers in a food processor until fine. They form a crisp, buttery coating on the shell.
- Granulated sugar (2 tablespoons): A small amount tossed with the crumbs adds sweetness and helps the crumbs adhere and caramelize slightly during baking.
- Butter (1/3 cup, melted): Unsalted butter, melted and brushed on both sides, creates browning and helps the crumbs stick. Do not skip butter — it’s essential for flavor and crispness.
- Cream cheese (8 ounces, softened): Full-fat cream cheese gives the filling body and tang. Make sure it’s at room temperature so it whips smooth without lumps; brands like Philadelphia produce consistent results.
- Powdered sugar (1/3 cup): Confectioners’ sugar sweetens the cream cheese without grittiness and helps stabilize the filling for piping.
- Vanilla extract (2 teaspoons): Pure vanilla rounds the flavor and complements the cherry topping. Use a quality extract for the best aroma.
- Whipped topping (8 ounces, thawed): Cool Whip-style topping lightens the mixture to create that airy cheesecake mousse texture. Fold it in gently to retain volume.
- Cherry pie filling (21 ounces): Canned cherry pie filling provides the glossy, syrupy finish and bright acidity. You can use cherry pie filling with whole cherries for visual appeal.
Instructions
Step 1 — Preheat and prep: Set the oven to 400°F (200°C). Position a rack in the center. Line a shallow bowl with the graham crumbs and granulated sugar and whisk to combine; this will be your crust coating station. Prepare an inverted cupcake pan to shape the tortillas later. Step 2 — Prevent bubbles and brush: Gently prick each tortilla 6–7 times with a fork — this releases steam and keeps bubbles from forming while baking. Brush both sides of each tortilla evenly with melted butter using a pastry brush so crumbs adhere and the tortilla browns uniformly. Step 3 — Coat with graham crumbs: Press each buttered tortilla into the graham-sugar mixture, coating both sides well. Press gently so crumbs adhere without tearing the tortilla. Shake off excess crumbs and set aside. Step 4 — Shape and bake: Flip an empty cupcake pan upside down and drape a tortilla folded in half over two adjacent inverted cups, tucking it between the cups to form a taco shape. Bake for 10–11 minutes until golden-brown and crisp. Let cool completely in the pan to retain shape; cooling is essential before filling. Step 5 — Make the filling: In a large bowl, beat softened cream cheese, powdered sugar, and vanilla with a handheld mixer until smooth and lump-free. Scrape the bowl to ensure even texture. Add thawed whipped topping and beat briefly at low speed until the mixture is light, airy, and homogeneous. Chill for at least 30 minutes to firm up for piping. Step 6 — Assemble and top: Transfer the chilled filling to a piping bag or a resealable plastic bag with the corner snipped off. Pipe a generous layer into each cooled shell. Spoon or dollop 3–4 cherries and a tablespoon of cherry pie sauce onto each taco, allowing some syrup to drizzle for shine. Serve immediately so shells stay crisp.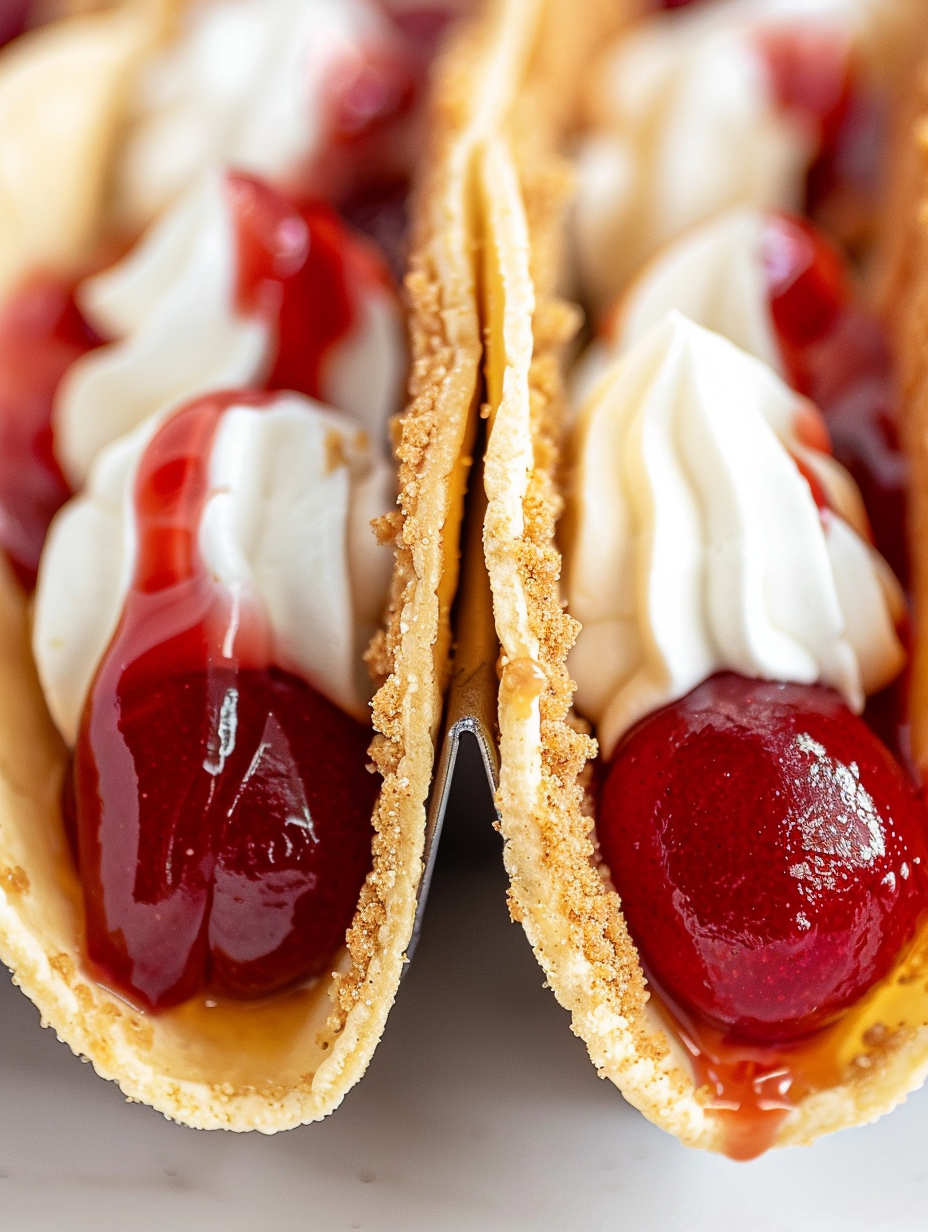
You Must Know
- The shells can be made a day ahead and stored in an airtight container at room temperature to preserve crispness; avoid refrigerating shells as moisture will soften them.
- This dessert contains dairy and gluten: cream cheese, whipped topping, and flour tortillas. Use gluten-free tortillas and gluten-free graham crumbs for a gluten-free adaptation.
- Chilling the filling for at least 30 minutes helps it hold shape when piped; if it still seems soft, chill another 15–20 minutes.
- Each taco is a single-serving portion, making portions easy to control; they’re ideal for parties where guests graze.
- Leftover assembled tacos will soften within hours; assemble close to serving time for best texture.
My favorite moment with these is handing them to someone who expects a savory taco and watching their surprise turn into delight. My kids love helping press the tortillas into the pan; it’s become our easy weekend activity. At larger gatherings I make the shells and filling ahead and let guests finish themselves — it saves time and keeps everything crisp and fresh.
Storage Tips
Store unfilled shells in an airtight container at room temperature for up to 2 days; layering with paper towels helps absorb any stray moisture. The cream filling keeps in the refrigerator for 3–4 days in a sealed container — bring it to serving temperature and rewhip gently if it has settled. Assembled tacos should be eaten within a few hours; refrigeration will soften the shells within 6–8 hours. If you need to freeze components, freeze the filling (without cherries) for up to 1 month and thaw overnight in the fridge before piping.
Ingredient Substitutions
If you want to lighten the filling, substitute half of the whipped topping with thick Greek yogurt, though this will change sweetness and tang. For a gluten-free version use certified gluten-free tortillas and substitute gluten-free graham cracker crumbs. Swap cherry pie filling for blueberry, strawberry, or apple pie filling for seasonal variation. For a nutty crunch, sprinkle toasted chopped almonds or pecans on top just before serving; to add citrus brightness, fold 1 teaspoon lemon zest into the filling.
Serving Suggestions
Present these on a shallow platter lined with parchment, arranging tacos in a single layer. Garnish with a light dusting of powdered sugar or a mint sprig for color contrast. Pair with iced coffee, dessert wine, or a sparkling soda. For a party dessert bar, offer a few topping options: warm berry compote, salted caramel, toasted coconut, and chopped toasted pecans so guests can personalize their tacos.
Cultural Background
These handheld treats are an American playful riff on two classic desserts: cheesecake and fruit pie. The idea of using tortillas as a vessel echoes modern fusion trends where familiar formats are repurposed for sweet applications, similar to dessert chimichangas. While not traditional in any single cuisine, they nod to American comfort food culture — combining convenience, portability, and nostalgia (graham cracker and cherry pie flavors) into a single, shareable bite.
Seasonal Adaptations
In summer, use fresh macerated strawberries or blueberry compote instead of canned filling for a lighter profile. During the holidays, swap cherry filling for warm spiced apple compote and add a pinch of cinnamon to the graham crumb mixture. For a spring brunch, brighten the filling with 1–2 teaspoons lemon zest and use rhubarb-strawberry topping. These small seasonal swaps keep the format but refresh flavors throughout the year.
Meal Prep Tips
Prep the shells a day in advance and store them airtight. Make the filling the night before and keep chilled; before serving, transfer the filling to a piping bag and whisk briefly to re-aerate. If hosting a large event, set up an assembly station with shells on one side, filling in a piping bag, and several topping choices so an assistant or guests can quickly finish each taco. Label toppings and provide small tongs for a hygienic finishing touch.
These cheesecake tacos are the sort of dessert that invites improvisation — try different toppings, switch up the filling, and make them your own. They’re quick, impressive, and endlessly adaptable, and I hope they become a regular in your dessert rotation as they are in mine.
Pro Tips
Pierce tortillas 6–7 times with a fork to prevent air bubbles and uneven blistering during baking.
Make sure cream cheese is at room temperature so the filling whips smooth without lumps.
Chill the filling at least 30 minutes before piping so it retains shape inside the shells.
Press tortillas gently into the inverted cupcake pan to avoid tearing; let shells cool fully in the pan to hold shape.
This nourishing cheesecake tacos recipe is sure to be a staple in your kitchen. Enjoy every moist, high protein slice — it is perfect for breakfast or as a wholesome snack any time.
FAQs about Recipes
Can I prepare components ahead of time?
Yes — make the shells up to 2 days ahead and store in an airtight container at room temperature. Keep the filling refrigerated and assemble right before serving to maintain crispness.
Is there a gluten-free option?
Use gluten-free tortillas and certified gluten-free graham crumbs; be sure to check canned pie filling for any gluten-containing additives.
Tags
Cheesecake Tacos
This Cheesecake Tacos recipe makes perfectly juicy, tender, and flavorful steak every time! Serve with potatoes and a side salad for an unforgettable dinner in under 30 minutes.
Ingredients
Taco Shells
Filling
Instructions
Preheat oven and prepare coating
Preheat the oven to 400°F. In a shallow bowl, combine the graham cracker crumbs and granulated sugar. Set an inverted cupcake pan nearby for shaping the tortillas.
Prevent bubbles and brush with butter
Gently prick each tortilla 6–7 times with a fork to release steam. Brush both sides with melted butter using a pastry brush so crumbs adhere and the tortilla browns evenly.
Coat tortillas with graham crumbs
Press the buttered tortillas into the graham-sugar mixture to coat both sides, pressing gently so crumb adheres without tearing. Shake off excess crumbs.
Shape and bake shells
Flip an empty cupcake pan upside down and fold each tortilla in half, tucking it between the inverted cups to form a taco shell. Bake for 10–11 minutes until golden and crisp. Let cool completely in the pan.
Make cheesecake filling
Beat softened cream cheese, powdered sugar, and vanilla until smooth with a handheld or stand mixer. Fold in thawed whipped topping until light and airy. Chill at least 30 minutes before piping.
Pipe and top
Transfer chilled filling to a piping bag and fill each cooled shell. Top each with 3–4 cherries and a spoonful of cherry pie filling syrup. Serve immediately for maximum crunch.
Last Step: Please leave a rating and comment letting us know how you liked this recipe! This helps our business to thrive and continue providing free, high-quality recipes for you.
Nutrition
Did You Make This?
Leave a comment & rating below or tag
@savoryte on social media!
Categories:
You might also like...

Tilapia with Lemon Butter
Flaky pan-seared tilapia topped with a velvety lemon butter sauce. Quick to cook, bright with citrus, and weeknight-easy yet dinner-party special.

Healthy Egg Muffin Cups
Start your morning with veggie-loaded, protein-packed egg muffins at just 50 calories each. Perfect for make-ahead breakfasts, freezer-friendly, and easy to customize.

TikTok Breakfast Tortilla Fold
Crispy, cheesy, and ready in minutes, this viral tortilla fold layers bacon, egg, avocado, and melty cheese into a perfectly portable triangle.
Did You Make This?
Leave a comment & rating below or tag @savoryte on social media!
Rate This Recipe
Share This Recipe
Enjoyed this recipe? Share it with friends and family, and don't forget to leave a review!
Comments (1)
This recipe looks amazing! Can't wait to try it.
Comments are stored locally in your browser. Server comments are displayed alongside your local comments.

Hi, I'm Sophia!
What's Popular

30-Minute Meals!
Join to receive our email series which contains a round-up of some of our quick and easy family favorite recipes.